Paisley the Pig Free Amigurumi Pattern

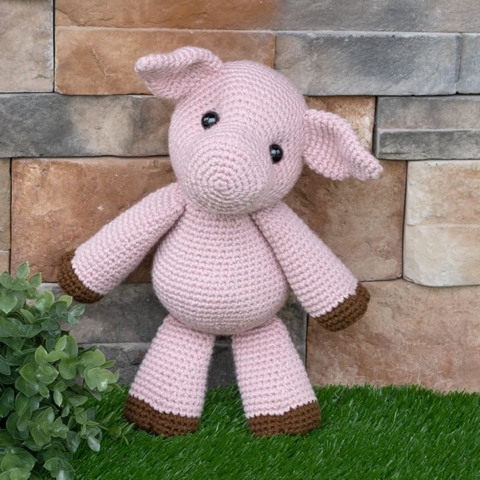
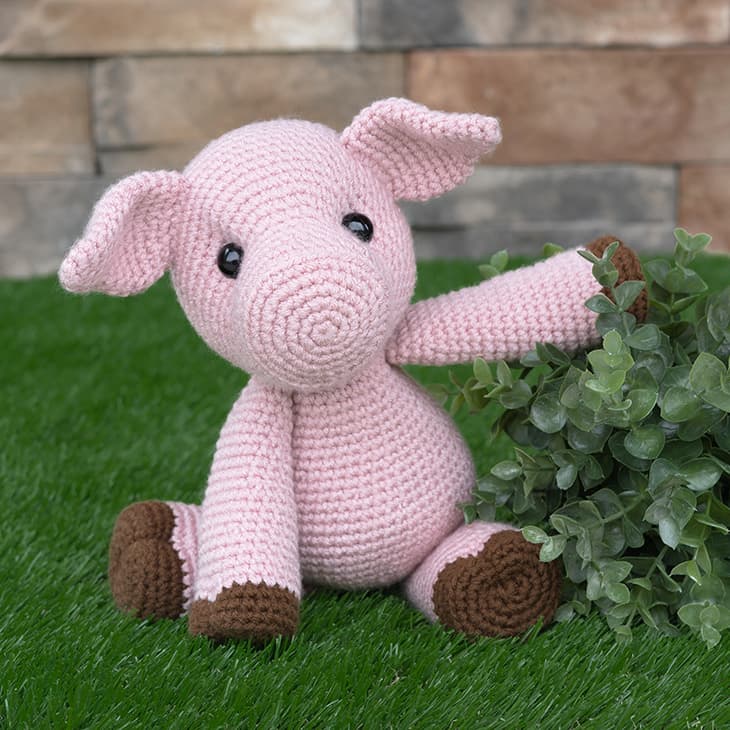
If you’re a fan of easy amigurumi patterns, you’ll love making Paisley! This crochet pig stands 14 inches tall when made with a 3.5mm hook and worsted-weight yarn.

This post may contain affiliate links. Please read my disclosure policy.
Pinterest Hidden Image
Crochet Pig Pattern Free Amigurumi

Which Jess Huff pattern is the easiest?

This question comes up a lot in my Facebook group: Crochet with Jess Huff. Until now, my answer was Esther the Elephant. Here are the reasons why:

  • The head begins with a simple magic ring, rather than a chain start/oval shape
  • It only requires two colors
  • There are no patch pieces to sew on
  • You don’t have to add any hair

Paisley the Pig is now my easiest crochet pattern!

I’m happy to say this piggy has my elephant beat as my easiest amigurumi pattern. I think it would be great for beginners.

All the nice features about my elephant listed above also apply to my pig. That said, here’s where Paisley the Pig has my elephant beat:

  • The pig’s ears are crocheted into the head (no sewing – YAY!)
  • The curly pig tail is much faster and easier to make

If you’re up for a bit of a challenge…

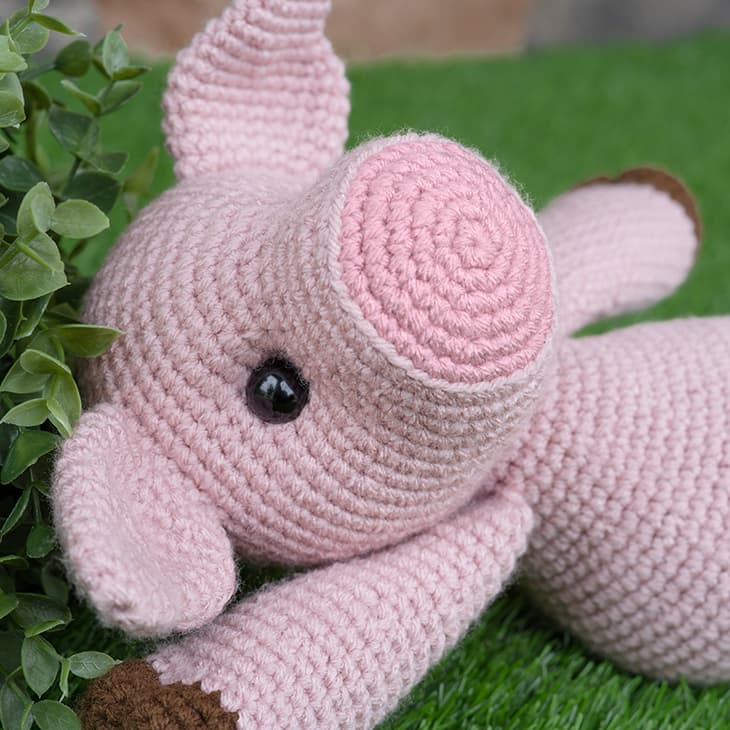
Darker Pink Snout | Crochet Pig

To keep the pattern as simple as possible, I opted to keep the head all one color.

However, Paisley looks super cute with a slightly darker pink for the front of her snout!

To achieve this look, start the head with a dark pink, then switch to the lighter pink before starting round 7.


  • Crochet Pig Pattern Free Amigurumi
  • Crochet Pig Pattern Free Amigurumi
  • Crochet Pig Pattern Free Amigurumi
  • Crochet Pig Pattern Free Amigurumi

Paisley the Pig

Height: 14" standing
Skill level: Intermediate
Ravelry: Paisley the Pig
Paisley loves to roll around in the mud and *pig out* on her favorite snacks. Make sure you bring your own food, because she *hogs* it all!

Supplies

Yarn (acrylic, weight 4) – 241 total yards

Notes

Abbreviations
  • ch – chain
  • sc – single crochet
  • inc – complete two single crochets within the same stitch
  • dec – combine two stitches into one with an invisible decrease
  • BLO – crochet in the back loop only
  • *sc x* – repeat the instructions between asterisks(*) the indicated number of times. If the pattern doesn’t tell you how many times to repeat, then repeat the sequence until you reach the end of the round.
  • 2hdc – complete two half double crochets in the same stitch
  • 2dc – complete two double crochets in the same stitch

General Instructions
  • Work all stitches in both loops unless the pattern instructs otherwise.
  • This pattern is worked in one continuous spiral. Do not join rounds unless the pattern indicates otherwise (in other words, do not slip stitch and chain to start a new round).
  • Use a stitch marker to keep track of where one round ends and the next begins. I prefer to place my stitch marker in the last stitch of the round.

Recommended Sequence
Here are the steps to create your pig, in order:
  1. Crochet the Ears
  2. Crochet the Head
  3. Crochet the Body
  4. Crochet the Arms
  5. Crochet the Legs
  6. Crochet the Tail
  7. Attach the Head to the Body
  8. Attach the Legs to the Body
  9. Attach the Arms to the Body
  10. Attach the Tail to the Body
  11. Add “cloven” details to Arms & Legs

Crochet Video Tutorials

Assembly Tutorials

Head: Round 14 – Marking Stitches for the Eyes
Round 14 – Eyes | Pig Crochet Pattern Tutorial 1
Between rounds 13 and 14, you are going to insert 2 markers to show you where to place your safety eyes at a later step.
Insert the first marker above the first increase of round 13. Place the second marker above the last increase of round 13.
There should be 18 stitches between the markers (counted on round 13) as shown in the photo.
You will leave the stitch markers in place as you crochet rounds 15 – 30, so I recommend using strands of yarn to mark these stitches, ensuring they’re easy to crochet around.
Use a yarn needle to insert each strand to mark your stitches.

Head: Round 20 – Marking Stitches for the Ears
Round 20 – Ears | Pig Crochet Pattern Tutorial 2
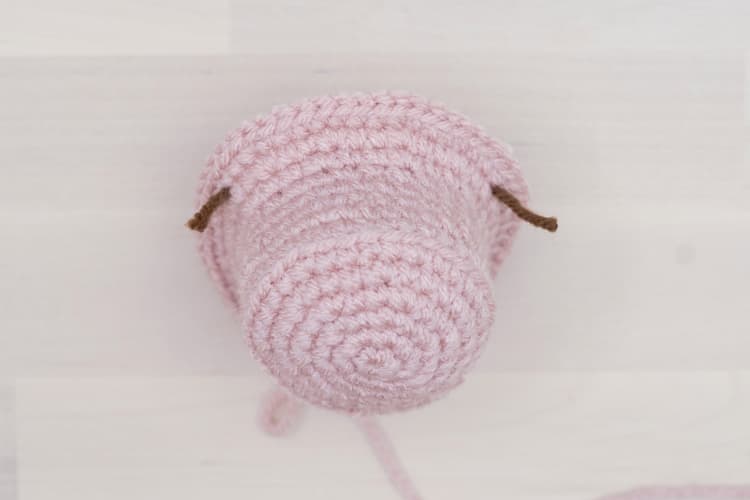
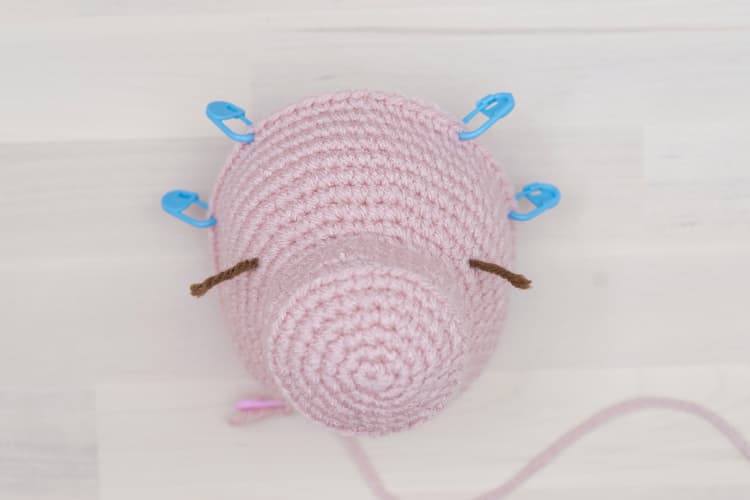
At the end of round 20, you are going to mark 4 stitches in the round you just completed to show where you should attach the ears in round 21.
Start by placing 2 stitch markers centered above the nose, with 12 stitches in between.
Then place 2 additional stitch markers, with 5 stitches between the outer and inner stitch markers, as shown in the picture.

Head: Round 21 – Crochet Ears to Head
Note: The video shows the head of a lion, but the technique is the same!
When you’re aligning each ear, make sure it’s facing the proper direction before crocheting it on. The right ear should flare out to the right, and the left ear should flare out to the left. See slider photos if you’re unsure.
Crochet round 21 as normal until you hit the first stitch marker.
Attach an ear to the head while crocheting until you’ve worked the second marked stitch. Complete the next 12 stitches as normal until you hit the next stitch marker.
Attach the other ear to the head as you crochet until you’ve worked the last marked stitch. Complete the round as normal.

How to Indent the Eyes
Note: This video shows a unicorn, but the technique is the same for all of my patterns.
Cut a strand of yarn approximately 18″ long. Tie a large, secure knot in one end and thread the other end through your yarn needle.
Insert your needle through the back opening of the head and sew between the two spots where you’ll be placing your safety eyes (marked with strands of yarn).
Pull your strand of yarn taut, which will create indents. Fasten off with a knot and hide your yarn tail inside the head.

How to Make Cloven Hooves
Note: The video shows alternate colors, but the technique is the same!
At this point your arm/leg should be stuffed and slip-stitched closed. In fact, I recommend doing this step very last, after your arms and legs are attached, so you can make sure the cloven part faces out.
Start with an 18″ strand of brown yarn and attach one end to a yarn needle.
Pass the needle through the magic ring in the center of your hoof, then through the top of the hoof (above the last round of brown). Repeat this process a few times, pulling the yarn taut each time.
When you’re satisfied with the look, attach the starting tail to the ending tail with a secure knot. Hide both tails inside the work.

Instructions

Ears (make 2)


  • With pink yarn:
    01. start 6 sc into a magic ring [6]
    02. *sc, inc* [9]
    03. sc, inc, *sc 2, inc* 2 times, sc [12]
    04 – 05. sc in each st around [12]
    06. *sc 3, inc* [15]
    07. inc, sc, inc, sc 9, inc, sc, inc [19]
    08. sc, inc, sc 15, inc, sc [21]
    09 – 12. sc in each st around [21]
    13. *sc, dec* 2 times, sc 9, *sc, dec* 2 times [17]
    14. *sc, dec* 2 times, sc 9, dec [14]

    Fasten off, leaving a tail of about 12”. Fold the top opening in half and slip stitch closed, then hide the tail inside the work using a yarn needle.

Head


  • With pink yarn:
    01. start 6 sc into a magic ring [6]
    02. inc in each st around [12]
    03. *sc, inc* [18]
    04. sc, inc, *sc 2, inc* 5 times, sc [24]
    05. *sc 3, inc* [30]
    06. sc 2, inc, *sc 4, inc* 5 times, sc 2 [36]
    07. BLO: sc in each st around [36]
    08. sc in each st around [36]
    09. inc, sc 5, inc, *sc 4, dec* 3 times, sc 5, inc, sc 5 [36]
    10. sc in each st around [36]
    11. inc, sc 5, inc, *sc 4, dec* 3 times, sc 5, inc, sc 5 [36]
    12. sc 9, *sc 2, inc* 6 times, sc 9 [42]
    13. sc 12, *sc 2, inc* 6 times, sc 12 [48]
    14. *sc 7, inc* [54]

    Between rounds 13 and 14 (the last two rounds you completed), you are going to insert 2 markers. Center them above the snout with 18 stitches in between. See "Head: Round 14 – Marking Stitches for the Eyes" in the Notes section for more details.

    15. sc 4, inc, *sc 8, inc* 5 times, sc 4 [60]
    16 – 20. sc in each st around [60]

    You are now going to mark 4 stitches in round 20 (the round you just completed) to show where you should attach the ears in round 21. See "Head: Round 20 – Marking Stitches for the Ears" in the Notes section for details and a video tutorial.

    21 – 25. sc in each st around [60]
    26. sc 4, dec, *sc 8, dec* 5 times, sc 4 [54]
    27. *sc 7, dec* [48]
    28. sc 3, dec, *sc 6, dec* 5 times, sc 3 [42]
    29. *sc 5, dec* [36]
    30. sc 2, dec, *sc 4, dec* 5 times, sc 2 [30]

    Stuff head ¾ full and create indents for the eyes. See “How to indent the eyes” in the notes section. Insert your safety eyes and secure the backings.

    31. *sc 3, dec* [24]
    32. sc, dec, *sc 2, dec* 5 times, sc [18]
    33. *sc, dec* [12]

    Finish stuffing.

    34. *dec* [6]

    Cut working yarn and close with an ultimate finish.

Body


  • With pink yarn:
    01. start 6 sc into a magic ring [6]
    02. inc in each st around [12]
    03. *sc, inc* [18]
    04. sc, inc, *sc 2, inc* 5 times, sc [24]
    05. *sc 3, inc* [30]
    06. sc 2, inc, *sc 4, inc* 5 times, sc 2 [36]
    07. *sc 5, inc* [42]
    08. sc 3, inc, *sc 6, inc* 5 times, sc 3 [48]
    09. *sc 7, inc* [54]
    10. sc 4, inc, *sc 8, inc* 5 times, sc 4 [60]
    11 – 17. sc in each st around [60]
    18. sc 4, dec, *sc 8, dec* 5 times, sc 4 [54]
    19. sc in each st around [54]
    20. *sc 7, dec* [48]
    21. sc in each st around [48]
    22. sc 3, dec, *sc 6, dec* 5 times, sc 3 [42]
    23 – 24. sc in each st around [42]
    25. *sc 5, dec* [36]
    26 – 27. sc in each st around [36]
    28. sc 2, dec, *sc 4, dec* 5 times, sc 2 [30]
    29 – 30. sc in each st around [30]
    31. *sc 3, dec* [24]

    Fasten off and create an invisible finish. Leave an 24" tail for sewing. Stuff with fiber fill.

Arms (make 2)


  • With brown yarn:
    01. start 6 sc into a magic ring [6]
    02. inc in each st around [12]
    03. *sc, inc* [18]
    04. sc, inc, *sc 2, inc* 5 times, sc [24]
    05. BLO: sc in each st around [24]
    06 – 07. sc in each st around [24]

    Switch to pink yarn:
    08. sc in each st around [24]
    09. sc 11, dec, sc 11 [23]
    10. sc in each st around [23]
    11. sc 21, dec [22]
    12. sc in each st around [22]
    13. sc 10, dec, sc 10 [21]
    14. sc in each st around [21]
    15. sc 19, dec [20]
    16. sc in each st around [20]
    17. sc 9, dec, sc 9 [19]
    18. sc in each st around [19]
    19. sc 17, dec [18]
    20. sc in each st around [18]
    21. sc 8, dec, sc 8 [17]
    22. sc in each st around [17]
    23. sc 15, dec [16]
    24 – 25. sc in each st around [16]
    26. *sc 2, dec* [12]

    Fasten off and create an invisible finish. Leave an 18" tail for sewing. Stuff with fiber fill. Fold the top opening in half and slip stitch closed.

    To finish the hooves, see "How to Make Cloven Hooves" in the Notes section of the pattern.

Legs (make 2)


  • With brown yarn:
    01. start 6 sc into a magic ring [6]
    02. inc in each st around [12]
    03. *sc, inc* [18]
    04. sc, inc, *sc 2, inc* 5 times, sc [24]
    05. *sc 3, inc* [30]
    06. BLO: sc in each st around [30]
    07 – 08. sc in each st around [30]

    Switch to pink yarn:
    09. sc in each st around [30]
    10. sc 14, dec, sc 14 [29]
    11. sc 27, dec [28]
    12. sc 13, dec, sc 13 [27]
    13. sc 25, dec [26]
    14. sc 12, dec, sc 12 [25]
    15. sc 23, dec [24]
    16. sc 11, dec, sc 11 [23]
    17. sc 21, dec [22]
    18. sc 10, dec, sc 10 [21]
    19. sc 19, dec [20]
    20. sc 9, dec, sc 9 [19]
    21. sc 17, dec [18]
    22. *sc 7, dec* [16]
    23. *sc 2, dec* [12]

    Fasten off and create an invisible finish. Leave an 18" tail for sewing. Stuff with fiber fill. Fold the top opening in half and slip stitch closed.

    To finish the hooves, see "How to Make Cloven Hooves" in the Notes section of the pattern.

Tail


  • With pink yarn:
    Create a slip knot on your hook, leaving a 6" yarn tail.

    01. ch 16, sc in 2nd ch from hook and in the next 4 chains. 2hdc in the next 5 chains. 2dc in the last 5 chains.

    Fasten off and leave another 6" yarn tail for sewing. The base of the tail should now have a yarn tail on each corner.

    When it's time to add the tail to the body, use the yarn tails to attach each corner of the tail base, then hide the yarn tails inside the work.

Subscribe To Our Newsletter

Join our mailing list to receive the latest news and updates from our team.

[ninja_form id=5]

You have Successfully Subscribed!