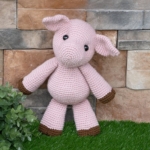
Paisley the Pig
Height: 14" standing
Supplies
Yarn (acrylic, weight 4) – 241 total yards
- Pink – 212 yards (I used I Love This Yarn! – Rosy Cheeks)
- Brown – 29 yards (I used I Love This Yarn! – Brown)
Notes
Abbreviations
General Instructions
Recommended Sequence
Here are the steps to create your pig, in order:
Crochet Video Tutorials
Assembly Tutorials
Head: Round 14 – Marking Stitches for the Eyes
Head: Round 20 – Marking Stitches for the Ears
Head: Round 21 – Crochet Ears to Head
How to Indent the Eyes
How to Make Cloven Hooves
- ch – chain
- sc – single crochet
- inc – complete two single crochets within the same stitch
- dec – combine two stitches into one with an invisible decrease
- BLO – crochet in the back loop only
- *sc x* – repeat the instructions between asterisks(*) the indicated number of times. If the pattern doesn't tell you how many times to repeat, then repeat the sequence until you reach the end of the round.
- 2hdc – complete two half double crochets in the same stitch
- 2dc – complete two double crochets in the same stitch
General Instructions
- Work all stitches in both loops unless the pattern instructs otherwise.
- This pattern is worked in one continuous spiral. Do not join rounds unless the pattern indicates otherwise (in other words, do not slip stitch and chain to start a new round).
- Use a stitch marker to keep track of where one round ends and the next begins. I prefer to place my stitch marker in the last stitch of the round.
Recommended Sequence
Here are the steps to create your pig, in order:
- Crochet the Ears
- Crochet the Head
- Crochet the Body
- Crochet the Arms
- Crochet the Legs
- Crochet the Tail
- Attach the Head to the Body
- Attach the Legs to the Body
- Attach the Arms to the Body
- Attach the Tail to the Body
- Add "cloven" details to Arms & Legs
Crochet Video Tutorials
Assembly Tutorials
- How to attach the head to the body
- How to attach the legs to the body
- How to attach the arms to the body
- How to attach the tail to the body
Head: Round 14 – Marking Stitches for the Eyes

Between rounds 13 and 14, you are going to insert 2 markers to show you where to place your safety eyes at a later step.
Insert the first marker above the first increase of round 13. Place the second marker above the last increase of round 13.
There should be 18 stitches between the markers (counted on round 13) as shown in the photo.
You will leave the stitch markers in place as you crochet rounds 15 - 30, so I recommend using strands of yarn to mark these stitches, ensuring they’re easy to crochet around.
Use a yarn needle to insert each strand to mark your stitches.
Head: Round 20 – Marking Stitches for the Ears

At the end of round 20, you are going to mark 4 stitches in the round you just completed to show where you should attach the ears in round 21.
Start by placing 2 stitch markers centered above the nose, with 12 stitches in between.
Then place 2 additional stitch markers, with 5 stitches between the outer and inner stitch markers, as shown in the picture.
Head: Round 21 – Crochet Ears to Head
Note: The video shows the head of a lion, but the technique is the same!
When you're aligning each ear, make sure it's facing the proper direction before crocheting it on. The right ear should flare out to the right, and the left ear should flare out to the left. See slider photos if you're unsure.
Crochet round 21 as normal until you hit the first stitch marker.
Attach an ear to the head while crocheting until you've worked the second marked stitch. Complete the next 12 stitches as normal until you hit the next stitch marker.
Attach the other ear to the head as you crochet until you've worked the last marked stitch. Complete the round as normal.
How to Indent the Eyes
Note: This video shows a unicorn, but the technique is the same for all of my patterns.
Cut a strand of yarn approximately 18" long. Tie a large, secure knot in one end and thread the other end through your yarn needle.
Insert your needle through the back opening of the head and sew between the two spots where you'll be placing your safety eyes (marked with strands of yarn).
Pull your strand of yarn taut, which will create indents. Fasten off with a knot and hide your yarn tail inside the head.
How to Make Cloven Hooves
Note: The video shows alternate colors, but the technique is the same!
At this point your arm/leg should be stuffed and slip-stitched closed. In fact, I recommend doing this step very last, after your arms and legs are attached, so you can make sure the cloven part faces out.
Start with an 18" strand of brown yarn and attach one end to a yarn needle.
Pass the needle through the magic ring in the center of your hoof, then through the top of the hoof (above the last round of brown). Repeat this process a few times, pulling the yarn taut each time.
When you're satisfied with the look, attach the starting tail to the ending tail with a secure knot. Hide both tails inside the work.
Instructions
Ears (make 2)
Head
01. start 6 sc into a magic ring [6]02. inc in each st around [12]03. *sc, inc* [18]04. sc, inc, *sc 2, inc* 5 times, sc [24]05. *sc 3, inc* [30]06. sc 2, inc, *sc 4, inc* 5 times, sc 2 [36]07. BLO: sc in each st around [36]08. sc in each st around [36]09. inc, sc 5, inc, *sc 4, dec* 3 times, sc 5, inc, sc 5 [36]10. sc in each st around [36]11. inc, sc 5, inc, *sc 4, dec* 3 times, sc 5, inc, sc 5 [36]12. sc 9, *sc 2, inc* 6 times, sc 9 [42]13. sc 12, *sc 2, inc* 6 times, sc 12 [48]14. *sc 7, inc* [54]
Body
Arms (make 2)
Legs (make 2)
Tail