Video Transcript:
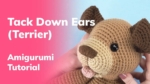
This is Jess from jesshuff.com. In this video, I’ll show you how to tack down the ears for my free amigurumi pattern, Daisy the Dog.
I’ve included a link to this pattern in the video description.
Start by cutting a 2-foot strand of yarn in the same color as your dog’s ears. Thread one end through a yarn needle.
Let’s start with the left ear.
Start by tying a knot in the ear 3 rounds up from the bottom: 1, 2, 3 … and about two stitches in from the outside edge.
Tie a knot, leaving a 5-inch yarn tail.
Now pass the needle under a stitch directly above your knot, 4 rounds down from the top of the ear: 1, 2, 3, 4 … and above that other stitch at the bottom.
We’re going to continue weaving our strand of yarn along the same rounds, alternating between bottom and top.
And we’re going to stop when we’re a couple stitches away from the right-side edge.
It should look something like this.
Now we’re going to go through and tighten all these strands. And you’ll see this will bring the ear together, folded over itself.
Once that’s tight, if you like the look of it, go ahead and secure it with a knot. Hide this ending yarn tail inside the work.
So that’s disappeared down inside the ear, and inside of the head. Cut off that remaining tail.
And then we’re going to do the same with this starting tail. It should go down inside the ear, through the head. Trim that off with some scissors.
And the first ear is done. Now we’re going to repeat this process for the other side.
Your dog’s ears are now complete.
If you found this video helpful, please hit the thumbs up button.
Be sure to subscribe to my YouTube channel so you’ll be notified about my future crochet tutorials. Thanks for watching!