Easy & Free Panda Crochet Pattern (Amigurumi Pattern)

What do you call a male panda? … Amanda! Just kidding, his name is Pei. This crochet panda stands 13.5 inches tall when crocheted with a 3.5mm hook and worsted-weight yarn.

This post may contain affiliate links. Please read my disclosure policy.
Pinterest Hidden ImagePinterest Hidden Image
free panda crochet pattern

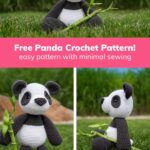
If I came across a panda in the wild, I’d end up in a world of hurt because I’d absolutely try to hug it. Who can resist those soft, squishy bellies? No one. As the kids say: “If danger, why friend-shaped?” 🥺

Luckily you don’t have to risk getting mauled at the zoo. You can make your very own amigurumi panda to snuggle, utilizing the power of crochet! Keep it for yourself or gift it to someone you love.

How to crochet a panda bear

This free panda crochet pattern is perfect for beginners and experts alike.

As long as you’re familiar with the basics of amigurumi–like how to work in the round, and standard stitches like single crochet, increase and decrease–you’ll have no problem following this easy panda amigurumi pattern.

I’ve created lots of video tutorials to guide you through the tricky parts, and have linked those in the pattern notes. You may want to bookmark this page so you can review the videos if you get stuck!

This pattern for Pei the Panda is a spin on my free teddy bear crochet pattern, Benedict the Bear. If you’re a bear lover, make sure you snag that pattern too!

crochet panda (viewed from all sides)

Step 1: Gather your supplies and review the crochet panda pattern

I’ve listed the necessary supplies at the very top of the pattern. Ready your trusty 3.5 mm crochet hook, polyfill and worsted weight (#4) yarn!

If you want to make a “pocket panda”, use a super fine (#1) yarn and a 2.5 mm hook. Making a little panda/baby panda to go with your bigger panda would be adorable.

Before getting started, make sure to read through the pattern. Watch the linked amigurumi video tutorials to learn any crochet techniques you aren’t already familiar with.

Step 2: Make the head

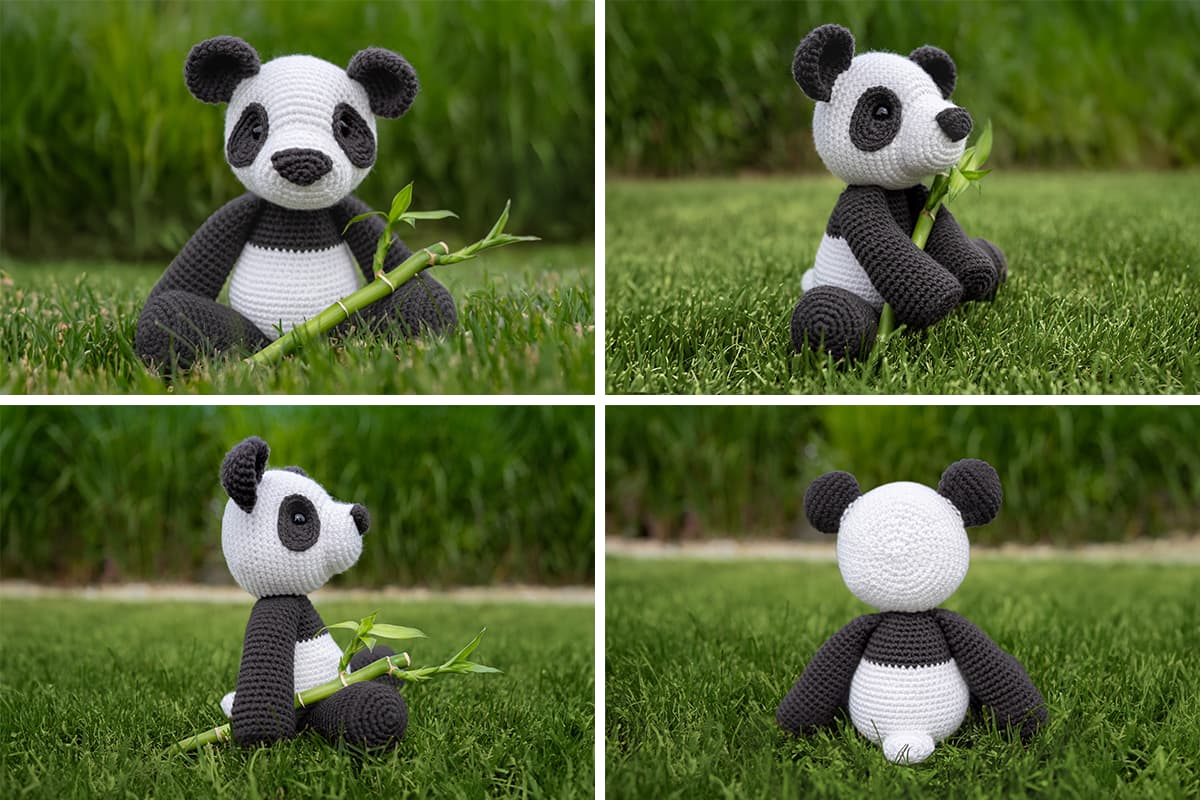
The first part of the panda crochet pattern will walk you through all the elements of your panda’s face: the ears, the eye ovals, and the nose.

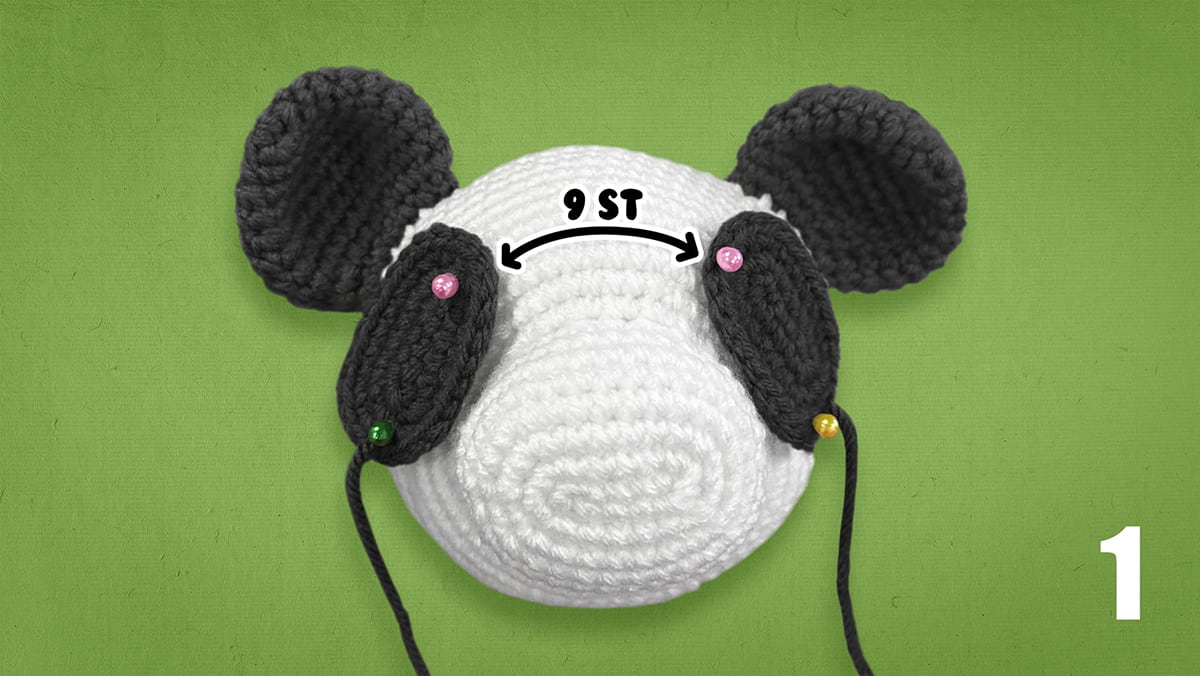
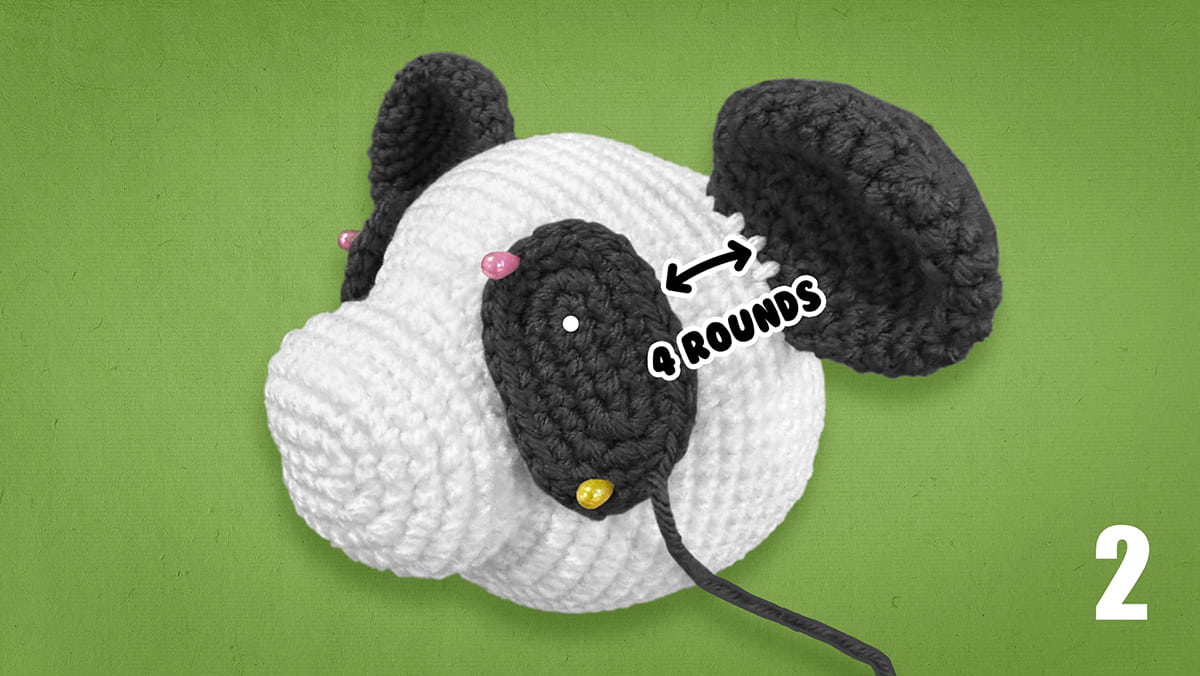
Next, you’ll move on to making the head. You will crochet the head front-to-back, starting with the snout. You will add in the ears as you crochet the head.

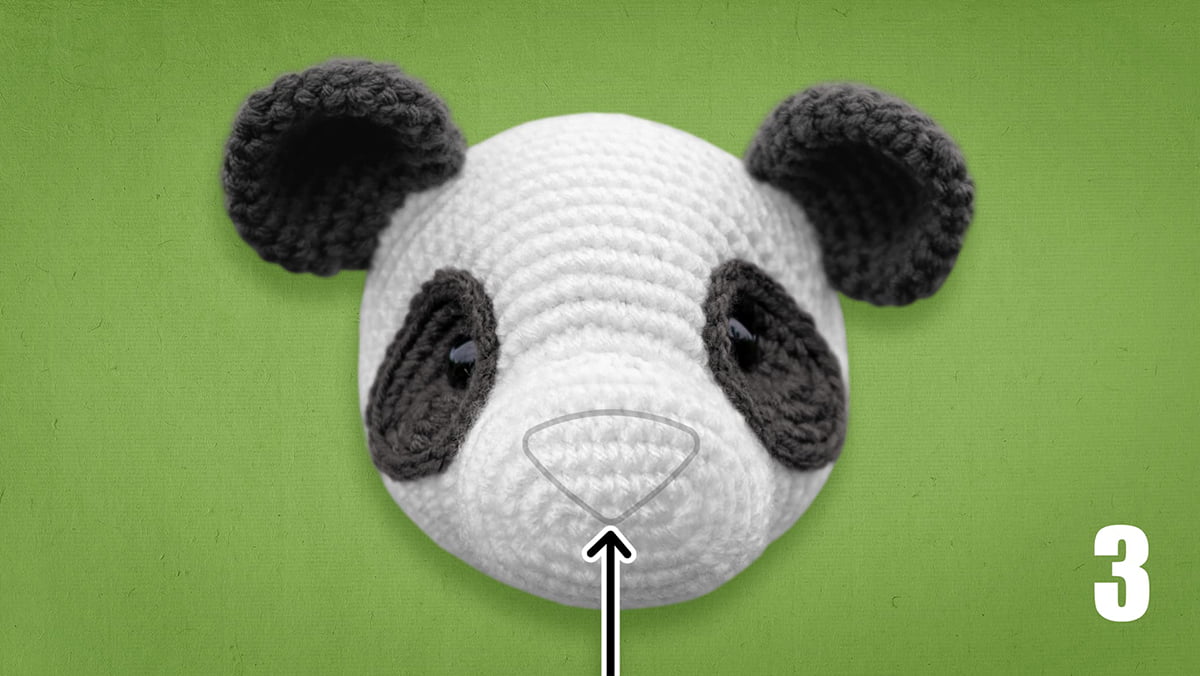
Once the head is ¾ complete, the pattern will instruct you to sew on the eye ovals and insert your safety eyes. After you’ve finished crocheting the head, you’ll sew on the nose.

Step 3: Make the body

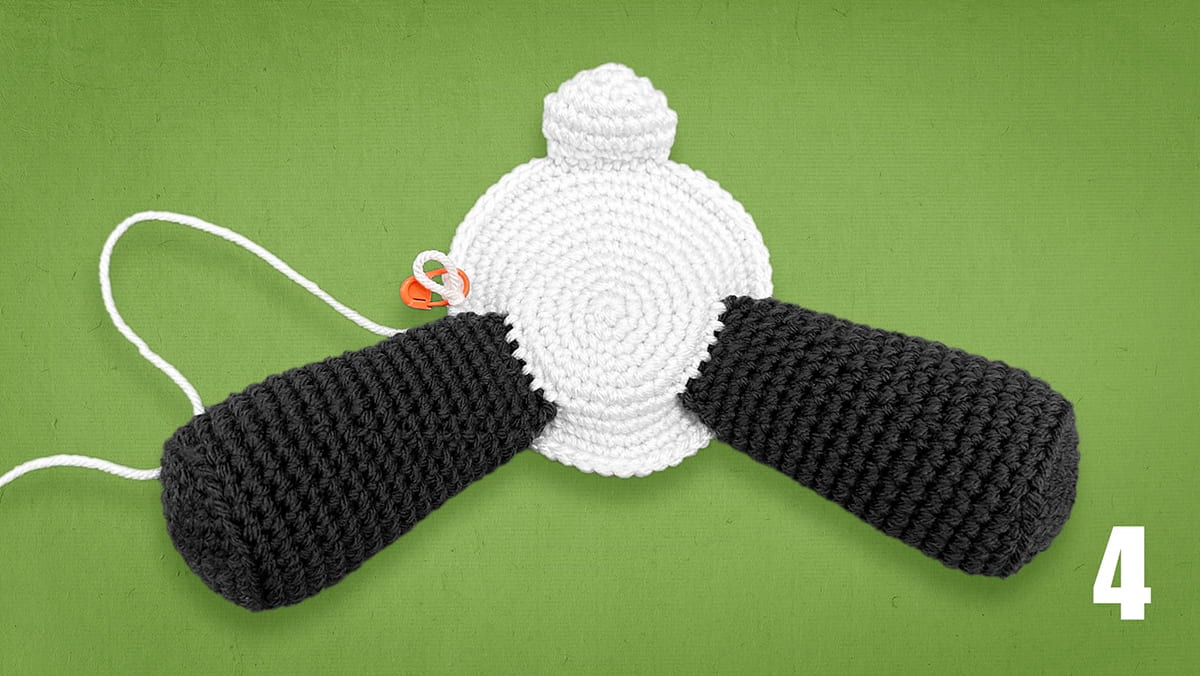
After you complete the head, the pattern will walk you through making the legs, the tail, and the arms. Move on to making the body, and you will crochet in the limbs as you go.

You will crochet the body bottom-to-top: you’ll start at the bottom of the torso and work your way up to the neck.

Step 4: Attach the head to the body

The final step is to add the head to the body. I like to trace the base of a shot glass on the bottom of the head to act as a guide as I sew the body to the head.

Leave a small gap so you can add some extra stuffing. This will stabilize the head and keep it from wobbling. The final step is to close up the gap.

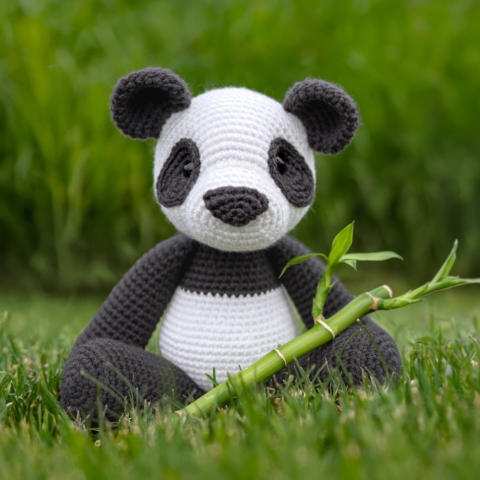
That’s all there is to it! At that point your amigurumi panda will be complete. I hope you enjoy this free crochet pattern. Happy crocheting! 🧶
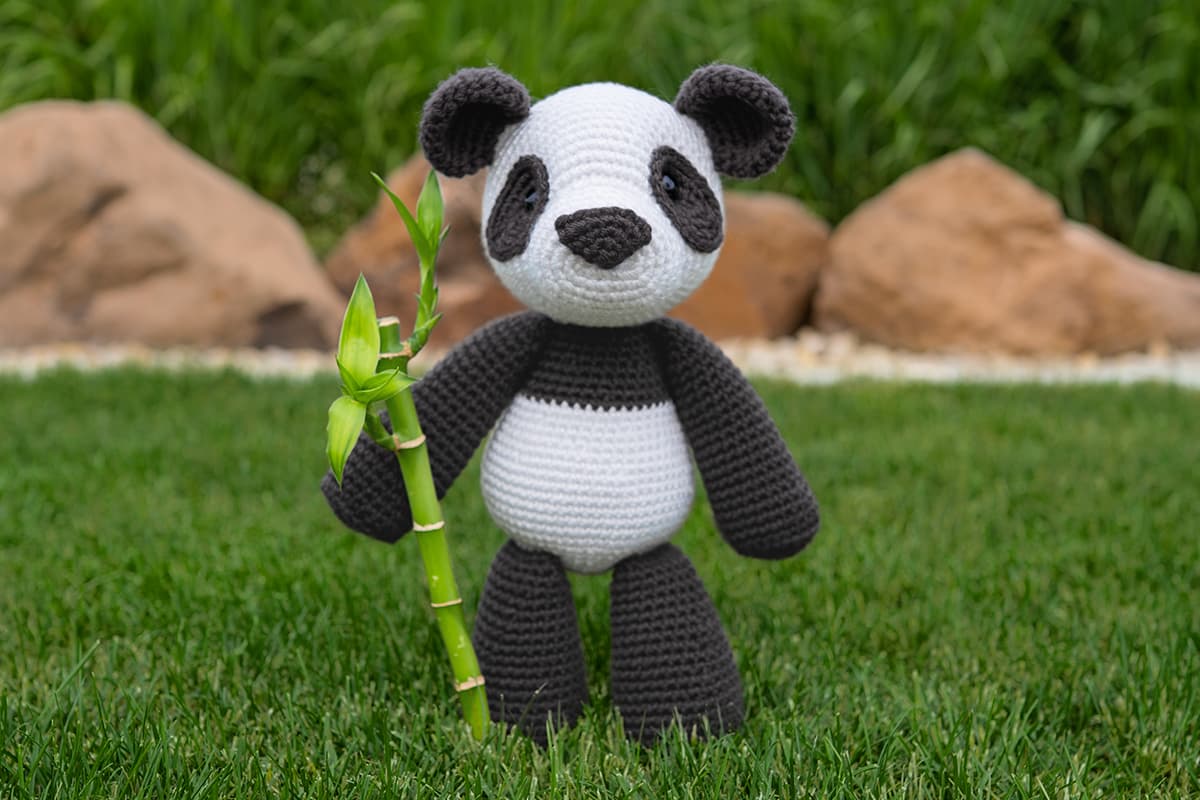
Pei the Panda

Height: 13.5" standing
Skill level: Intermediate
Terms: US 🇺🇸
Deep in the bamboo forest lives a peaceful panda named Pei. In his wise silence, Pei imparts life lessons, leading us to inner strength & serenity.

Notes

Video Tutorials
I’ve made lots of video tutorials to help you through this project:
 
If you’re reading a printed copy of the pattern, you’ll need to visit my website in order to click the tutorial links and view the videos:
Website – jhuff.co/panda

Abbreviations
  • ch – chain
  • sc – single crochet
  • inc – complete two single crochets within the same stitch
  • dec – combine two stitches into one with an invisible decrease
  • *sc x* – repeat the instructions between asterisks(*) the indicated number of times.
  • (sc x) – attach a body part while completing the stitches inside parentheses as instructed by the pattern.

General Instructions
  • This pattern is worked in one continuous spiral.
  • Use a stitch marker to keep track of where one round ends and the next begins. I prefer to place my stitch marker in the last stitch of the round.

Recommended Sequence
Here are the steps to create your panda, in order:
  1. Crochet the Ears
  2. Crochet the Eye Ovals
  3. Crochet the Nose
  4. Crochet the Head
  5. Sew on the Nose
  6. Crochet the Legs
  7. Crochet the Tail
  8. Crochet the Arms
  9. Crochet the Body
  10. Sew the Head to the Body
 
Free Panda Amigurumi Crochet Pattern - Eye Ovals (Front View)
Figure 1: Shows two completed Eye Ovals pinned to the front of the head, spaced with 9 stitches in between.
Free Panda Amigurumi Crochet Pattern - Eye Ovals (Side View)
Figure 2: Shows Eye Ovals pinned to the front of the head, 4 rows in front of ears. White dot indicates safety eye placement.
Free Panda Amigurumi Crochet Pattern - Nose Placement
Figure 3: Shows recommended placement for nose. Bottom tip of nose should be centered on the chain 5 start of head.
Free Panda Amigurumi Crochet Pattern - Legs & Tail
Figure 4: Shows the body crocheted to the end of round 11, with the tail centered above the legs on the opposite side of the round.
 

Instructions

Ears (make 2)


  • With black yarn:

    01. start 6 sc into a magic ring [6]
    02. inc in each st around [12]
    03. *sc, inc* 6 times [18]
    04. sc, inc, *sc 2, inc* 5 times, sc [24]
    05. *sc 3, inc* 6 times [30]
    06 – 07. sc in each st around [30]
    08. *sc 3, dec* 6 times [24]
    09. sc, dec, *sc 2, dec* 5 times, sc [18]
    10. *sc, dec* 6 times [12]

    Fasten off, leaving an 18 inch yarn tail. Do not stuff the ear. Pinch the final round together and slip stitch closed. Hide the remainder of the yarn tail inside the work. Your ear is now ready to attach while crocheting the head at a later step.

Eye Ovals (make 2)


  • With black yarn:

    01. Chain 5 start: ch5, inc in second ch from hook, sc 2, 5sc in the last ch. Continue on the other side of the chain base, sc 2, 3sc in the last ch [14]
    02. inc, sc 4, *inc* 3 times, sc 4, *inc* 2 times [20]
    03. inc, sc 6, *inc* 2 times, sc, inc, sc 6, *inc* 2 times, sc [26]

    Fasten off, leaving an 24 inch tail. Create an Invisible Finish and secure with a knot on the back of the work. Leave the remainder of the tail intact; You will use this to sew the Eye Oval to the head at a later step.

Nose


  • With black yarn:

    01. start 6 sc into a magic ring [6]
    02. *sc, inc* 3 times [9]
    03. sc, inc, *sc 2, inc* 2 times, sc [12]
    04. *sc 2, inc* 4 times [16]

    Fasten off, leaving a 24 inch tail. Do not stuff the nose. Pinch the final round together and slip stitch closed. The remainder of the tail will be used to sew the nose to the head at at later step.

Head


  • With white yarn:

    01. Chain 5 start: ch5, inc in second ch from hook, sc 2, 5sc in the last ch. Continue on the other side of the chain base, sc 2, 3sc in the last ch [14]
    02. inc, sc 4, *inc* 3 times, sc 4, *inc* 2 times [20]
    03. inc, sc 6, *inc* 2 times, sc, inc, sc 6, *inc* 2 times, sc [26]
    04. inc, sc 8, *inc, sc* 2 times, inc, sc 8, *inc, sc* 2 times [32]
    05. sc 14, *inc* 2 times, sc 14, *inc* 2 times [36]
    06 – 07. sc in each st around [36]
    08. *sc, dec* 12 times [24]
    09. inc in each st around [48]
    10. *sc 7, inc* 6 times [54]
    11. sc 4, inc, *sc 8, inc* 5 times, sc 4 [60]
    12 – 18. sc in each st around [60]

    Attaching the Ears: In the next round, you'll be attaching the ears. To view a video tutorial, see "How to Attach Ears" in the Notes section of the pattern.

    19. sc, Attach the first ear: (sc 6), sc 12, Attach the second ear: (sc 6), sc 35 [60]

    At the end of round 19, the ears should appear centered on the top of the head. If your ears appear off center, redo the round and adjust the placement of the ears as necessary.

    20 – 22. sc in each st around [60]
    23. sc 4, dec, *sc 8, dec* 5 times, sc 4 [54]
    24. *sc 7, dec* 6 times [48]
    25. sc 3, dec, *sc 6, dec* 5 times, sc 3 [42]
    26. *sc 5, dec* 6 times [36]
    27. sc 2, dec, *sc 4, dec* 5 times, sc 2 [30]

    Stuff head ¾ full. Pin the Eye Ovals to the head with 9 stitches in between, and 4 rounds before the ears. To view photos of the placement, see Figures 1 & 2 in the Notes section of the pattern. When you're satisfied with the placement, sew the Eye Ovals to the head.

    The safety eyes will be placed in the top chain of the Chain 5 Start used to begin round 1 of each Eye Oval (see the white dot in Figure 2 for placement).

    Create indents for the eyes, then insert your safety eyes and secure the backings. To view a video tutorial, see "How to Indent Amigurumi Eyes" in the Notes section.

    Tip: It can be difficult to insert the safety eyes through two layers of crochet. You can use something sharp (like a pen) to push through both layers & create a hole before inserting the eye.

    28. *sc 3, dec* 6 times [24]
    29. sc, dec, *sc 2, dec* 5 times, sc [18]

    Finish stuffing.

    30. *sc, dec* 6 times [12]
    31. *dec* 6 times [6]

    Fasten off, leaving a tail of about 8 inches. Close with an Ultimate Finish, then hide the tail inside the work.

    Sew the nose to the panda's snout. The tip of the nose should be centered over the first round of the head (see Figure 3).

Legs (make 2)


  • With black yarn:

    01. start 6 sc into a magic ring [6]
    02. inc in each st around [12]
    03. *sc, inc* 6 times [18]
    04. sc, inc, *sc 2, inc* 5 times, sc [24]
    05. *sc 3, inc* 6 times [30]
    06. BLO: sc in each st around [30]
    07 – 09. sc in each st around [30]
    10. sc 14, dec, sc 14 [29]
    11. sc 27, dec [28]
    12. sc 13, dec, sc 13 [27]
    13. sc 25, dec [26]
    14. sc 12, dec, sc 12 [25]
    15. sc 23, dec [24]
    16. sc 11, dec, sc 11 [23]
    17. sc 21, dec [22]
    18. sc 10, dec, sc 10 [21]
    19. sc 19, dec [20]
    20. sc 9, dec, sc 9 [19]
    21. sc 17, dec [18]
    22. *sc 7, dec* 2 times [16]
    23. *sc 2, dec* 4 times [12]

    Fasten off, leaving an 18 inch yarn tail. Stuff the leg. Pinch the final round together and slip stitch closed. Hide the remainder of the yarn tail inside the work. Your leg is now ready to attach while crocheting the body at a later step.

Tail


  • With white yarn:

    01. start 6 sc into a magic ring [6]
    02. inc in each st around [12]
    03. *sc, inc* 6 times [18]
    04. sc, inc, *sc 2, inc* 5 times, sc [24]
    05. *sc 2, dec* 6 times [18]
    06. *sc, dec* 6 times [12]

    Fasten off, leaving a 18 inch yarn tail. Lightly stuff the tip of the tail. Pinch the final round together and slip stitch closed. Hide the remainder of the yarn tail inside the work. Your tail is now ready to attach while crocheting the body at a later step.

Arms (make 2)


  • With black yarn:

    01. start 6 sc into a magic ring [6]
    02. inc in each st around [12]
    03. *sc, inc* 6 times [18]
    04. sc, inc, *sc 2, inc* 5 times, sc [24]
    05. BLO: sc in each st around [24]
    06 – 08. sc in each st around [24]
    09. sc 11, dec, sc 11 [23]
    10. sc in each st around [23]
    11. sc 21, dec [22]
    12. sc in each st around [22]
    13. sc 10, dec, sc 10 [21]
    14. sc in each st around [21]
    15. sc 19, dec [20]
    16. sc in each st around [20]
    17. sc 9, dec, sc 9 [19]
    18. sc in each st around [19]
    19. sc 17, dec [18]
    20. sc in each st around [18]
    21. sc 8, dec, sc 8 [17]
    22. sc in each st around [17]
    23. sc 15, dec [16]
    24 – 25. sc in each st around [16]
    26. *sc 2, dec* 4 times [12]

    Fasten off, leaving an 18 inch yarn tail. Stuff the arm. Pinch the final round together and slip stitch closed. Hide the remainder of the yarn tail inside the work. Your arm is now ready to attach while crocheting the body at a later step.

Body


  • With white yarn:

    01. start 6 sc into a magic ring [6]
    02. inc in each st around [12]
    03. *sc, inc* 6 times [18]
    04. sc, inc, *sc 2, inc* 5 times, sc [24]
    05. *sc 3, inc* 6 times [30]
    06. sc 2, inc, *sc 4, inc* 5 times, sc 2 [36]

    Attaching the Legs: Attach the legs where instructed while crocheting the next round. To view a video tutorial, see "How to Attach Legs | No-Sew Method" in the Notes section of the pattern.

    07. Attach the first leg: (sc 5, inc), sc 5, inc, Attach the second leg: (sc 5, inc), *sc 5, inc* 3 times [42]

    08. sc 3, inc, *sc 6, inc* 5 times, sc 3 [48]
    09. *sc 7, inc* 6 times [54]
    10. sc 4, inc, *sc 8, inc* 5 times, sc 4 [60]

    Attaching the Tail: Attach the tail where instructed while crocheting the next round. To view a video tutorial, see "How to Attach Tail | No-Sew Method" in the Notes section of the pattern.

    11. sc 41, Attach the tail: (sc 6), sc 13 [60]

    At the end of round 11, the tail should be centered above the legs on the opposite side of the round. If your tail appears off center, redo the round and adjust the placement of the tail as necessary.

    To view a photo of what your work should look like at this stage, see Figure 4 in the Notes section of the pattern.

    12 – 17. sc in each st around [60]
    18. sc 4, dec, *sc 8, dec* 5 times, sc 4 [54]
    19. sc in each st around [54]
    20. *sc 7, dec* 6 times [48]
    21. sc in each st around [48]
    22. sc 3, dec, *sc 6, dec* 5 times, sc 3 [42]
    23. sc 24, Switch to black yarn for remainder of body: sc 18 [42]
    24. sc in each st around [42]
    25. *sc 5, dec* 6 times [36]
    26 – 27. sc in each st around [36]
    28. sc 2, dec, *sc 4, dec* 5 times, sc 2 [30]
    29. sc in each st around [30]

    Attaching the Arms: Attach the arms where instructed while crocheting the next round. To view a video tutorial, see "How to Attach Arms | No-Sew Method" in the Notes section of the pattern.

    30. sc, Attach the first arm: (sc 6), sc 8, Attach second arm: (sc 6), sc 9 [30]

    At the end of round 30, the arms should be centered above the legs. If your arms appear off center, redo the round and adjust the placement of the arms as necessary.

    Stuff the body.

    31. *sc 3, dec* 6 times [24]

    Fasten off and leave a tail the length of your arm span (5+ feet). The final step is to sew the head to the body. To view a video tutorial, see "How to Sew Head to Body" in the Notes section.

Subscribe To Our Newsletter

Join our mailing list to receive the latest news and updates from our team.

[ninja_form id=5]

You have Successfully Subscribed!