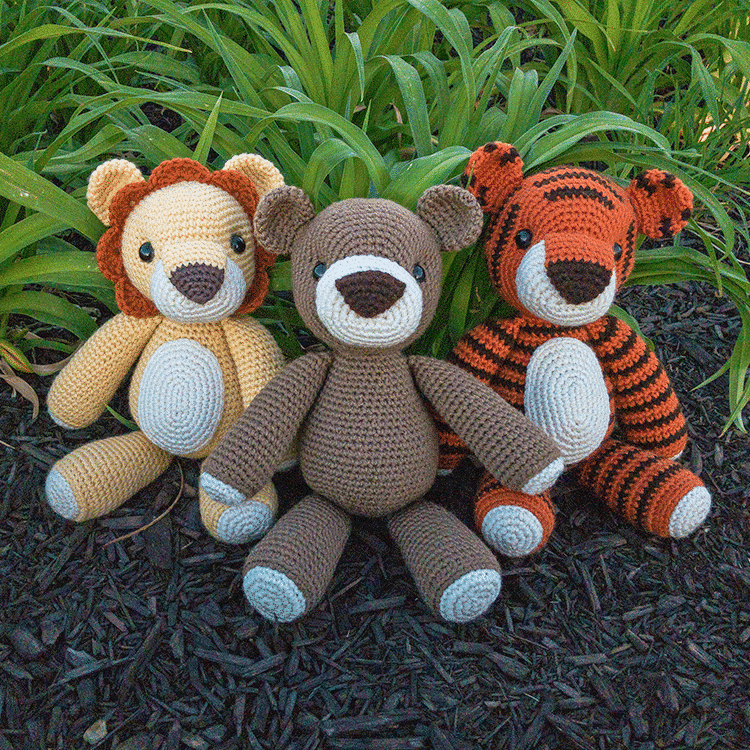
Benedict the Bear completes a set of three free amigurumi patterns inspired by The Wizard of Oz – Lions and Tigers and Bears, Oh My! The other two patterns include Laurence the Lion and Thomas the Tiger. Check out the last photo in the album below to see these three amigos together!
I dragged my feet creating a bear pattern because there are tons of free teddy bear amigurumi patterns out there already and I thought I would be underwhelmed by the result. Boy, was I wrong! Benedict turned out so stinking cute and makes a great addition to my amigurumi pattern collection. 🙂
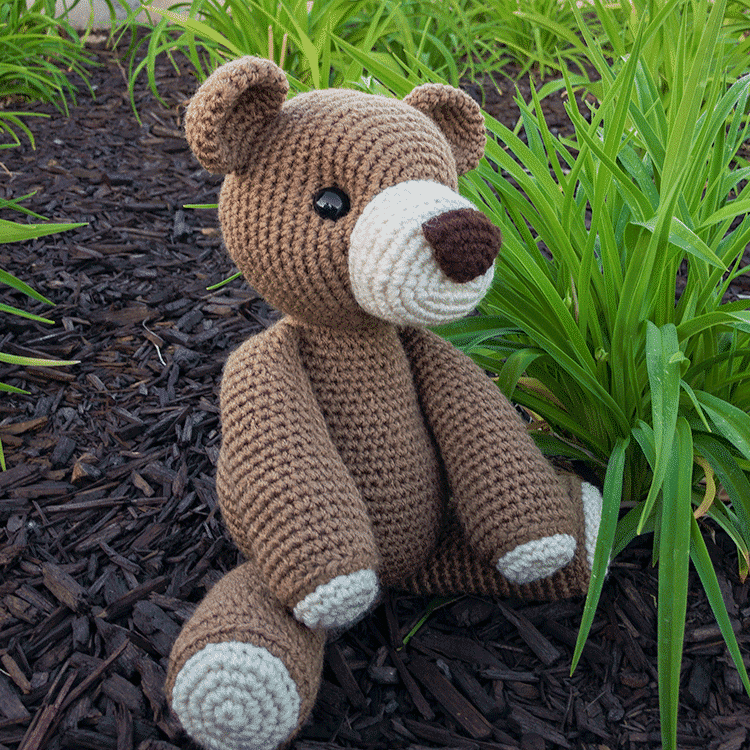

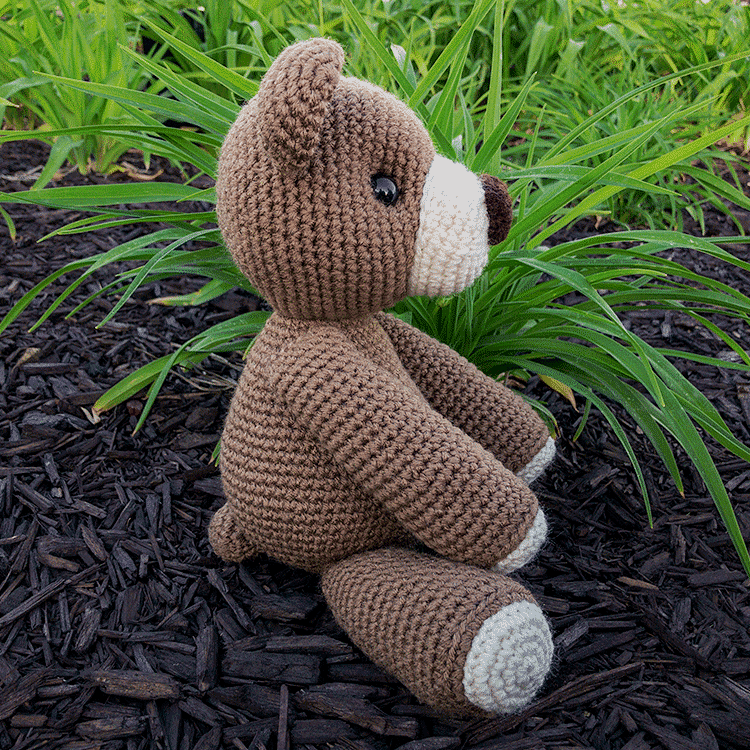
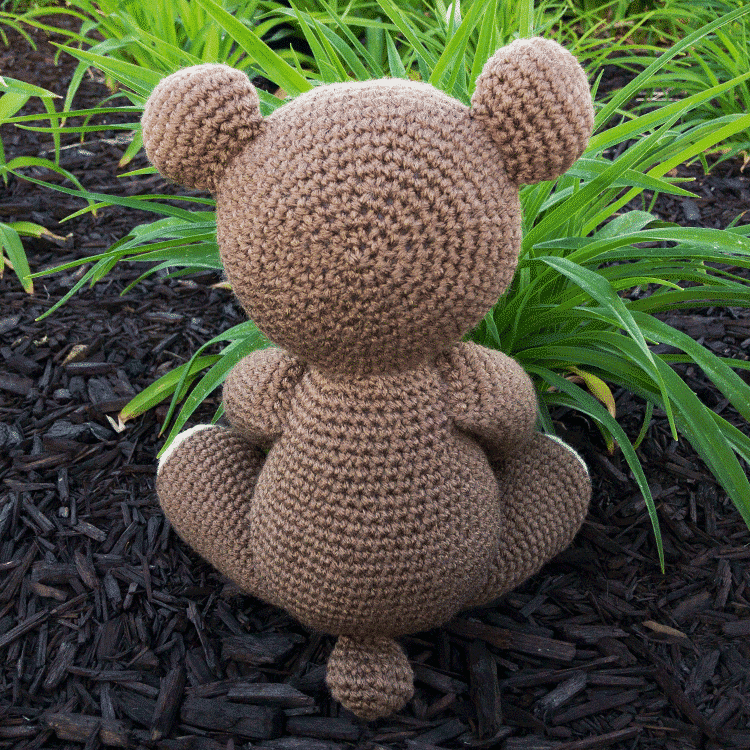


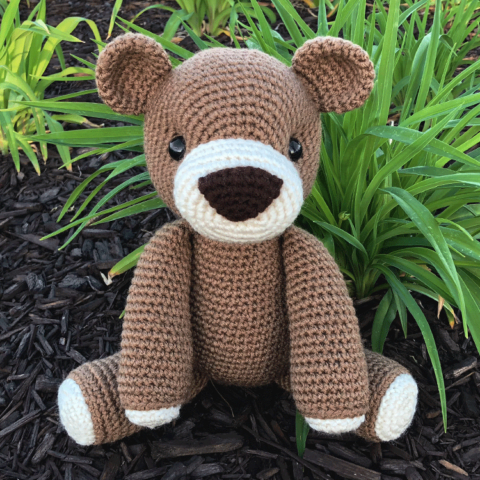
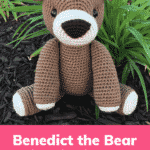
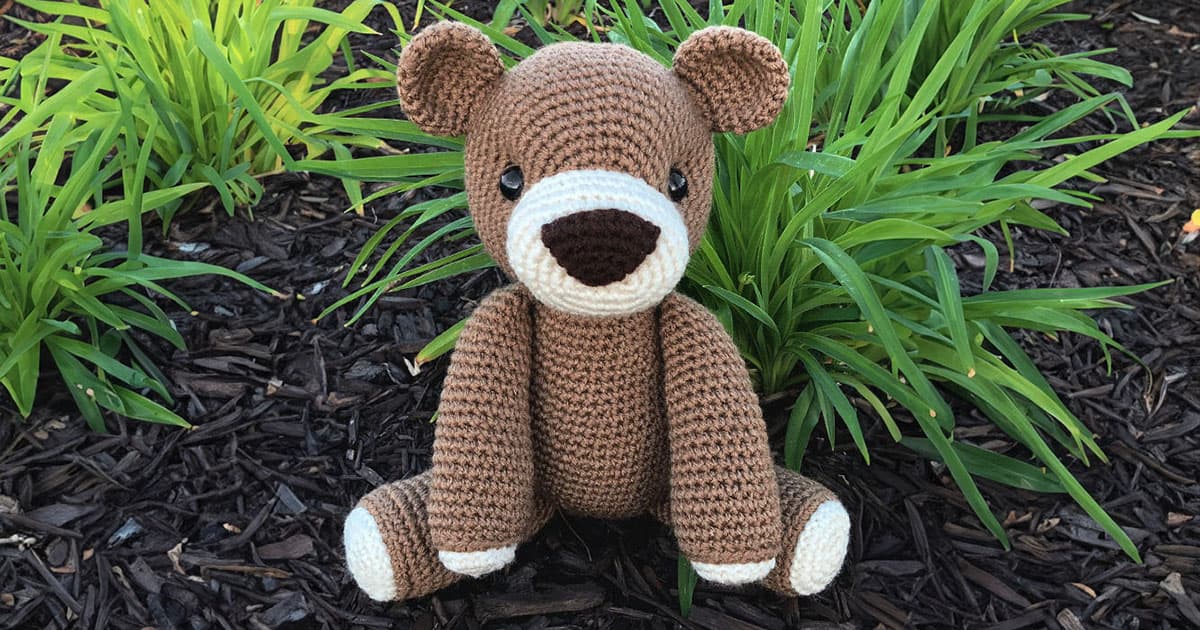
Benedict the Bear
Height: 13.5" standing
Skill level: Intermediate-Advanced
Terms: US 🇺🇸If you can bear the cuteness, Benedict would love to be your friend. Pop by to say hello next time you're in his neck of the woods!
Skill level: Intermediate-Advanced
Terms: US 🇺🇸If you can bear the cuteness, Benedict would love to be your friend. Pop by to say hello next time you're in his neck of the woods!
Supplies
Yarn (acrylic, weight 4)
- Cream (I used Red Heart Super Saver – Aran)
- Dark Brown (I used Red Heart Super Saver – Coffee)
- Medium Brown (I used Red Heart Super Saver – Cafe Latte)
Notes
Abbreviations
General Instructions
Recommended Sequence
Here are the steps to create your bear, in order:
Crochet Video Tutorials
Head: Round 18 – Attaching the Ears
Indenting the Eyes
Body: Round 7 – Attaching the Legs
Body: Round 11 – Attaching the Tail
Body: Round 30 – Attaching the Arms
Attaching the Head to the Body
- ch – chain
- sc – single crochet
- inc – complete two single crochets within the same stitch
- dec – combine two stitches into one with an invisible decrease
- *sc x* – repeat the instructions between asterisks(*) the indicated number of times.
- (sc x) – attach a body part while completing the stitches inside parentheses as instructed by the pattern.
General Instructions
- This pattern is worked in one continuous spiral.
- Use a stitch marker to keep track of where one round ends and the next begins. I prefer to place my stitch marker in the last stitch of the round.
Recommended Sequence
Here are the steps to create your bear, in order:
- Crochet the Nose
- Crochet the Ears
- Crochet the Snout & Head
- Attach the Nose to the Snout
- Crochet the Legs
- Crochet the Tail
- Crochet the Arms
- Crochet the Body
- Attach the Head to the Body
Crochet Video Tutorials
Head: Round 18 – Attaching the Ears
Note: This video shows a lion, but the technique is the same.
Crochet round 18 as normal until you hit the first stitch marker. Attach an ear to the head while crocheting until you’ve worked the second marked stitch.
Complete the next 12 stitches as normal until you hit the next stitch marker.
Attach the other ear to the head as you crochet until you’ve worked the last marked stitch. Complete the round as normal.
At the end of round 18, the ears should be centered above the snout. If your ears appear off center, redo the round and adjust the placement of the ears as necessary.
Indenting the Eyes
Note: This video shows a unicorn, but the technique is the same for all of my patterns.
Cut a strand of yarn approximately 18″ long. Tie a large, secure knot in one end and thread the other end through your yarn needle.
Insert your needle through the back opening of the head and sew between the two spots where you’ll be placing your safety eyes (marked with strands of yarn).
Pull your strand of yarn taut, which will create indents. Fasten off with a knot and hide your yarn tail inside the head.
Body: Round 7 – Attaching the Legs
Note: This video shows a llama, but the technique is the same for this pattern.
Since this pattern indicates in which exact stitches of the round you’ll be attaching each leg, you do not have to use stitch markers as shown in the video.
As you crochet round 7, attach the first leg as you crochet into the first 6 stitches.
Crochet into the next 6 stitches as normal to leave a gap between the legs, then attach the second leg as you crochet into the second group of 6 marked off stitches.
Complete the remainder of the round as normal.
Body: Round 11 – Attaching the Tail
Note: This video shows a llama, but the technique is the same for this pattern.
Since this pattern indicates in which exact stitches of the round you’ll be attaching the tail, you do not have to use stitch markers as shown in the video.
At the end of round 11, the tail should be centered above the legs on the opposite side of the round. If your tail appears off center, redo the round and adjust the placement of the tail as necessary.
Body: Round 30 – Attaching the Arms
Note: This video shows a llama, but the technique is the same for this pattern.
Since this pattern indicates in which exact stitches of the round you’ll be attaching each arm, you do not have to use stitch markers as shown in the video.
At the end of round 30, the arms should be centered above the legs and tail. If your arms appear off center, redo the round and adjust the placement of the arms as necessary.
Attaching the Head to the Body
Note: This video shows a sheep, but the technique is the same for this pattern.
Step 1: Find an object with a circular base that has the same circumference as the opening of your body. I like to use a shot glass that I found at the dollar store.
Using a disappearing ink marker, trace the circular object centered on the bottom of the head. This will act as a guide as you sew.
Step 2: Sew the head to the body, leaving some slack in your stitches. Leave your last couple stitches open, and view the head & body from all angles to ensure the head is on straight.
Tighten all the stitching with a yarn needle. Tight stitching and proper stuffing ensure you won’t end up with a wobbly head.
Step 3: Add additional stuffing until the neck is nice and firm. There shouldn’t be any slack or empty space between the top of the body and the head.
Step 4: Once you’re finished stuffing, close up the last couple stitches and pull them tight. Secure with a knot and hide the yarn tail inside the work.
Instructions
Nose
Ears (make 2)
Snout & Head
With cream yarn: 09. BLO: *sc 5, inc* 4 times, sc, Both Loops: sc 4, inc, sc 5, inc [42] 10. sc 3, inc, *sc 6, inc* 5 times, sc 3 [48]11. *sc 7, inc* 6 times [54]12. sc 4, inc, *sc 8, inc* 5 times, sc 4 [60]
Legs (make 2)
Tail
Arms (make 2)
Body
Attaching the Legs: Attach the legs where instructed while crocheting the next round. For additional details and a video tutorial, see "Body: Round 7 – Attaching the Legs" in the Notes section of the pattern. 07. Attach the first leg in the next six stitches: (sc 5, inc), sc 5, inc, Attach the second leg in the next six stitches: (sc 5, inc), *sc 5, inc* 3 times [42]08. sc 3, inc, *sc 6, inc* 5 times, sc 3 [48]09. *sc 7, inc* 6 times [54]10. sc 4, inc, *sc 8, inc* 5 times, sc 4 [60] Attaching the Tail: Attach the tail where instructed while crocheting the next round. For additional details and a video tutorial, see "Body: Round 11 – Attaching the Tail" in the Notes section of the pattern. At the end of round 11, the tail should be centered above the legs on the opposite side of the round. If your tail appears off center, redo the round and adjust the placement of the tail as necessary. Attaching the Arms: Attach the arms where instructed while crocheting the next round. For additional details and a video tutorial, see "Body: Round 30 – Attaching the Arms" in the Notes section of the pattern. At the end of round 30, the arms should be centered above the legs and tail. If your arms appear off center, redo the round and adjust the placement of the arms as necessary. Stuff the body. 31. *sc 3, dec* 6 times [24] Fasten off and leave a tail the length of your arm span (5+ feet). For instructions on how to attach the head to the body, see "Attaching the Head to the Body" in the Notes section of the pattern.