Video Transcript:
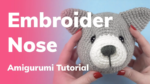
This is Jess from jesshuff.com. In this video, I’ll show you how to embroider a nose on your amigurumi crochet project.
The first step is to cut a strand of yarn, about three feet long. Thread one end through a yarn needle.
Now we’re going to embroider a V to outline the shape of the nose. If your pattern doesn’t specify the stitches you should embroider into, just use your best judgment.
Now we’re going to embroider from one side to the other, and I’ll go through each stitch across the top 3 or 4 times.
If you want, you can end with a final strand across the top of the nose to give a smoother final appearance.
Now we’re going to add a line from the point of the nose to the bottom of the snout. Tie the beginning and ending tails together in a knot, then hide the tails inside the work.
You now have an adorable nose on your crocheted animal.
If you found this video helpful, please hit the thumbs-up button. Be sure to subscribe to my YouTube channel so you’ll be notified about my future crochet tutorials. Thanks for watching!