Video Transcript:
This is Jess from jesshuff.com. In this video, I’ll show you how to attach the tail as you’re crocheting the body of your amigurumi project.
At this point, you should have crocheted rounds 1 – 10 of the body, including attaching the legs where indicated.
You should also have a completed tail that has been slip stitched closed with the yarn tail hidden inside the work.
The next step is to mark stitches on the body, that will show us where to attach the tail as we’re crocheting round 11.
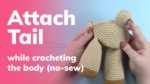
Our tail has five slip stitches across the top, so we’ll mark off five stitches centered between the legs on the opposite side of the round. Crochet around until you hit the first marker for the tail.
Align the tail on the right side of the work. Remove the first stitch marker and we’ll attach the tail stitch-for-stitch.
Single crochet in all stitches remaining in the round. Our tail is now attached. Complete the rest of the body as your pattern is written.
If you found this video helpful, please hit the thumbs-up button. Be sure to subscribe to my channel, so you’ll be notified about my future crochet tutorials. Thanks for watching!