
 by
by 
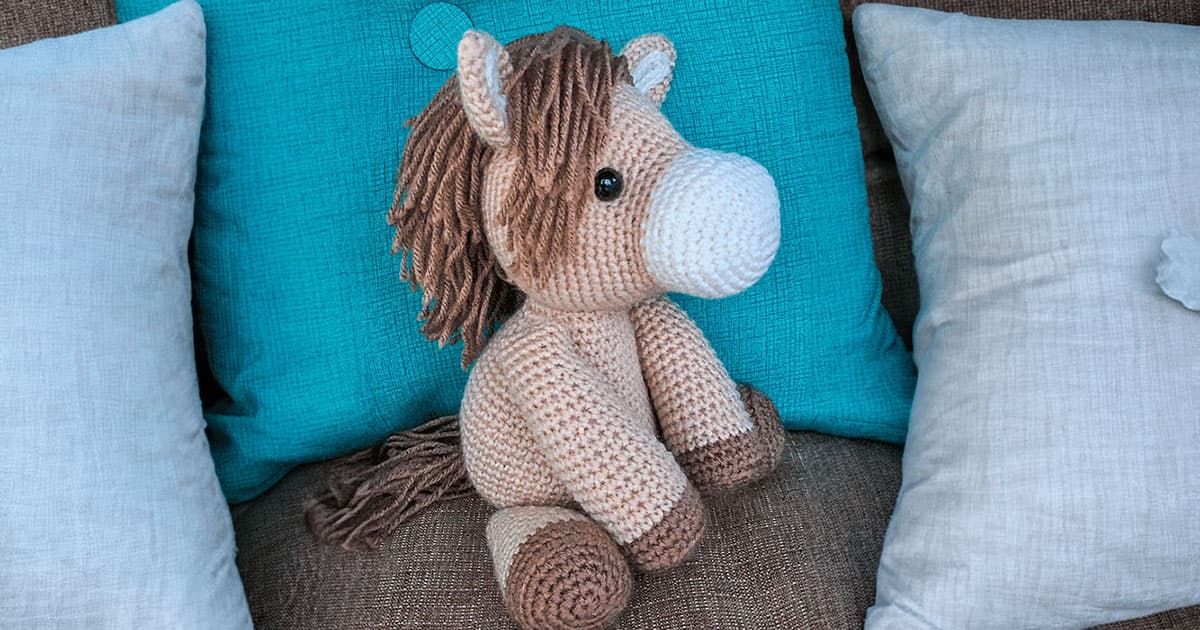
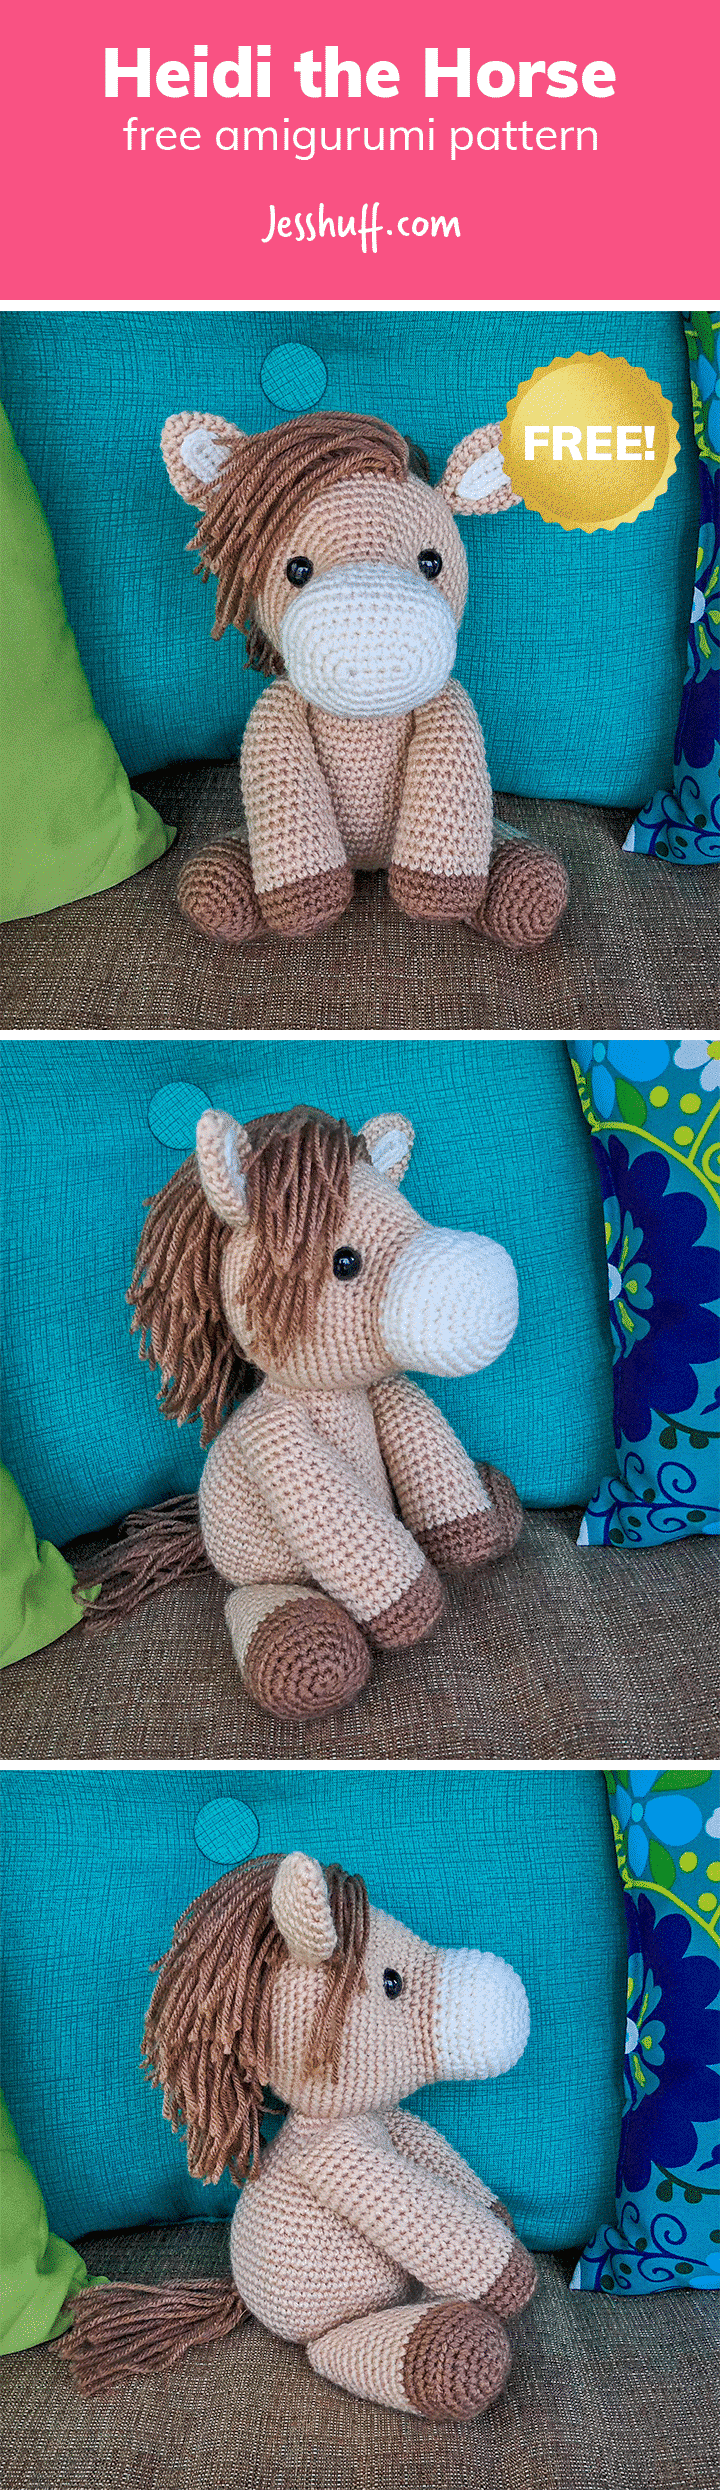
Heidi the Horse completes my little equestrian family. She uses the same basic pattern as Jazzy the Unicorn and Zane the Zebra, but with different colors. 🙂 I decided to publish them as separate patterns for ease of use.
I wish I could take pictures of the horse, unicorn and zebra together, but I’ve already gifted two of them. I hope they’re well-loved in their new homes, and I hope you enjoy making your own creation with my free horse amigurumi pattern!

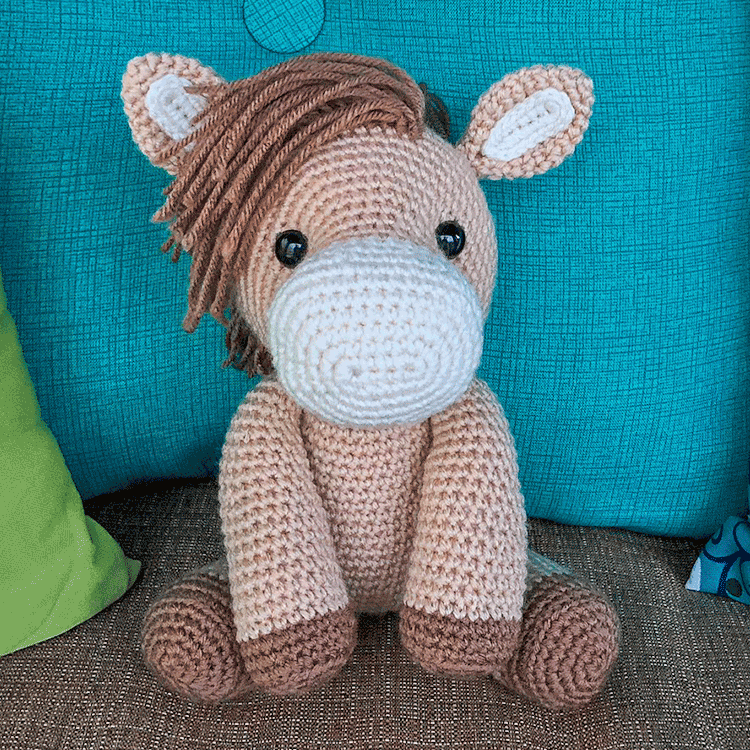
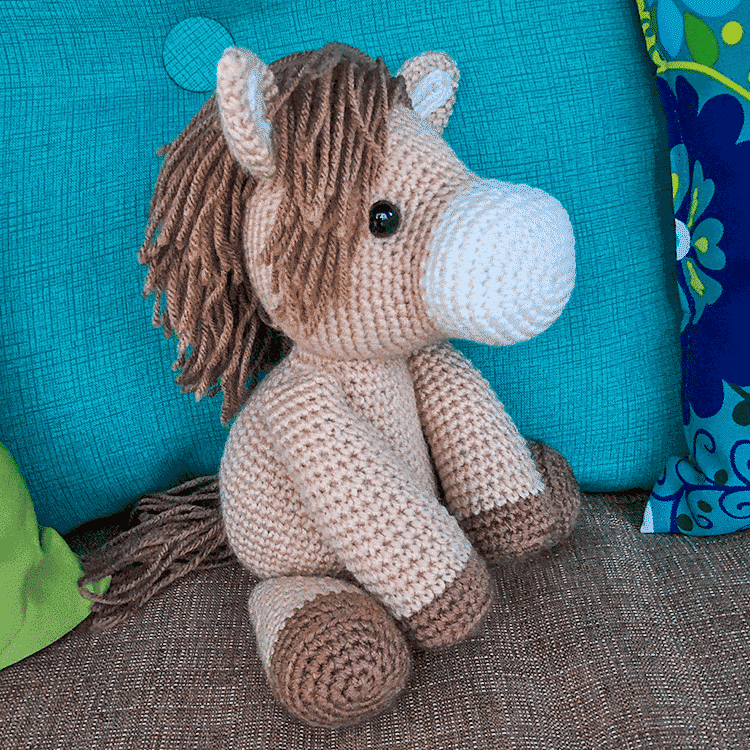
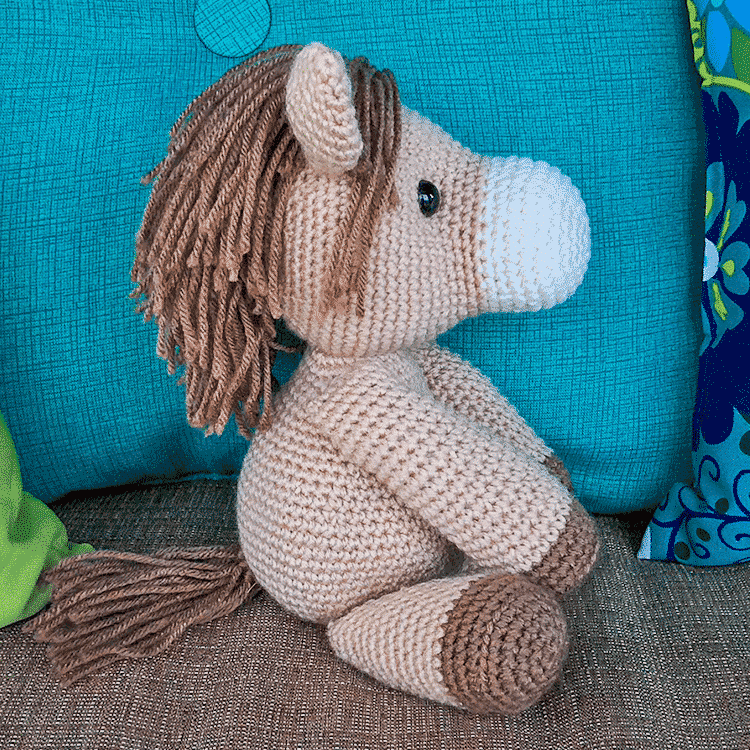
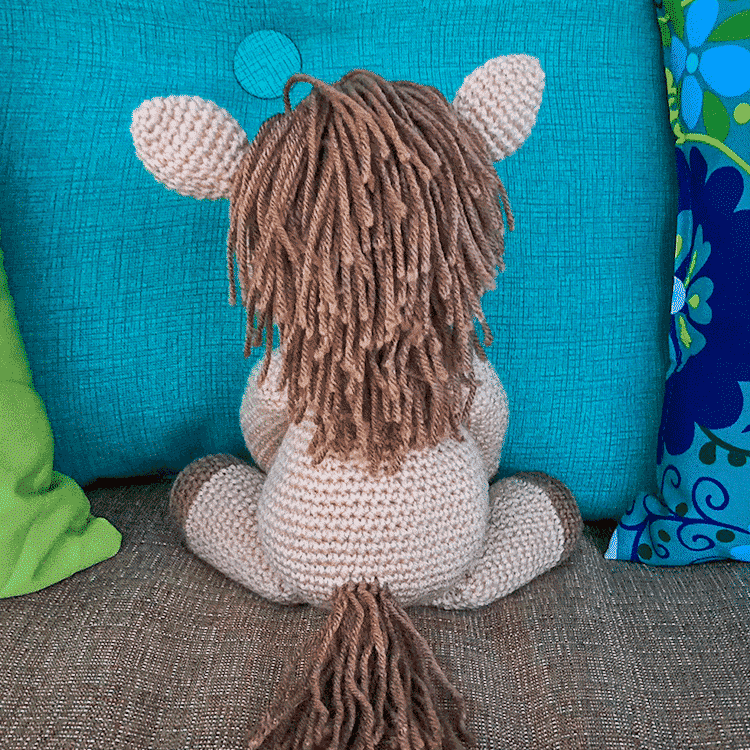
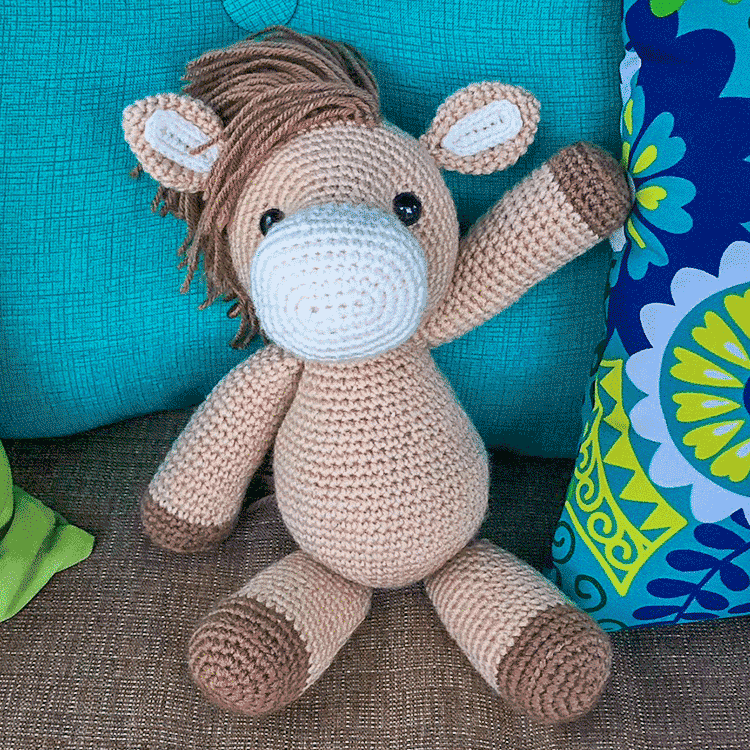


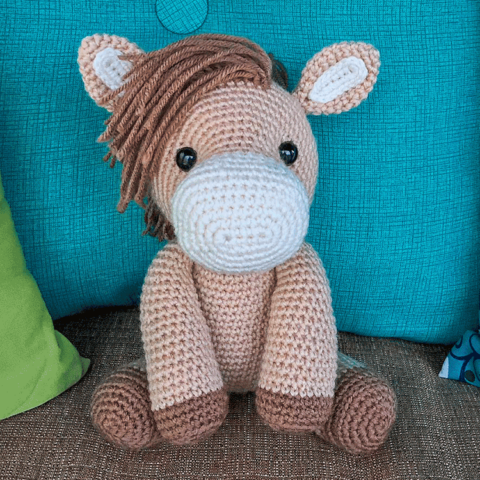
Heidi the Horse
Height: 14" standing
Skill Level: Intermediate
Ravelry: Heidi the Horse
Heidi the Horse is the color of honey and just as sweet! She'll clip clop her way right into your heart.
Skill Level: Intermediate
Ravelry: Heidi the Horse
Heidi the Horse is the color of honey and just as sweet! She'll clip clop her way right into your heart.
Supplies
- 3.5mm (E) hook
- 15mm safety eyes (buy here)
- Yarn needle
- Fiber fill
- Disappearing ink marker (optional – buy here)
Yarn (acrylic, weight 4)
- Cream (I used RHSS – Aran)
- Tan (I used RHSS – Buff)
- Brown (I used RHSS – Cafe Latte)
Notes
Abbreviations
ch: chain
sc: single crochet
inc: 2sc increase
BLO: back loop only
dec: invisible decrease
Attaching with thread vs. yarn tail
For a cleaner look, I opted to cut the yarn tails on the inner ears short and weave them into the back of the work, then attach the inner ears to the ears with matching thread. However, you can also attach them using a yarn needle and the yarn tail. It's up to you!
Regarding stitch markers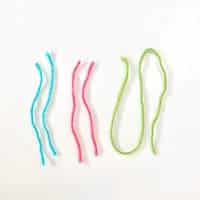
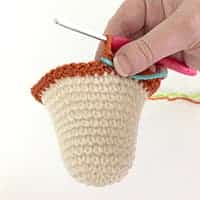
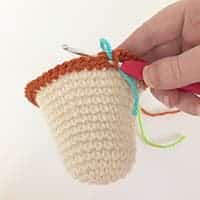
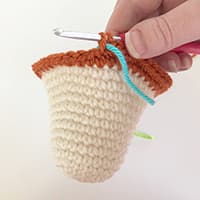
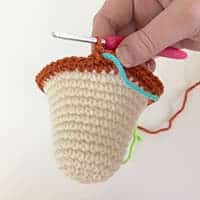
 Note: The photos above show a fox, but the technique is the same for all of my patterns.
The pattern indicates to insert 4 different stitch markers in various places besides the one you use to track the beginning/end of each round.
I recommend using strands of yarn in 3 different colors as your stitch markers: Two strands in color 1 (blue) to mark where you will place each eye, Two strands color 2 (pink) to mark where you will start attaching each ear, and one long strand in color 3 (green) to track the beginning/end of each round.
The photos above demonstrate how to mark a stitch while crocheting a round: lay your strand of yarn acting as a marker over your working yarn and the stitch you'll be working into, then complete the stitch as normal.
You'll essentially be weaving the long strand in color 3 through your work with each round. On odd rounds you'll be laying the strand back-to-front, and on even rounds you'll be laying the strand front-to-back.
The advantage of using this technique is you'll have the beginning of every single round marked, which makes it much easier to find your place if you make a mistake. That said, It's perfectly fine to use a regular ol' safety pin-like marker to keep track of your rounds instead. 🙂
Note: The photos above show a fox, but the technique is the same for all of my patterns.
The pattern indicates to insert 4 different stitch markers in various places besides the one you use to track the beginning/end of each round.
I recommend using strands of yarn in 3 different colors as your stitch markers: Two strands in color 1 (blue) to mark where you will place each eye, Two strands color 2 (pink) to mark where you will start attaching each ear, and one long strand in color 3 (green) to track the beginning/end of each round.
The photos above demonstrate how to mark a stitch while crocheting a round: lay your strand of yarn acting as a marker over your working yarn and the stitch you'll be working into, then complete the stitch as normal.
You'll essentially be weaving the long strand in color 3 through your work with each round. On odd rounds you'll be laying the strand back-to-front, and on even rounds you'll be laying the strand front-to-back.
The advantage of using this technique is you'll have the beginning of every single round marked, which makes it much easier to find your place if you make a mistake. That said, It's perfectly fine to use a regular ol' safety pin-like marker to keep track of your rounds instead. 🙂
How to indent the eyes Note: The video above shows a unicorn, but the technique is the same for all of my patterns.
Step 1 – Cut a strand of yarn approximately 18" long. Tie a large, secure knot in one end and thread the other end through your yarn needle.
Step 2 – Insert your needle through the back opening of the head and sew between the two spots where you'll be placing your safety eyes (marked with your color 1 stitch markers).
Step 3 – Pull your strand of yarn taut, which will create indents.
Step 4 – Fasten off with a knot and hide your yarn tail inside the head.
Note: The video above shows a unicorn, but the technique is the same for all of my patterns.
Step 1 – Cut a strand of yarn approximately 18" long. Tie a large, secure knot in one end and thread the other end through your yarn needle.
Step 2 – Insert your needle through the back opening of the head and sew between the two spots where you'll be placing your safety eyes (marked with your color 1 stitch markers).
Step 3 – Pull your strand of yarn taut, which will create indents.
Step 4 – Fasten off with a knot and hide your yarn tail inside the head.
How to add hair for the mane and tail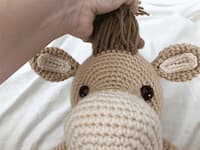

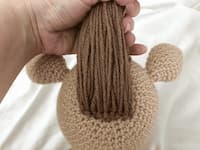
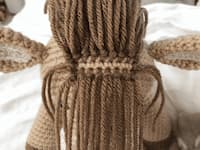 Step 1 – Cut 10" long strands of yarn. How many depends on your personal preference, but I ended up using well over 100. As you can see in the 4th photo above, I only rooted hair on every other round, but filled in the gaps with one strand of yarn on each side.
I recommend finding a book or DVD case to wrap your yarn around several times, then cut along the top – it makes the process of cutting yarn strands much faster and it’s easier to produce a consistent length.
Optional: Use a ruler and a disappearing ink marker to draw a rectangle on the head as a guide for where to root the mane. You can do the same for the tail by tracing something circular (about 1.5" in diameter) on the rear.
Step 2 – Fold a strand of yarn in half, insert your hook under a stitch in the head or body. Use your hook to catch your yarn strand and pull through a loop, then pull your tail ends of the strand through the loop.
This video illustrates the technique perfectly, except I insert my hook front-to-back instead of side-to-side.
Step 3 – If giving your creation to a small child, be sure to secure each strand of hair with a knot so it can't easily be pulled out.
Step 1 – Cut 10" long strands of yarn. How many depends on your personal preference, but I ended up using well over 100. As you can see in the 4th photo above, I only rooted hair on every other round, but filled in the gaps with one strand of yarn on each side.
I recommend finding a book or DVD case to wrap your yarn around several times, then cut along the top – it makes the process of cutting yarn strands much faster and it’s easier to produce a consistent length.
Optional: Use a ruler and a disappearing ink marker to draw a rectangle on the head as a guide for where to root the mane. You can do the same for the tail by tracing something circular (about 1.5" in diameter) on the rear.
Step 2 – Fold a strand of yarn in half, insert your hook under a stitch in the head or body. Use your hook to catch your yarn strand and pull through a loop, then pull your tail ends of the strand through the loop.
This video illustrates the technique perfectly, except I insert my hook front-to-back instead of side-to-side.
Step 3 – If giving your creation to a small child, be sure to secure each strand of hair with a knot so it can't easily be pulled out.
ch: chain
sc: single crochet
inc: 2sc increase
BLO: back loop only
dec: invisible decrease
Attaching with thread vs. yarn tail
For a cleaner look, I opted to cut the yarn tails on the inner ears short and weave them into the back of the work, then attach the inner ears to the ears with matching thread. However, you can also attach them using a yarn needle and the yarn tail. It's up to you!
Regarding stitch markers
Note: The photos above show a fox, but the technique is the same for all of my patterns.
The pattern indicates to insert 4 different stitch markers in various places besides the one you use to track the beginning/end of each round.
I recommend using strands of yarn in 3 different colors as your stitch markers: Two strands in color 1 (blue) to mark where you will place each eye, Two strands color 2 (pink) to mark where you will start attaching each ear, and one long strand in color 3 (green) to track the beginning/end of each round.
The photos above demonstrate how to mark a stitch while crocheting a round: lay your strand of yarn acting as a marker over your working yarn and the stitch you'll be working into, then complete the stitch as normal.
You'll essentially be weaving the long strand in color 3 through your work with each round. On odd rounds you'll be laying the strand back-to-front, and on even rounds you'll be laying the strand front-to-back.
The advantage of using this technique is you'll have the beginning of every single round marked, which makes it much easier to find your place if you make a mistake. That said, It's perfectly fine to use a regular ol' safety pin-like marker to keep track of your rounds instead. 🙂
How to indent the eyes
How to add hair for the mane and tail
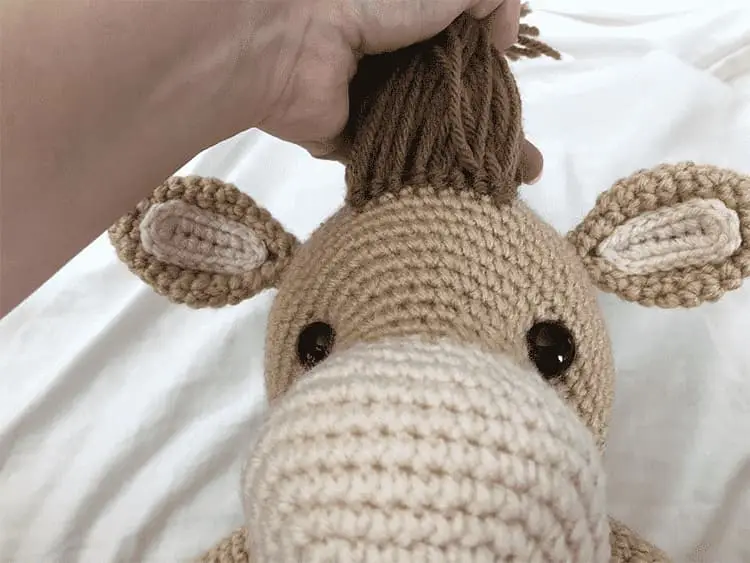

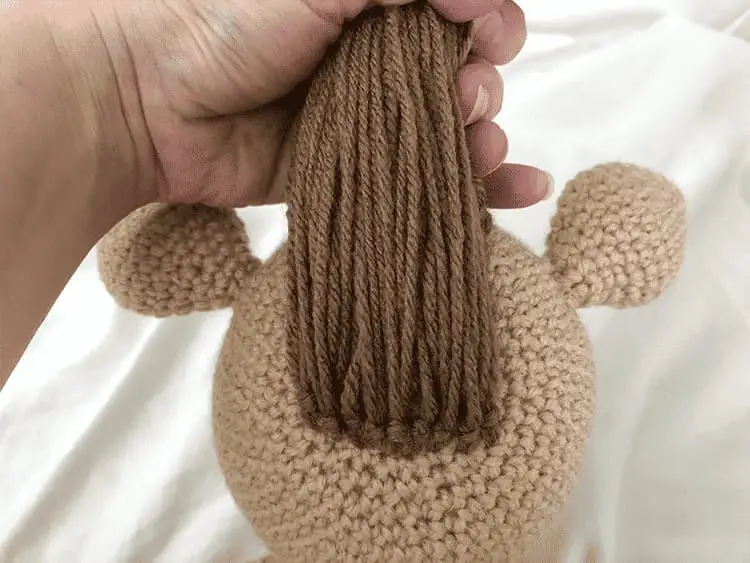
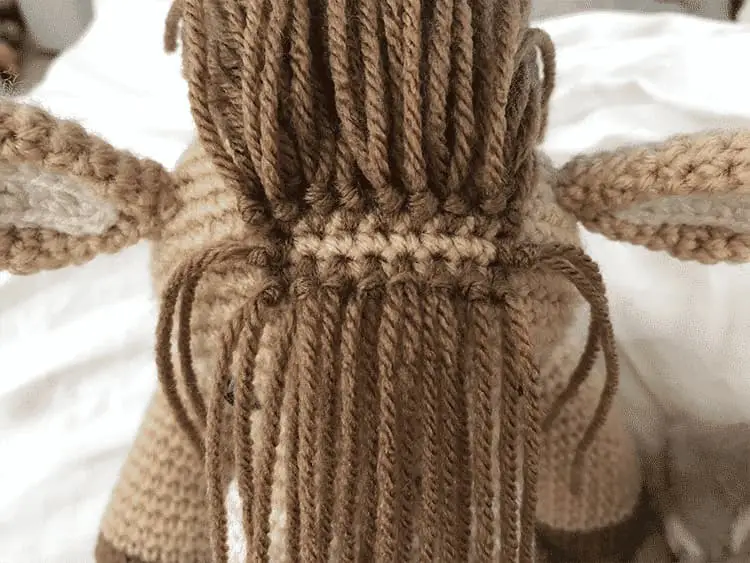 Step 1 – Cut 10" long strands of yarn. How many depends on your personal preference, but I ended up using well over 100. As you can see in the 4th photo above, I only rooted hair on every other round, but filled in the gaps with one strand of yarn on each side.
I recommend finding a book or DVD case to wrap your yarn around several times, then cut along the top – it makes the process of cutting yarn strands much faster and it’s easier to produce a consistent length.
Optional: Use a ruler and a disappearing ink marker to draw a rectangle on the head as a guide for where to root the mane. You can do the same for the tail by tracing something circular (about 1.5" in diameter) on the rear.
Step 2 – Fold a strand of yarn in half, insert your hook under a stitch in the head or body. Use your hook to catch your yarn strand and pull through a loop, then pull your tail ends of the strand through the loop.
This video illustrates the technique perfectly, except I insert my hook front-to-back instead of side-to-side.
Step 3 – If giving your creation to a small child, be sure to secure each strand of hair with a knot so it can't easily be pulled out.
Step 1 – Cut 10" long strands of yarn. How many depends on your personal preference, but I ended up using well over 100. As you can see in the 4th photo above, I only rooted hair on every other round, but filled in the gaps with one strand of yarn on each side.
I recommend finding a book or DVD case to wrap your yarn around several times, then cut along the top – it makes the process of cutting yarn strands much faster and it’s easier to produce a consistent length.
Optional: Use a ruler and a disappearing ink marker to draw a rectangle on the head as a guide for where to root the mane. You can do the same for the tail by tracing something circular (about 1.5" in diameter) on the rear.
Step 2 – Fold a strand of yarn in half, insert your hook under a stitch in the head or body. Use your hook to catch your yarn strand and pull through a loop, then pull your tail ends of the strand through the loop.
This video illustrates the technique perfectly, except I insert my hook front-to-back instead of side-to-side.
Step 3 – If giving your creation to a small child, be sure to secure each strand of hair with a knot so it can't easily be pulled out.Instructions
- Be sure to read the "notes" section before proceeding.
Head
- With cream yarn:
01. Chain 5 start: ch5, inc in 2nd ch from hook, sc 2, 5sc in the last ch. Continue on the other side of the chain base, sc 2, 3sc in the last ch [14]
02. inc, sc 4, *inc* 3 times, sc 4, *inc* 2 times [20]
03. inc, sc 6, *inc* 2 times, sc, inc, sc 6, *inc* 2 times, sc [26]
04. inc, sc 8, *inc, sc* 2 times, inc, sc 8, *inc, sc* 2 times [32]
05. inc, sc 10, inc, sc 2, inc, sc, inc, sc 10, inc, sc 2, inc, sc [38]
06. inc, sc 12, *inc, sc 2* 2 times, inc, sc 12, *inc, sc 2* 2 times [44]
07. *sc 10, inc* 4 times [48]
08. sc 3, dec, *sc 6, dec* 5 times, sc 3 [42]
09. *sc 5, dec* [36]
10. sc 2, dec, *sc 4, dec* 5 times, sc 2 [30]
At the end of round 10, sc 7 additional stitches. Consider this the official end of round 10 and proceed with round 11 as normal. This ensures your color join will be at the bottom of the head.
Switch to tan yarn (tutorial):
11 - 12. sc in each st around [30]
13. sc 2, inc, *sc 4, inc* 5 times, sc 2 [36]
14. *sc 5, inc* [42]
15. sc 3, inc, sc 6, inc, sc 3, insert marker color 1 into the next sc (17th st from start of round), sc 2, inc, sc 6, inc, sc 4, insert marker color 1 into next sc (34th st from start of round), sc, inc, sc 6, inc, sc 3 [48]
16. *sc 7, inc* [54]
17. sc 4, inc, *sc 8, inc* 5 times, sc 4 [60]
18 - 23. sc in each st around [60]
24. sc 23, insert marker color 2 into the next sc (24th st from start of round), sc 17, insert marker color 2 into the next sc (42nd st from start of round), sc 18 [60]
25 - 27. sc in each st around [60]
28. sc 4, dec, *sc 8, dec* 5 times, sc 4 [54]
29. *sc 7, dec* [48]
30. sc 3, dec, *sc 6, dec* 5 times, sc 3 [42]
31. *sc 5, dec* [36]
32. sc 2, dec, *sc 4, dec* 5 times, sc 2 [30]
Stuff head ¾ full. Sew between the two spots marked with your color 1 markers to sculpt the head. The markers are where you will place the eyes. Insert eyes and secure backings.
33. *sc 3, dec* [24]
34. sc, dec, *sc 2, dec* 5 times, sc [18]
35. *sc, dec* [12]
Finish stuffing.
36. dec in each st around [6]
Close with an ultimate finish.
Ears (make 2)
- With tan yarn:
01. start 6 sc into a magic ring [6]
02. *sc, inc* [9]
03. sc, inc, *sc 2, inc* 2 times, sc [12]
04. *sc 3, inc* [15]
05. sc 2, inc, *sc 4, inc* 2 times, sc 2 [18]
06. *sc 5, inc* [21]
07. sc in each st around [21]
08. *sc 5, dec* [18]
09. sc 2, dec, *sc 4, dec* 2 times, sc 2 [15]
10. *sc 3, dec* [12]
11 - 12. sc in each st around [12]
Fasten off and leave a long tail for sewing. Fold the top opening in half and slip stitch closed.
Inner Ears (make 2)
- With cream yarn:
01. Chain 7 start: ch 7, inc in 2nd ch from hook, sc 4, 5sc in the last ch. Continue on the other side of the chain base, sc 4, 3sc in the last ch [18]
Fasten off and leave a long tail for sewing.
Body
- With tan yarn:
01. start 6 sc into a magic ring [6]
02. inc in each st around [12]
03. *sc, inc* [18]
04. sc, inc, *sc 2, inc* 5 times, sc [24]
05. *sc 3, inc* [30]
06. sc 2, inc, *sc 4, inc* 5 times, sc 2 [36]
07. *sc 5, inc* [42]
08. sc 3, inc, *sc 6, inc* 5 times, sc 3 [48]
09. *sc 7, inc* [54]
10. sc 4, inc, *sc 8, inc* 5 times, sc 4 [60]
11 - 17. sc in each st around [60]
18. sc 4, dec, *sc 8, dec* 5 times, sc 4 [54]
19. sc in each st around [54]
20. *sc 7, dec* [48]
21. sc in each st around [48]
22. sc 3, dec, *sc 6, dec* 5 times, sc 3 [42]
23 - 24. sc in each st around [42]
25. *sc 5, dec* [36]
26 - 27. sc in each st around [36]
28. sc 2, dec, *sc 4, dec* 5 times, sc 2 [30]
29 - 30. sc in each st around [30]
31. *sc 3, dec* [24]
Fasten off and leave a long tail for sewing. Stuff firmly with fiber fill.
Arms (make 2)
- With brown yarn:
01. start 6 sc into a magic ring [6]
02. inc in each st around [12]
03. *sc, inc* [18]
04. sc, inc, *sc 2, inc* 5 times, sc [24]
05. BLO: sc in each st around [24]
06 - 07. sc in each st around [24]
Switch to tan yarn (tutorial):
08. sc in each st around [24]
09. sc 11, dec, sc 11 [23]
10. sc in each st around [23]
11. sc 21, dec [22]
12. sc in each st around [22]
13. sc 10, dec, sc 10 [21]
14. sc in each st around [21]
15. sc 19, dec [20]
16. sc in each st around [20]
17. sc 9, dec, sc 9 [19]
18. sc in each st around [19]
19. sc 17, dec [18]
20. sc in each st around [18]
21. sc 8, dec, sc 8 [17]
22. sc in each st around [17]
23. sc 15, dec [16]
24 - 25. sc in each st around [16]
26. *sc 2, dec* [12]
Fasten off and leave a long tail for sewing. Stuff firmly with fiber fill. Fold the top opening in half and slip stitch closed.
Legs (make 2)
- With brown yarn:
01. start 6 sc into a magic ring [6]
02. inc in each st around [12]
03. *sc, inc* [18]
04. sc, inc, *sc 2, inc* 5 times, sc [24]
05. *sc 3, inc* [30]
06. BLO: sc in each st around [30]
07 - 08. sc in each st around [30]
Switch to tan yarn (tutorial):
09. sc in each st around [30]
10. sc 14, dec, sc 14 [29]
11. sc 27, dec [28]
12. sc 13, dec, sc 13 [27]
13. sc 25, dec [26]
14. sc 12, dec, sc 12 [25]
15. sc 23, dec [24]
16. sc 11, dec, sc 11 [23]
17. sc 21, dec [22]
18. sc 10, dec, sc 10 [21]
19. sc 19, dec [20]
20. sc 9, dec, sc 9 [19]
21. sc 17, dec [18]
22. *sc 7, dec* [16]
23. *sc 2, dec* [12]
Fasten off and leave a long tail for sewing. Stuff firmly with fiber fill. Fold the top opening in half and slip stitch closed.