Wowie, talk about a hiatus! I wrote the pattern for Rose the Rabbit last summer before I went on maternity leave, and now my baby boy is almost 5 months old. This pattern has been available in my Facebook group since November, but I thought I should get it officially published on my website in time for Easter.
Rose the Rabbit is the 5th pattern release in my woodland animals series. The 6th and final pattern in this series will be a deer, and… I’m not going to make any promises on a release date at this point. I hope to have more time to commit to crochet and pattern-publishing in the next few months as my son gets older. I will keep you posted!
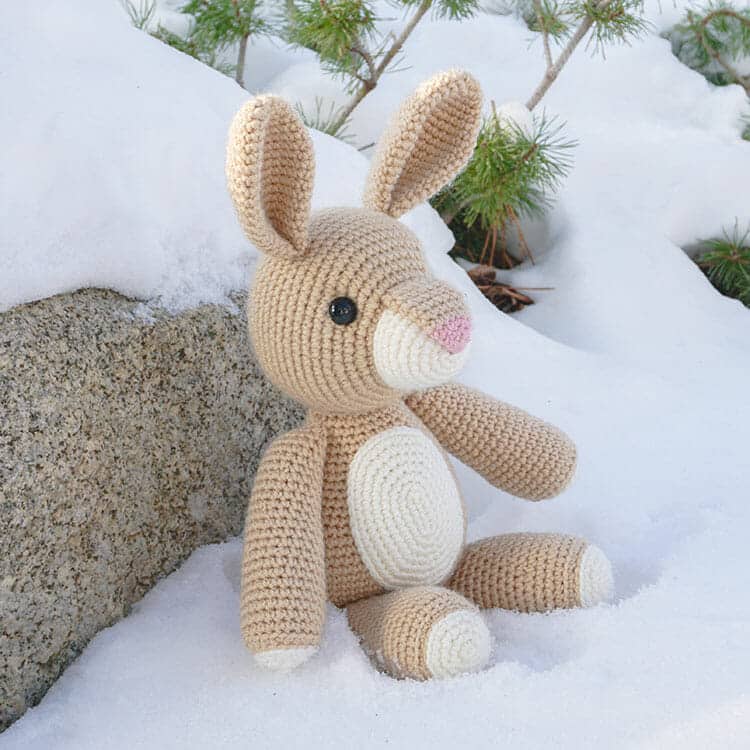


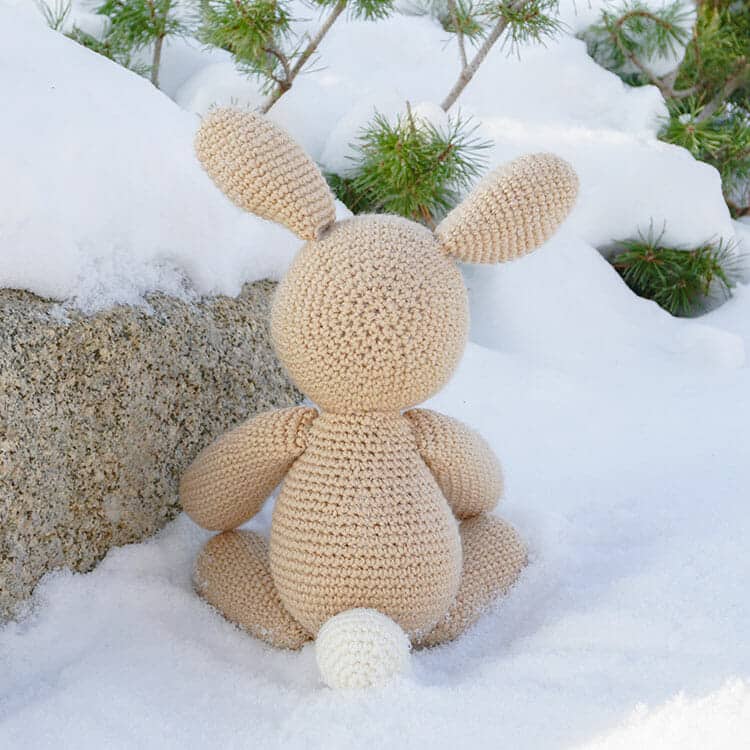


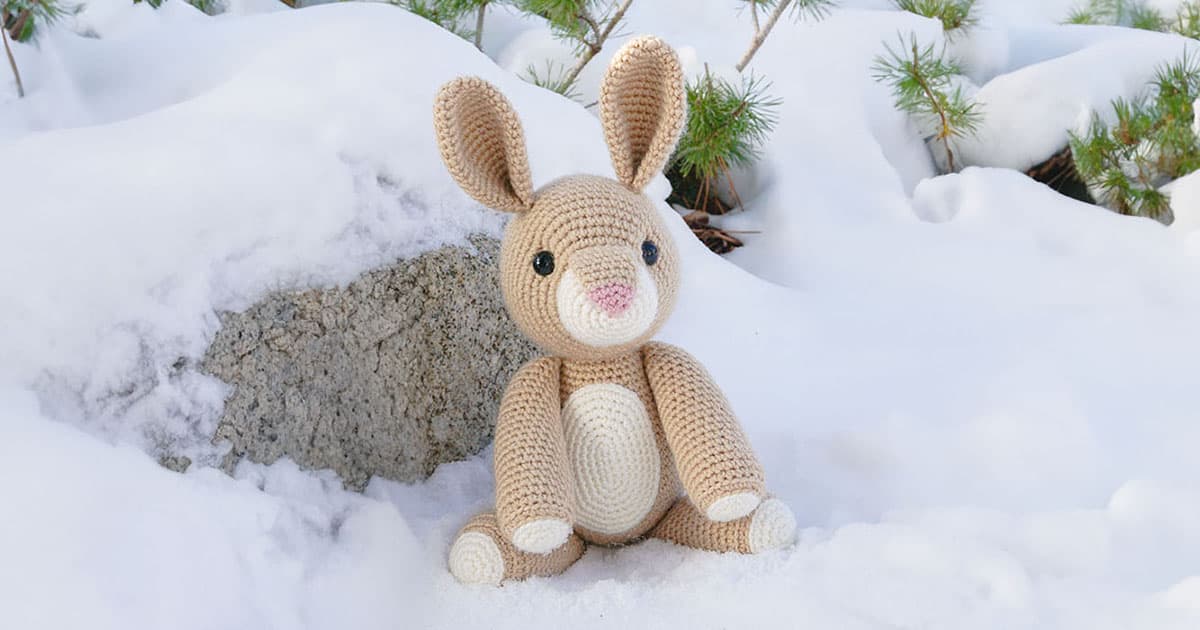
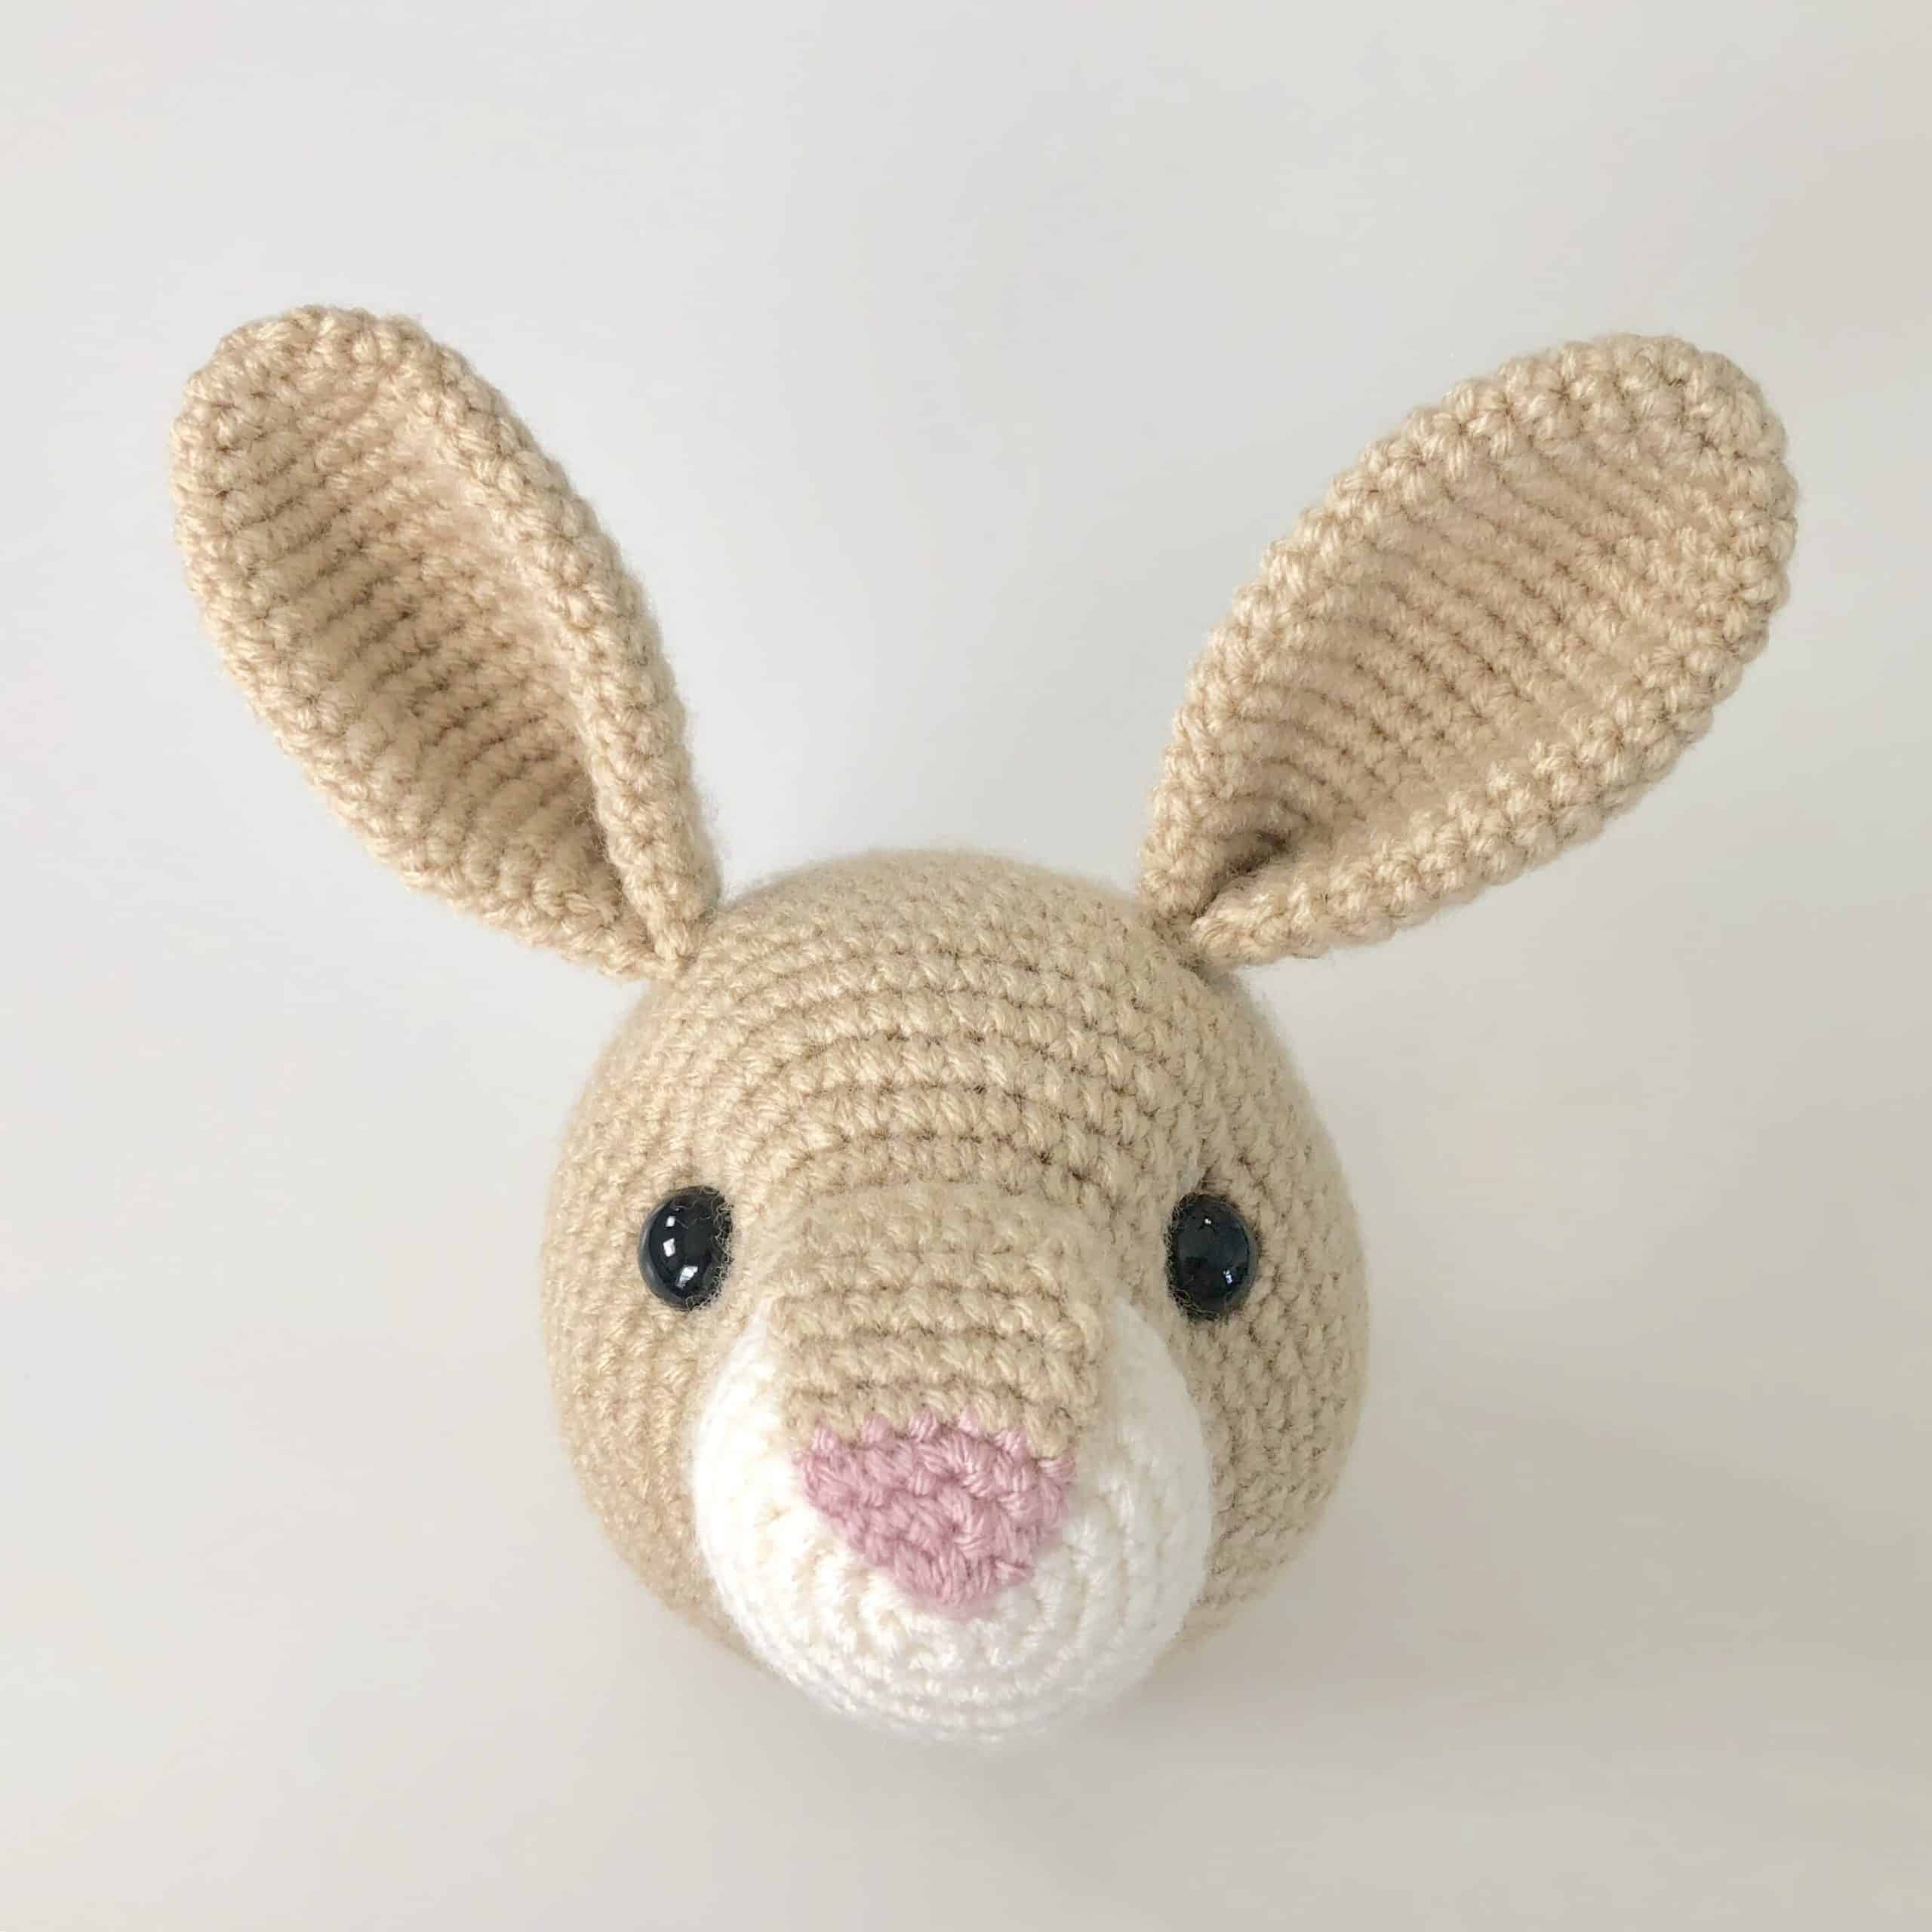
Rose the Rabbit
Height: 18" standing
Skill Level: Intermediate
Ravelry: Rose the Rabbit
You don't have to be a magician to pull this rabbit out of your hat! Give her a chance and Rose the Rabbit will hippity hop her way into your heart.
Supplies
Yarn (acrylic, weight 4)
- Pink (I used Red Heart Super Saver – Baby Pink)
- Cream (I used Red Heart Super Saver – Aran)
- Tan (I used Red Heart Super Saver – Buff)
Notes
Abbreviations
sc: single crochet
inc: 2sc increase
dec: invisible decrease
ch: chain
BLO: back loop only
slst: slip stitch
Attaching with thread vs. yarn tail
For a cleaner look on the belly patch, I opted to weave the tail into the back of the work and trim it short, then attach the belly patch to the body with a sewing needle and matching thread.
Stitch markers


 Note: The photos above show a fox, but the technique is the same for all of my patterns.
The pattern indicates to insert 5 different stitch markers in various places besides the one you use to track the beginning/end of each round.
I recommend using strands of yarn in 4 different colors as your stitch markers: One strand in color 1 (purple) to mark where you will start attaching the nose, two strands in color 2 (blue) to mark where you will place each eye, two strands color 3 (pink) to mark where you will start attaching each ear, and one long strand in color 4 (green) to track the beginning/end of each round.
The photos above demonstrate how to mark a stitch while crocheting a round: lay your strand of yarn acting as a marker over your working yarn and the stitch you'll be working into, then complete the stitch as normal.
You'll essentially be weaving the long strand in color 4 through your work with each round. On odd rounds you'll be laying the strand back-to-front, and on even rounds you'll be laying the strand front-to-back.
The advantage of using this technique is you'll have the beginning of every single round marked, which makes it much easier to find your place if you make a mistake. That said, It's perfectly fine to use a regular ol' safety pin-like marker to keep track of your rounds instead. 🙂
Note: The photos above show a fox, but the technique is the same for all of my patterns.
The pattern indicates to insert 5 different stitch markers in various places besides the one you use to track the beginning/end of each round.
I recommend using strands of yarn in 4 different colors as your stitch markers: One strand in color 1 (purple) to mark where you will start attaching the nose, two strands in color 2 (blue) to mark where you will place each eye, two strands color 3 (pink) to mark where you will start attaching each ear, and one long strand in color 4 (green) to track the beginning/end of each round.
The photos above demonstrate how to mark a stitch while crocheting a round: lay your strand of yarn acting as a marker over your working yarn and the stitch you'll be working into, then complete the stitch as normal.
You'll essentially be weaving the long strand in color 4 through your work with each round. On odd rounds you'll be laying the strand back-to-front, and on even rounds you'll be laying the strand front-to-back.
The advantage of using this technique is you'll have the beginning of every single round marked, which makes it much easier to find your place if you make a mistake. That said, It's perfectly fine to use a regular ol' safety pin-like marker to keep track of your rounds instead. 🙂
How to attach the tip of the nose to the snout


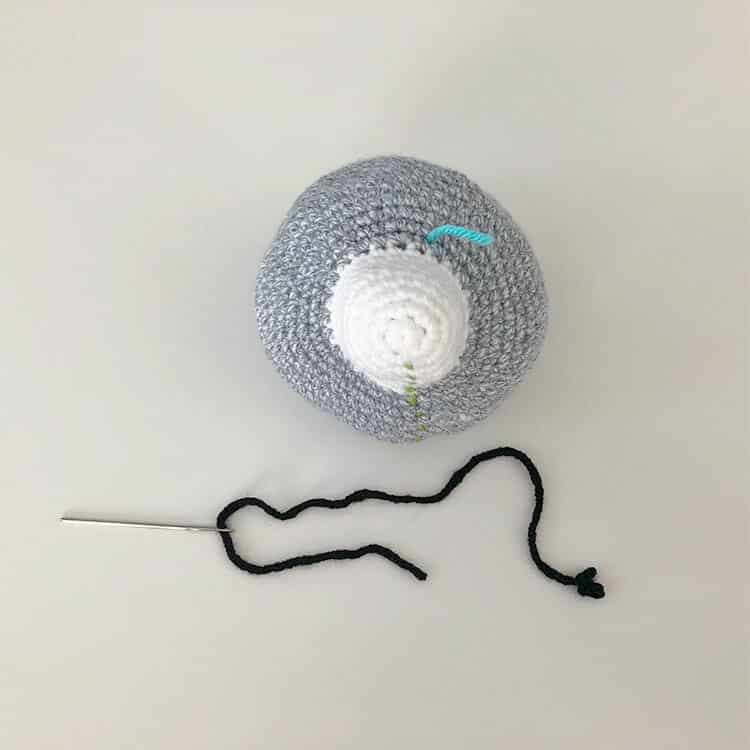
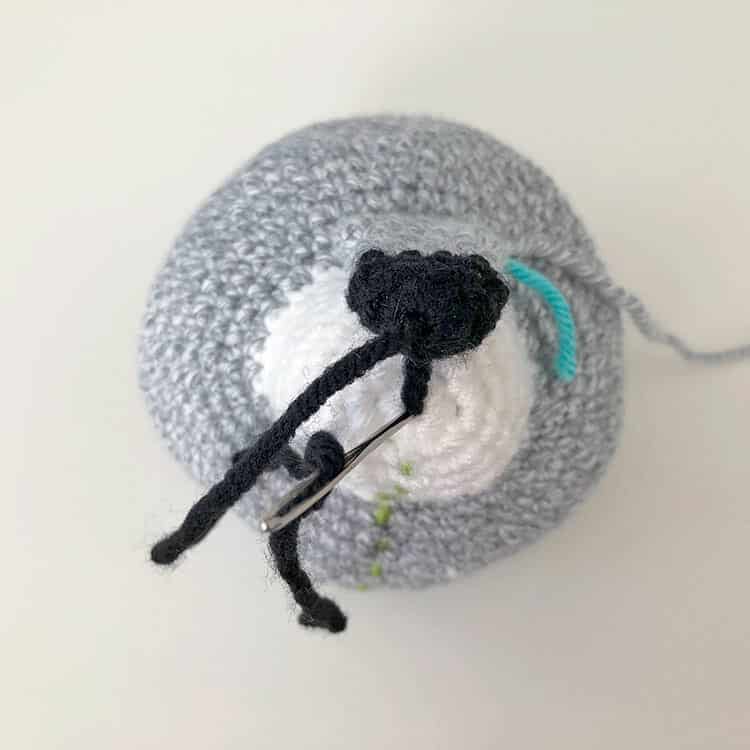
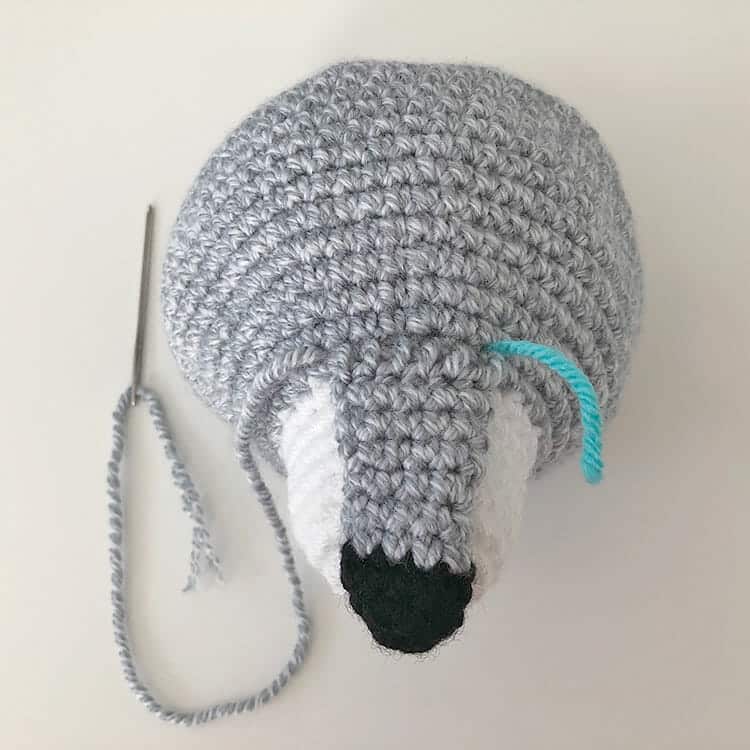
 Note: The photos above show a raccoon, but the technique is the same for all of my patterns.
Step 1 – Cut a strand of yarn approximately 18" long. Tie a large, secure knot in one end and thread the other end through your yarn needle.
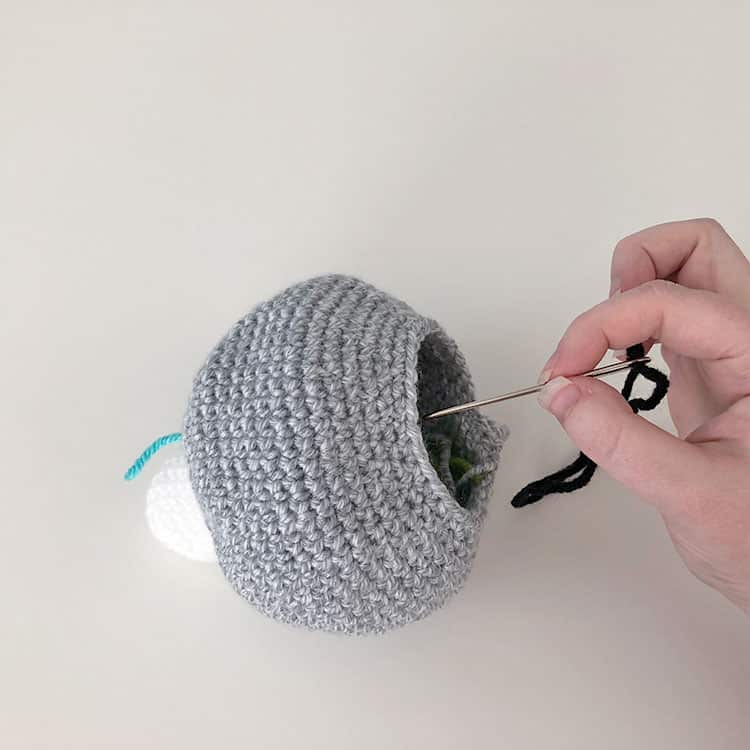
Step 2 – Insert your needle through the back opening of the head and exit the needle through the starting magic ring on the snout.
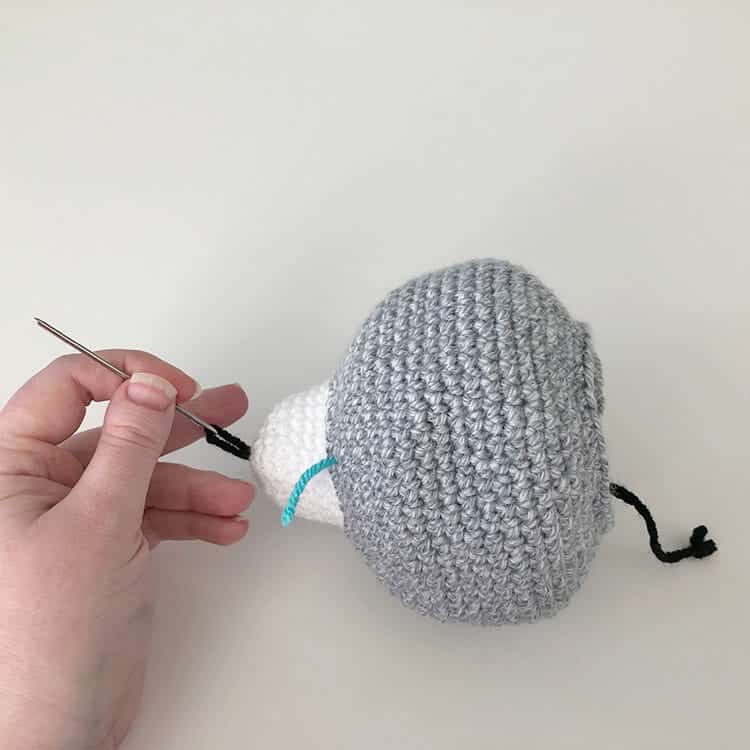
Step 3 – Next, thread your needle through the starting magic ring of the nose, then insert your needle back through the starting magic ring on the snout.
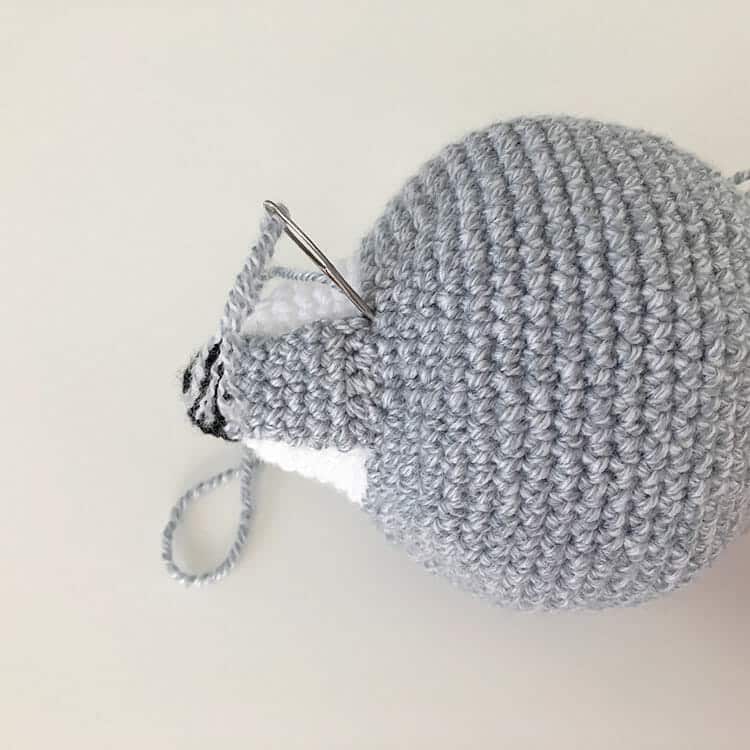
Step 4 – Flip the head over. Secure the two black strands with a large knot on the inside of the snout, then trim the excess.
Note: The photos above show a raccoon, but the technique is the same for all of my patterns.
Step 1 – Cut a strand of yarn approximately 18" long. Tie a large, secure knot in one end and thread the other end through your yarn needle.
Step 2 – Insert your needle through the back opening of the head and exit the needle through the starting magic ring on the snout.
Step 3 – Next, thread your needle through the starting magic ring of the nose, then insert your needle back through the starting magic ring on the snout.
Step 4 – Flip the head over. Secure the two black strands with a large knot on the inside of the snout, then trim the excess.
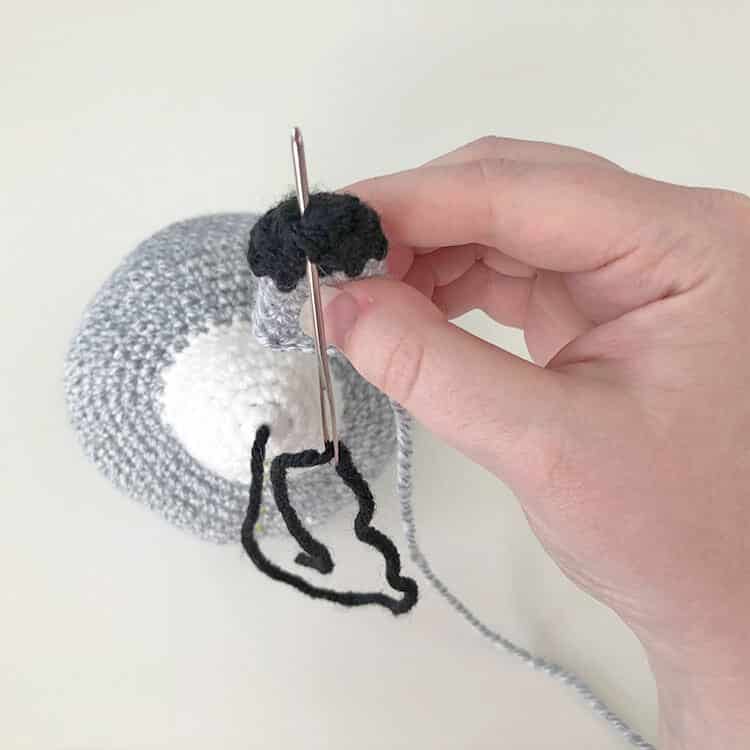
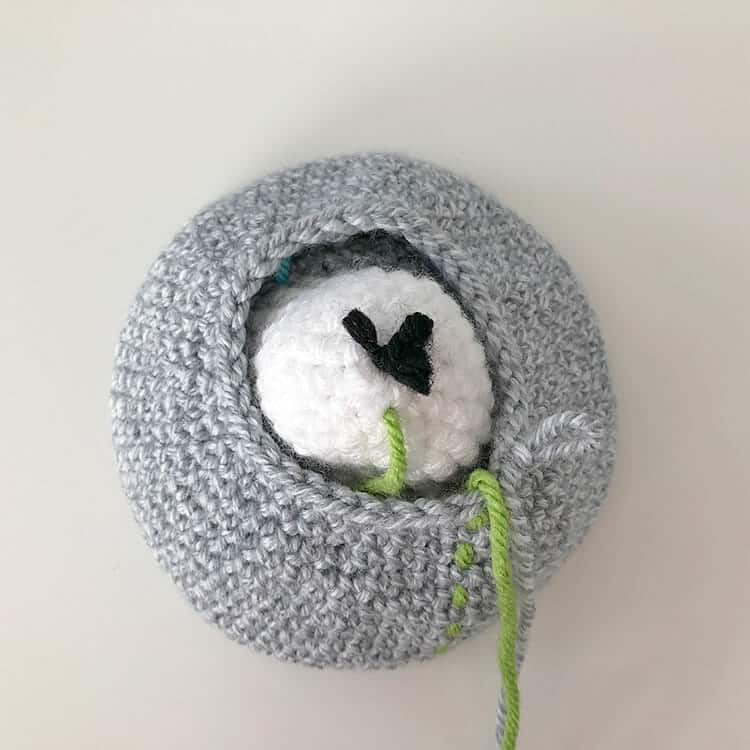
How to attach the top of the nose to the snout


 Note: The photos above show a raccoon, but the technique is the same for all of my patterns.
Step 1 – Take the yarn tail from the top of your nose and thread it through a yarn needle. Thread your needle through the stitch marked with color 1. Then attach the remaining 5 stitches across the top of your nose to the next 5 stitches following your marked stitch on the snout.
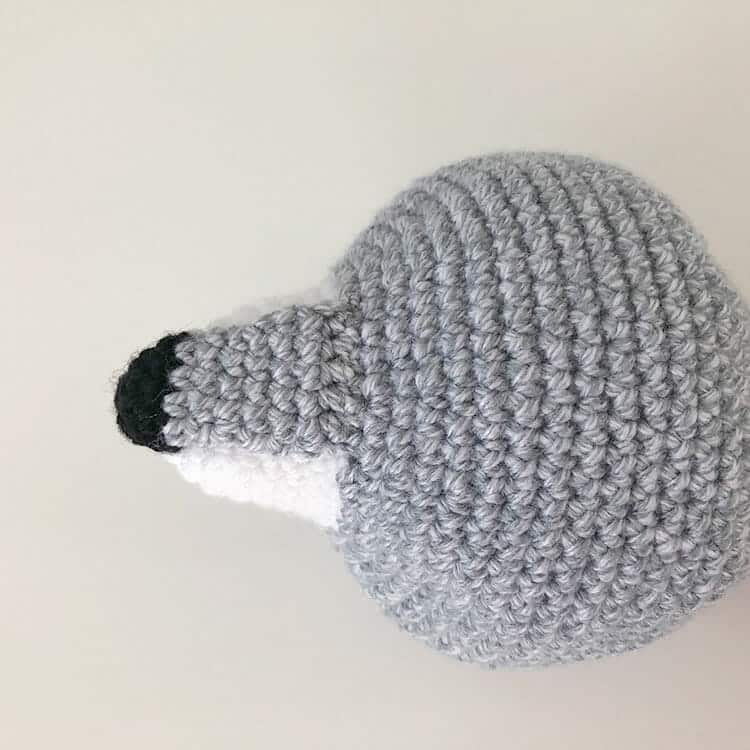
Step 2 – Tighten down your stitches, secure the end with a knot, and hide the yarn tail inside the head.
Note: The photos above show a raccoon, but the technique is the same for all of my patterns.
Step 1 – Take the yarn tail from the top of your nose and thread it through a yarn needle. Thread your needle through the stitch marked with color 1. Then attach the remaining 5 stitches across the top of your nose to the next 5 stitches following your marked stitch on the snout.
Step 2 – Tighten down your stitches, secure the end with a knot, and hide the yarn tail inside the head.
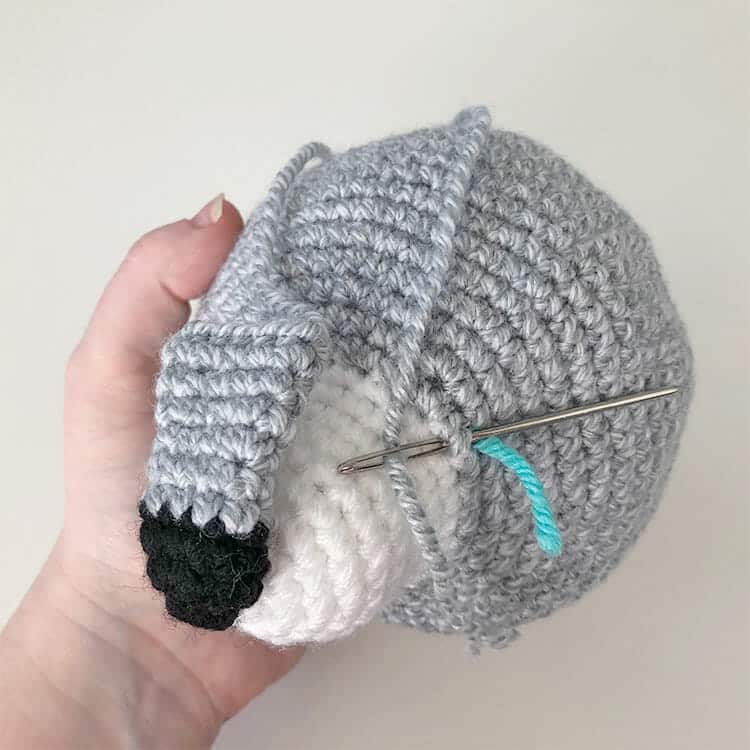
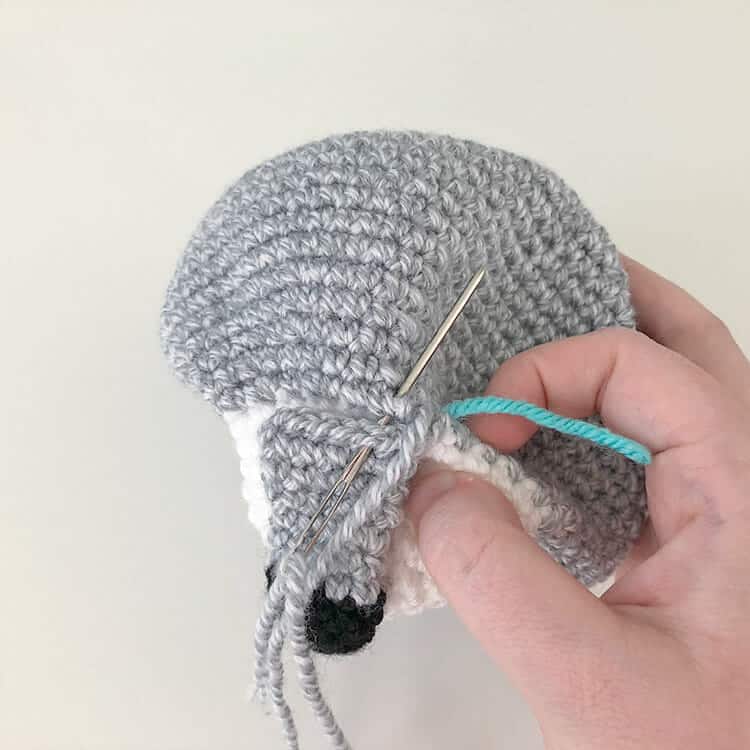
How to indent the eyes Note: The video above shows a unicorn, but the technique is the same for all of my patterns.
Step 1 – Cut a strand of yarn approximately 18" long. Tie a large, secure knot in one end and thread the other end through your yarn needle.
Step 2 – Insert your needle through the back opening of the head and sew between the two spots where you'll be placing your safety eyes (marked with your color 1 stitch markers).
Step 3 – Pull your strand of yarn taut, which will create indents.
Step 4 – Fasten off with a knot and hide your yarn tail inside the head.
Note: The video above shows a unicorn, but the technique is the same for all of my patterns.
Step 1 – Cut a strand of yarn approximately 18" long. Tie a large, secure knot in one end and thread the other end through your yarn needle.
Step 2 – Insert your needle through the back opening of the head and sew between the two spots where you'll be placing your safety eyes (marked with your color 1 stitch markers).
Step 3 – Pull your strand of yarn taut, which will create indents.
Step 4 – Fasten off with a knot and hide your yarn tail inside the head.
How fold the ears and sew them closed


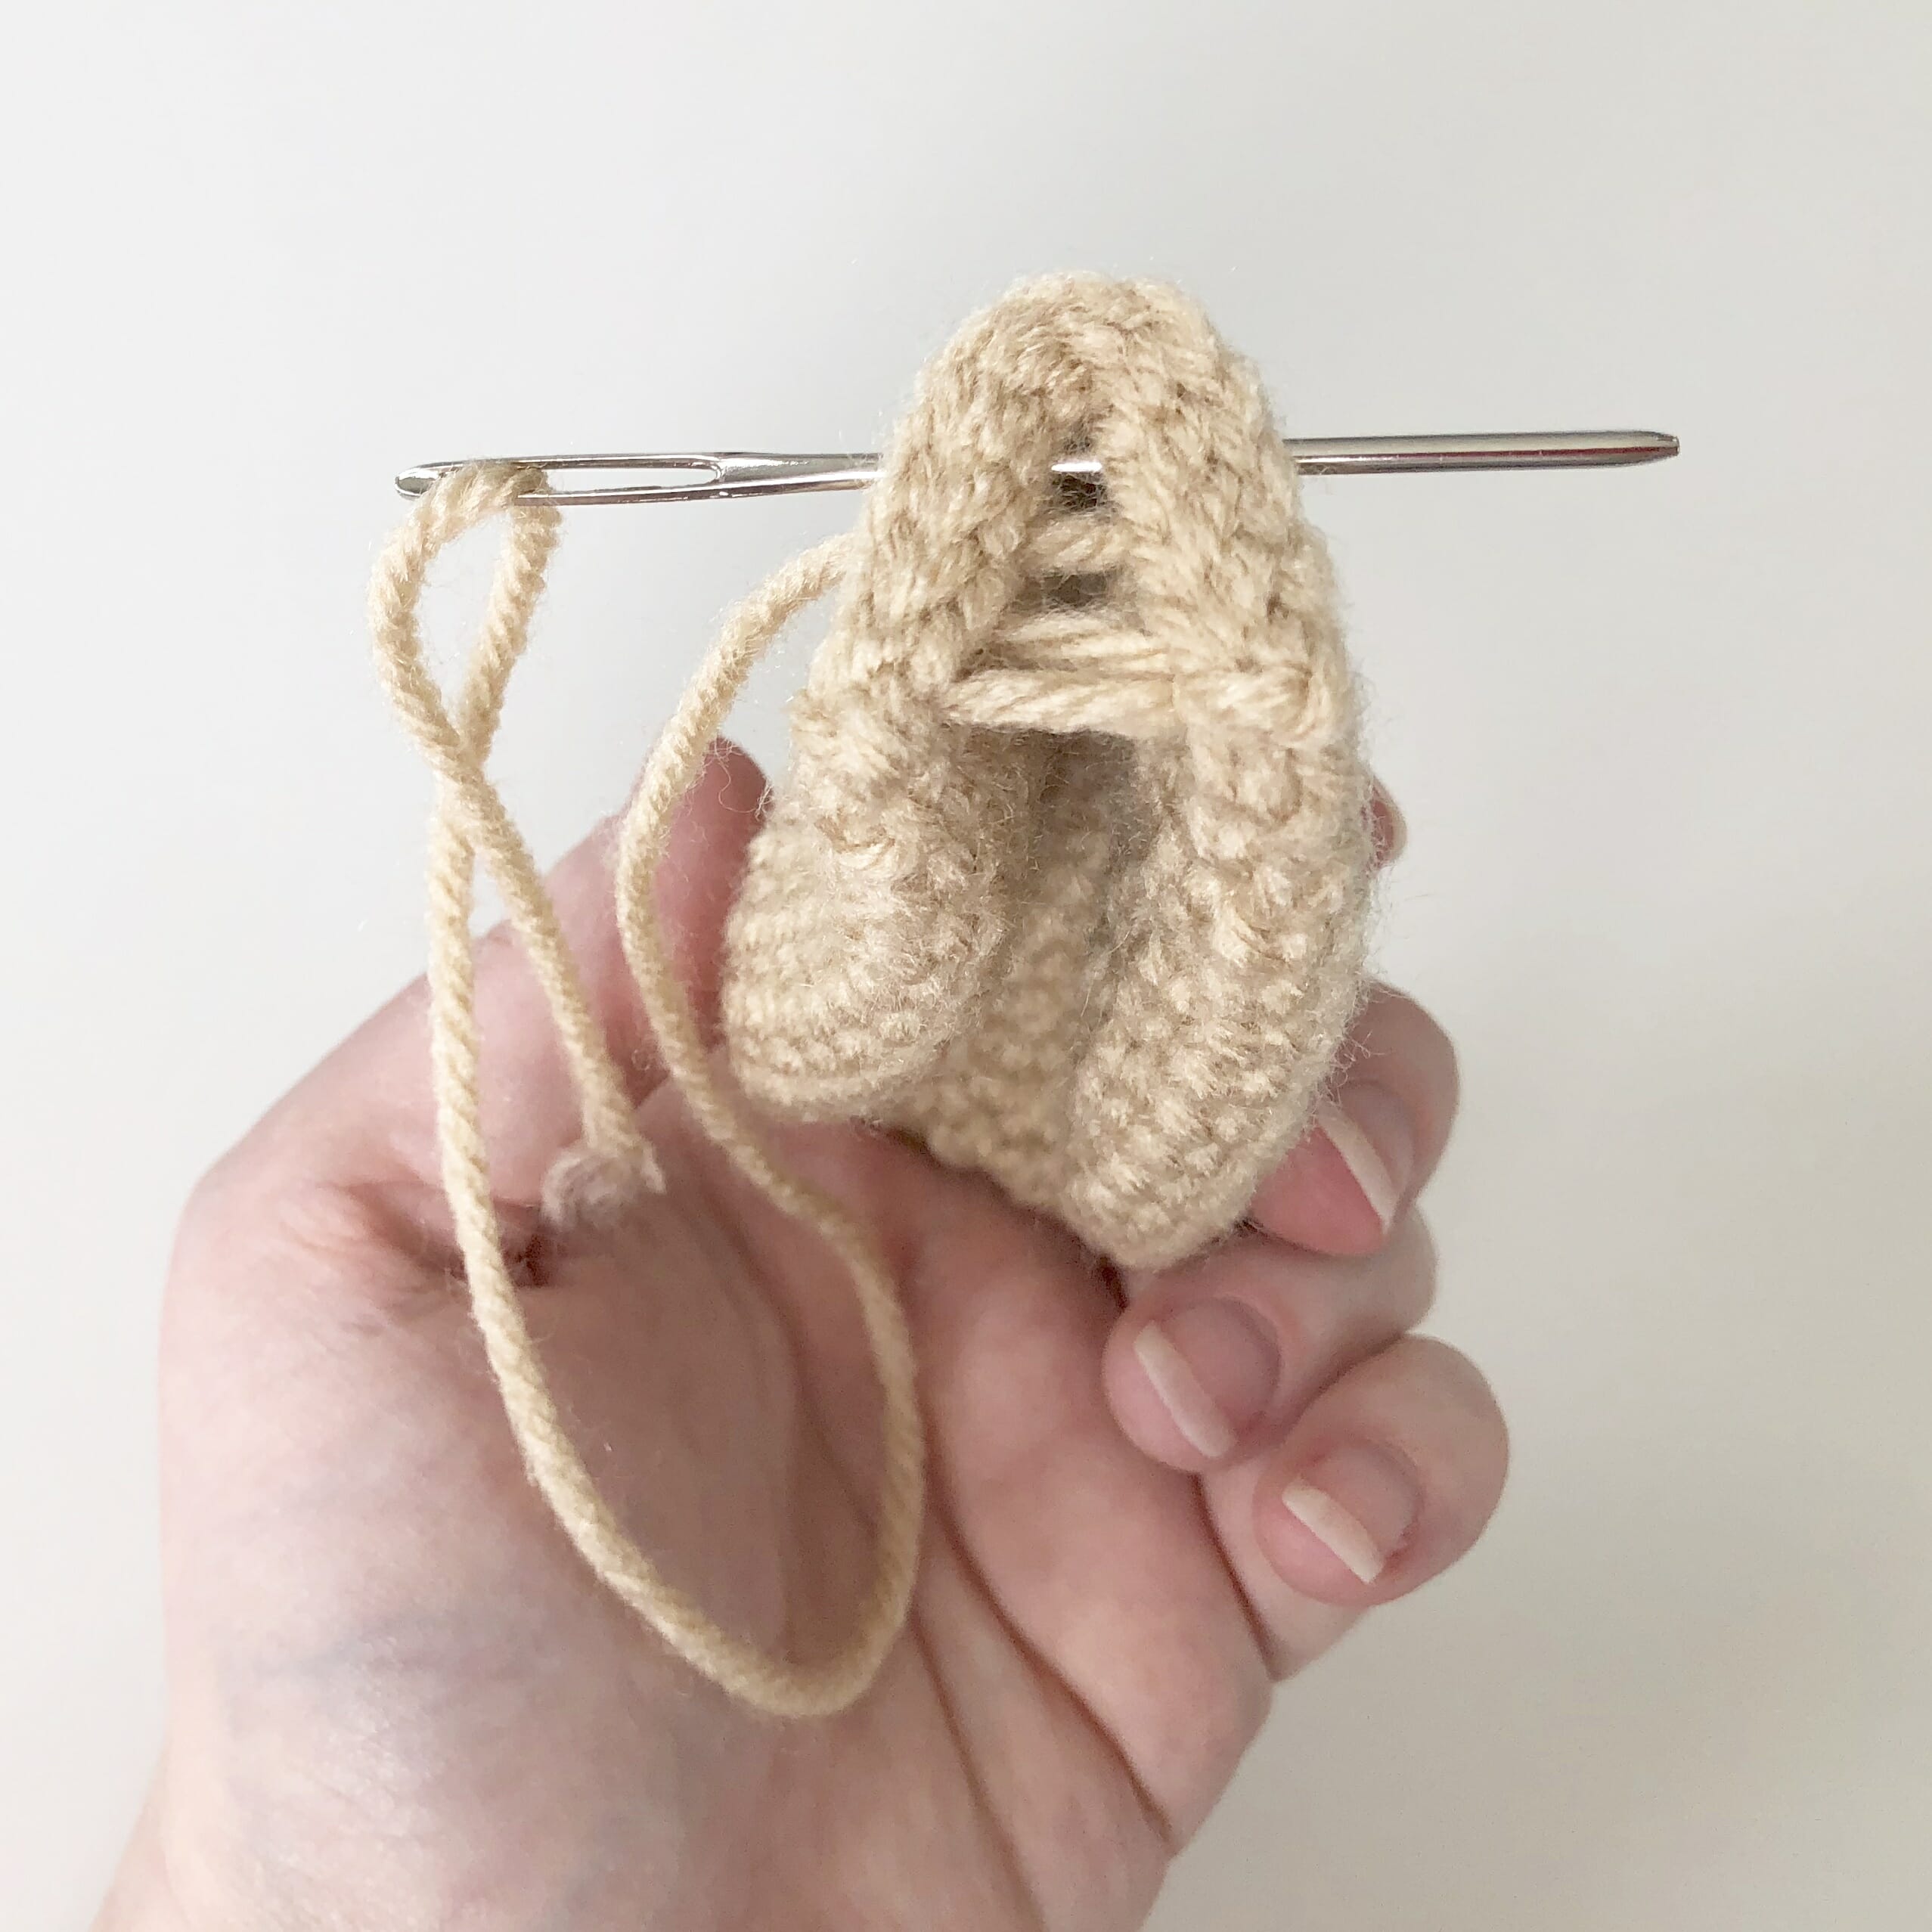
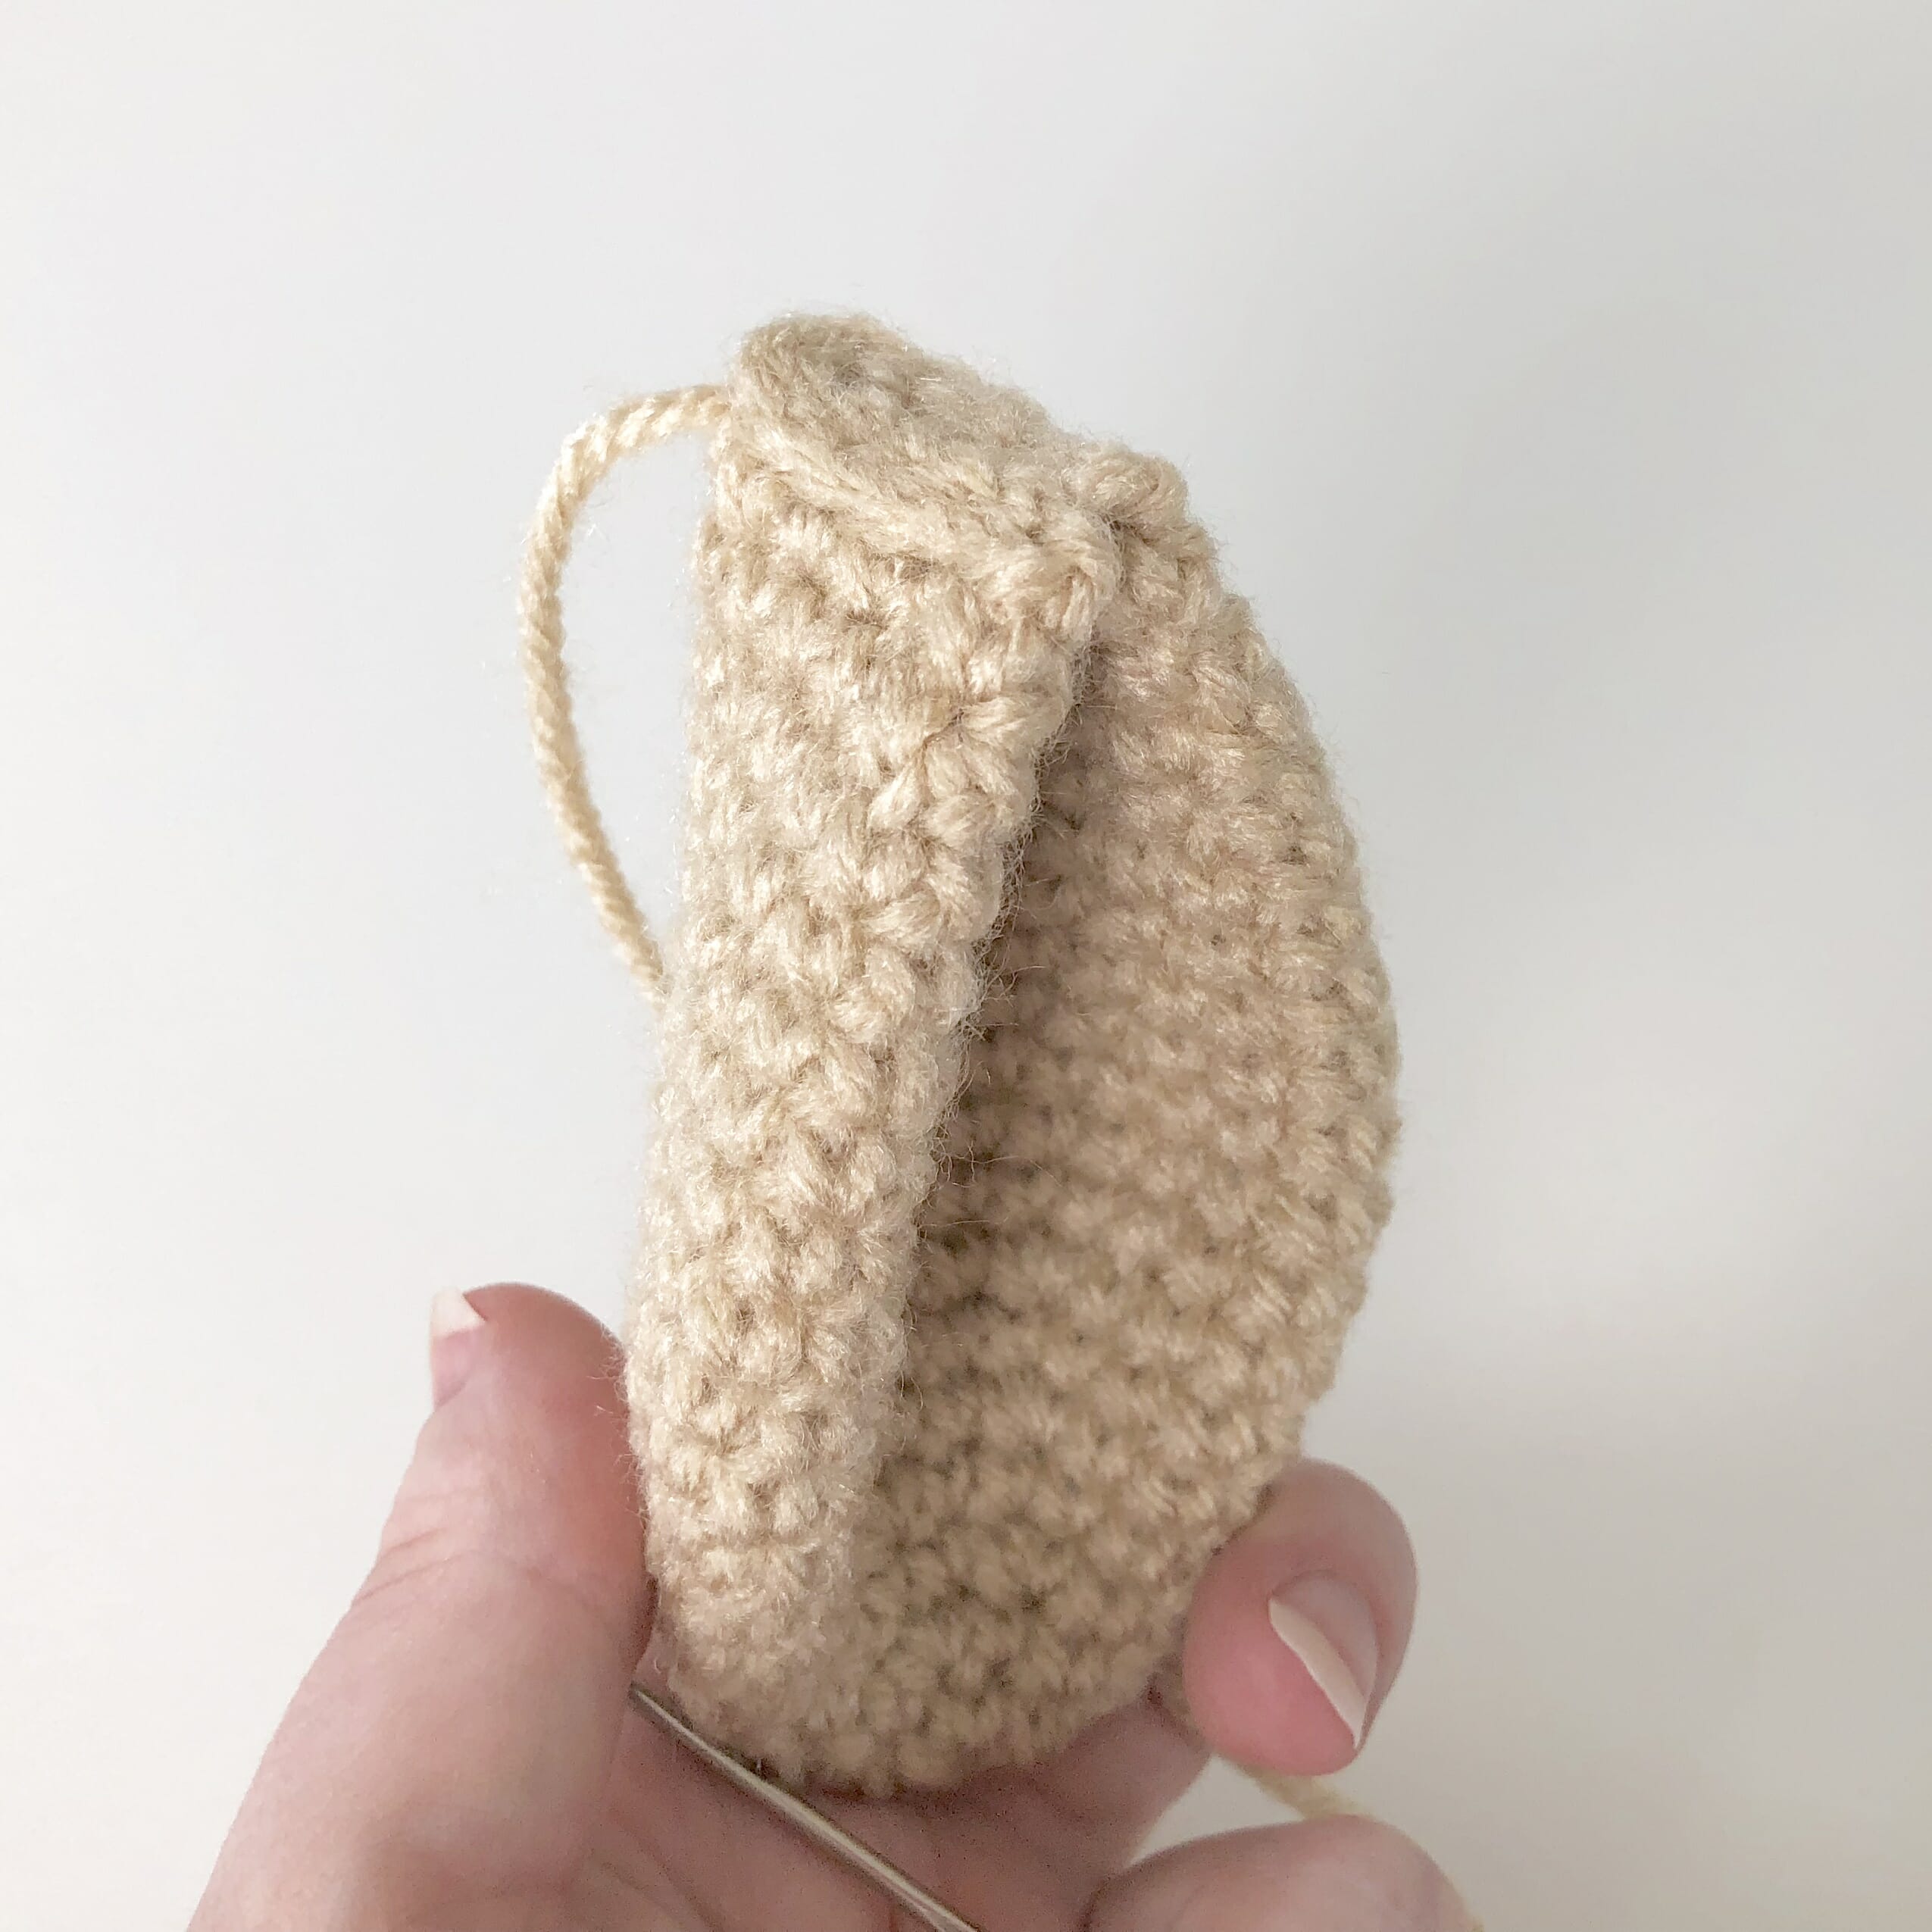 Step 1 – Close the top opening of each ear with a slip stitch, leaving a long yarn tail.
Step 2 – Fold the slip-stitched edge in half and sew closed with a running stitch using your yarn tail and a yarn needle, leaving the tail intact.
Step 3 – Your ears should now look like figure 3 above and are ready to attach to the head at a later step!
Step 1 – Close the top opening of each ear with a slip stitch, leaving a long yarn tail.
Step 2 – Fold the slip-stitched edge in half and sew closed with a running stitch using your yarn tail and a yarn needle, leaving the tail intact.
Step 3 – Your ears should now look like figure 3 above and are ready to attach to the head at a later step!
How to attach the ears to the head


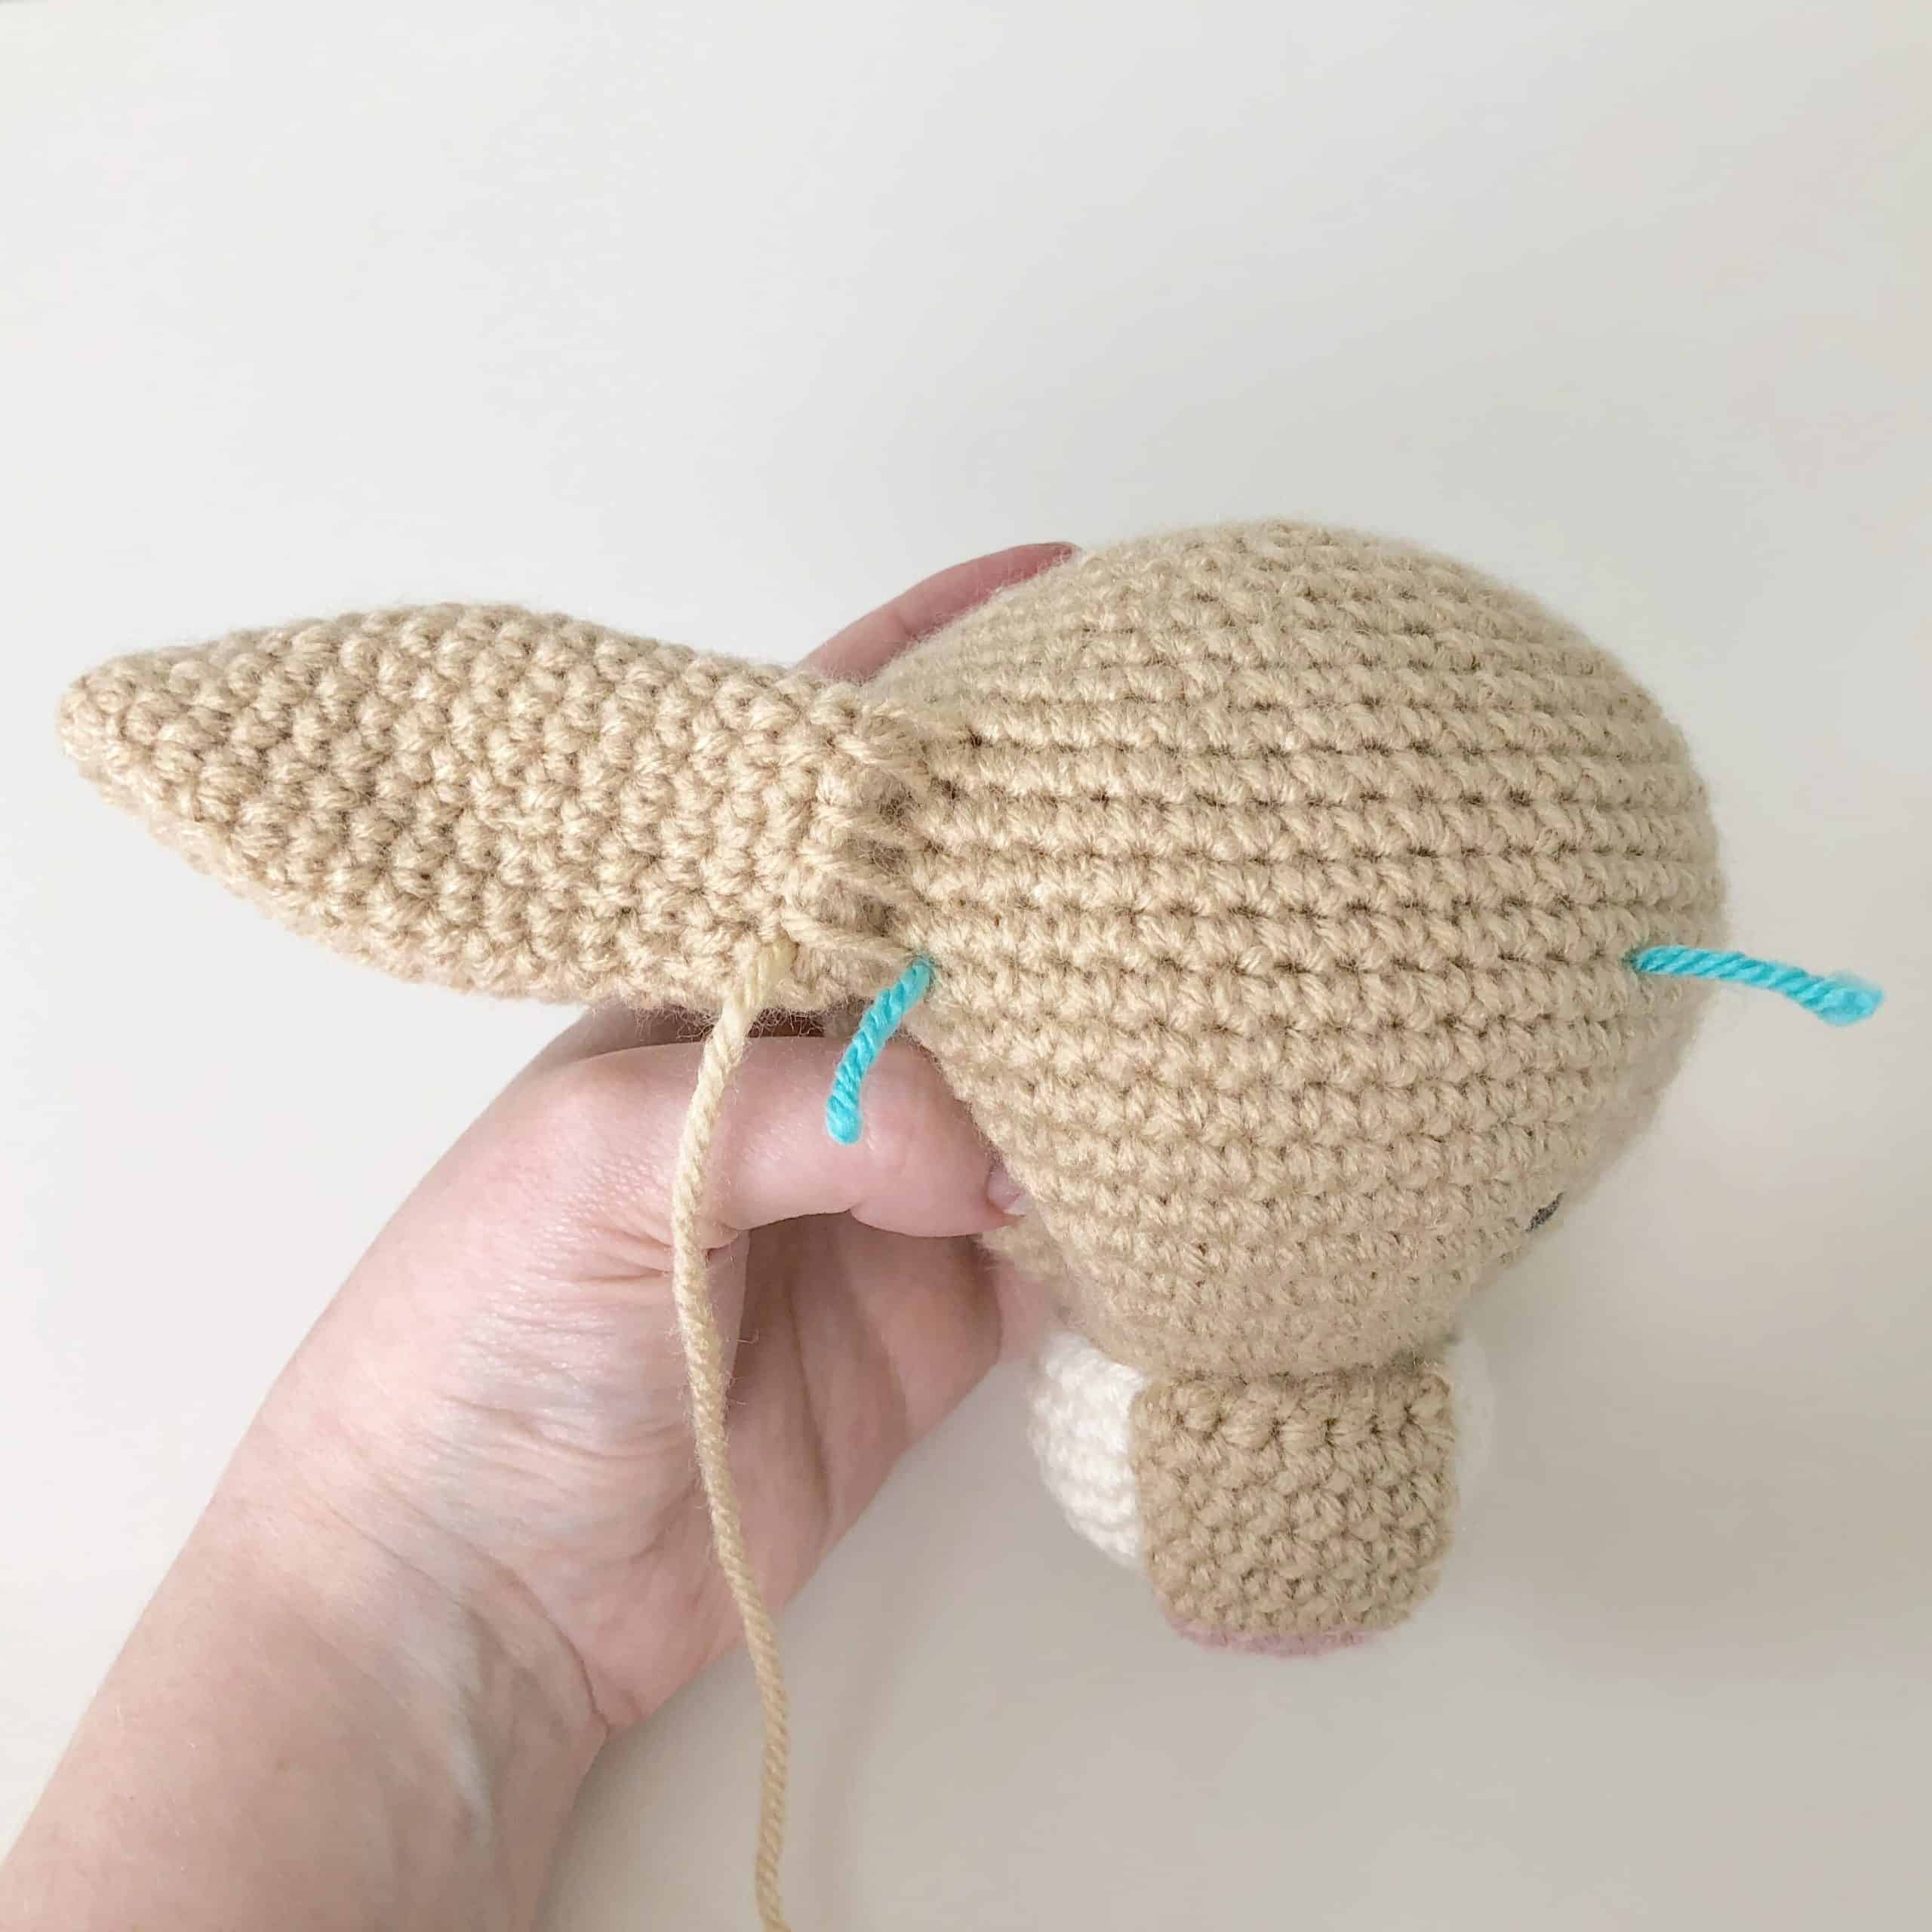
 Step 1 – Line up your ear with your color 3 stitch marker on the top of the head.
Step 2 – Using a yarn needle and your yarn tail, attach the ear to the head stitch-for-stitch, leaving your stitches slightly loose in case you need to undo them. Repeat steps 1 and 2 for the second ear.
Step 3 – Examine the head from multiple angles to make sure your ears are symmetrical and look the way you want them, then remove your stitch markers. Tighten down your stitches, secure the end with a knot, and hide the yarn tail inside the head.
Step 1 – Line up your ear with your color 3 stitch marker on the top of the head.
Step 2 – Using a yarn needle and your yarn tail, attach the ear to the head stitch-for-stitch, leaving your stitches slightly loose in case you need to undo them. Repeat steps 1 and 2 for the second ear.
Step 3 – Examine the head from multiple angles to make sure your ears are symmetrical and look the way you want them, then remove your stitch markers. Tighten down your stitches, secure the end with a knot, and hide the yarn tail inside the head.
sc: single crochet
inc: 2sc increase
dec: invisible decrease
ch: chain
BLO: back loop only
slst: slip stitch
Attaching with thread vs. yarn tail
For a cleaner look on the belly patch, I opted to weave the tail into the back of the work and trim it short, then attach the belly patch to the body with a sewing needle and matching thread.
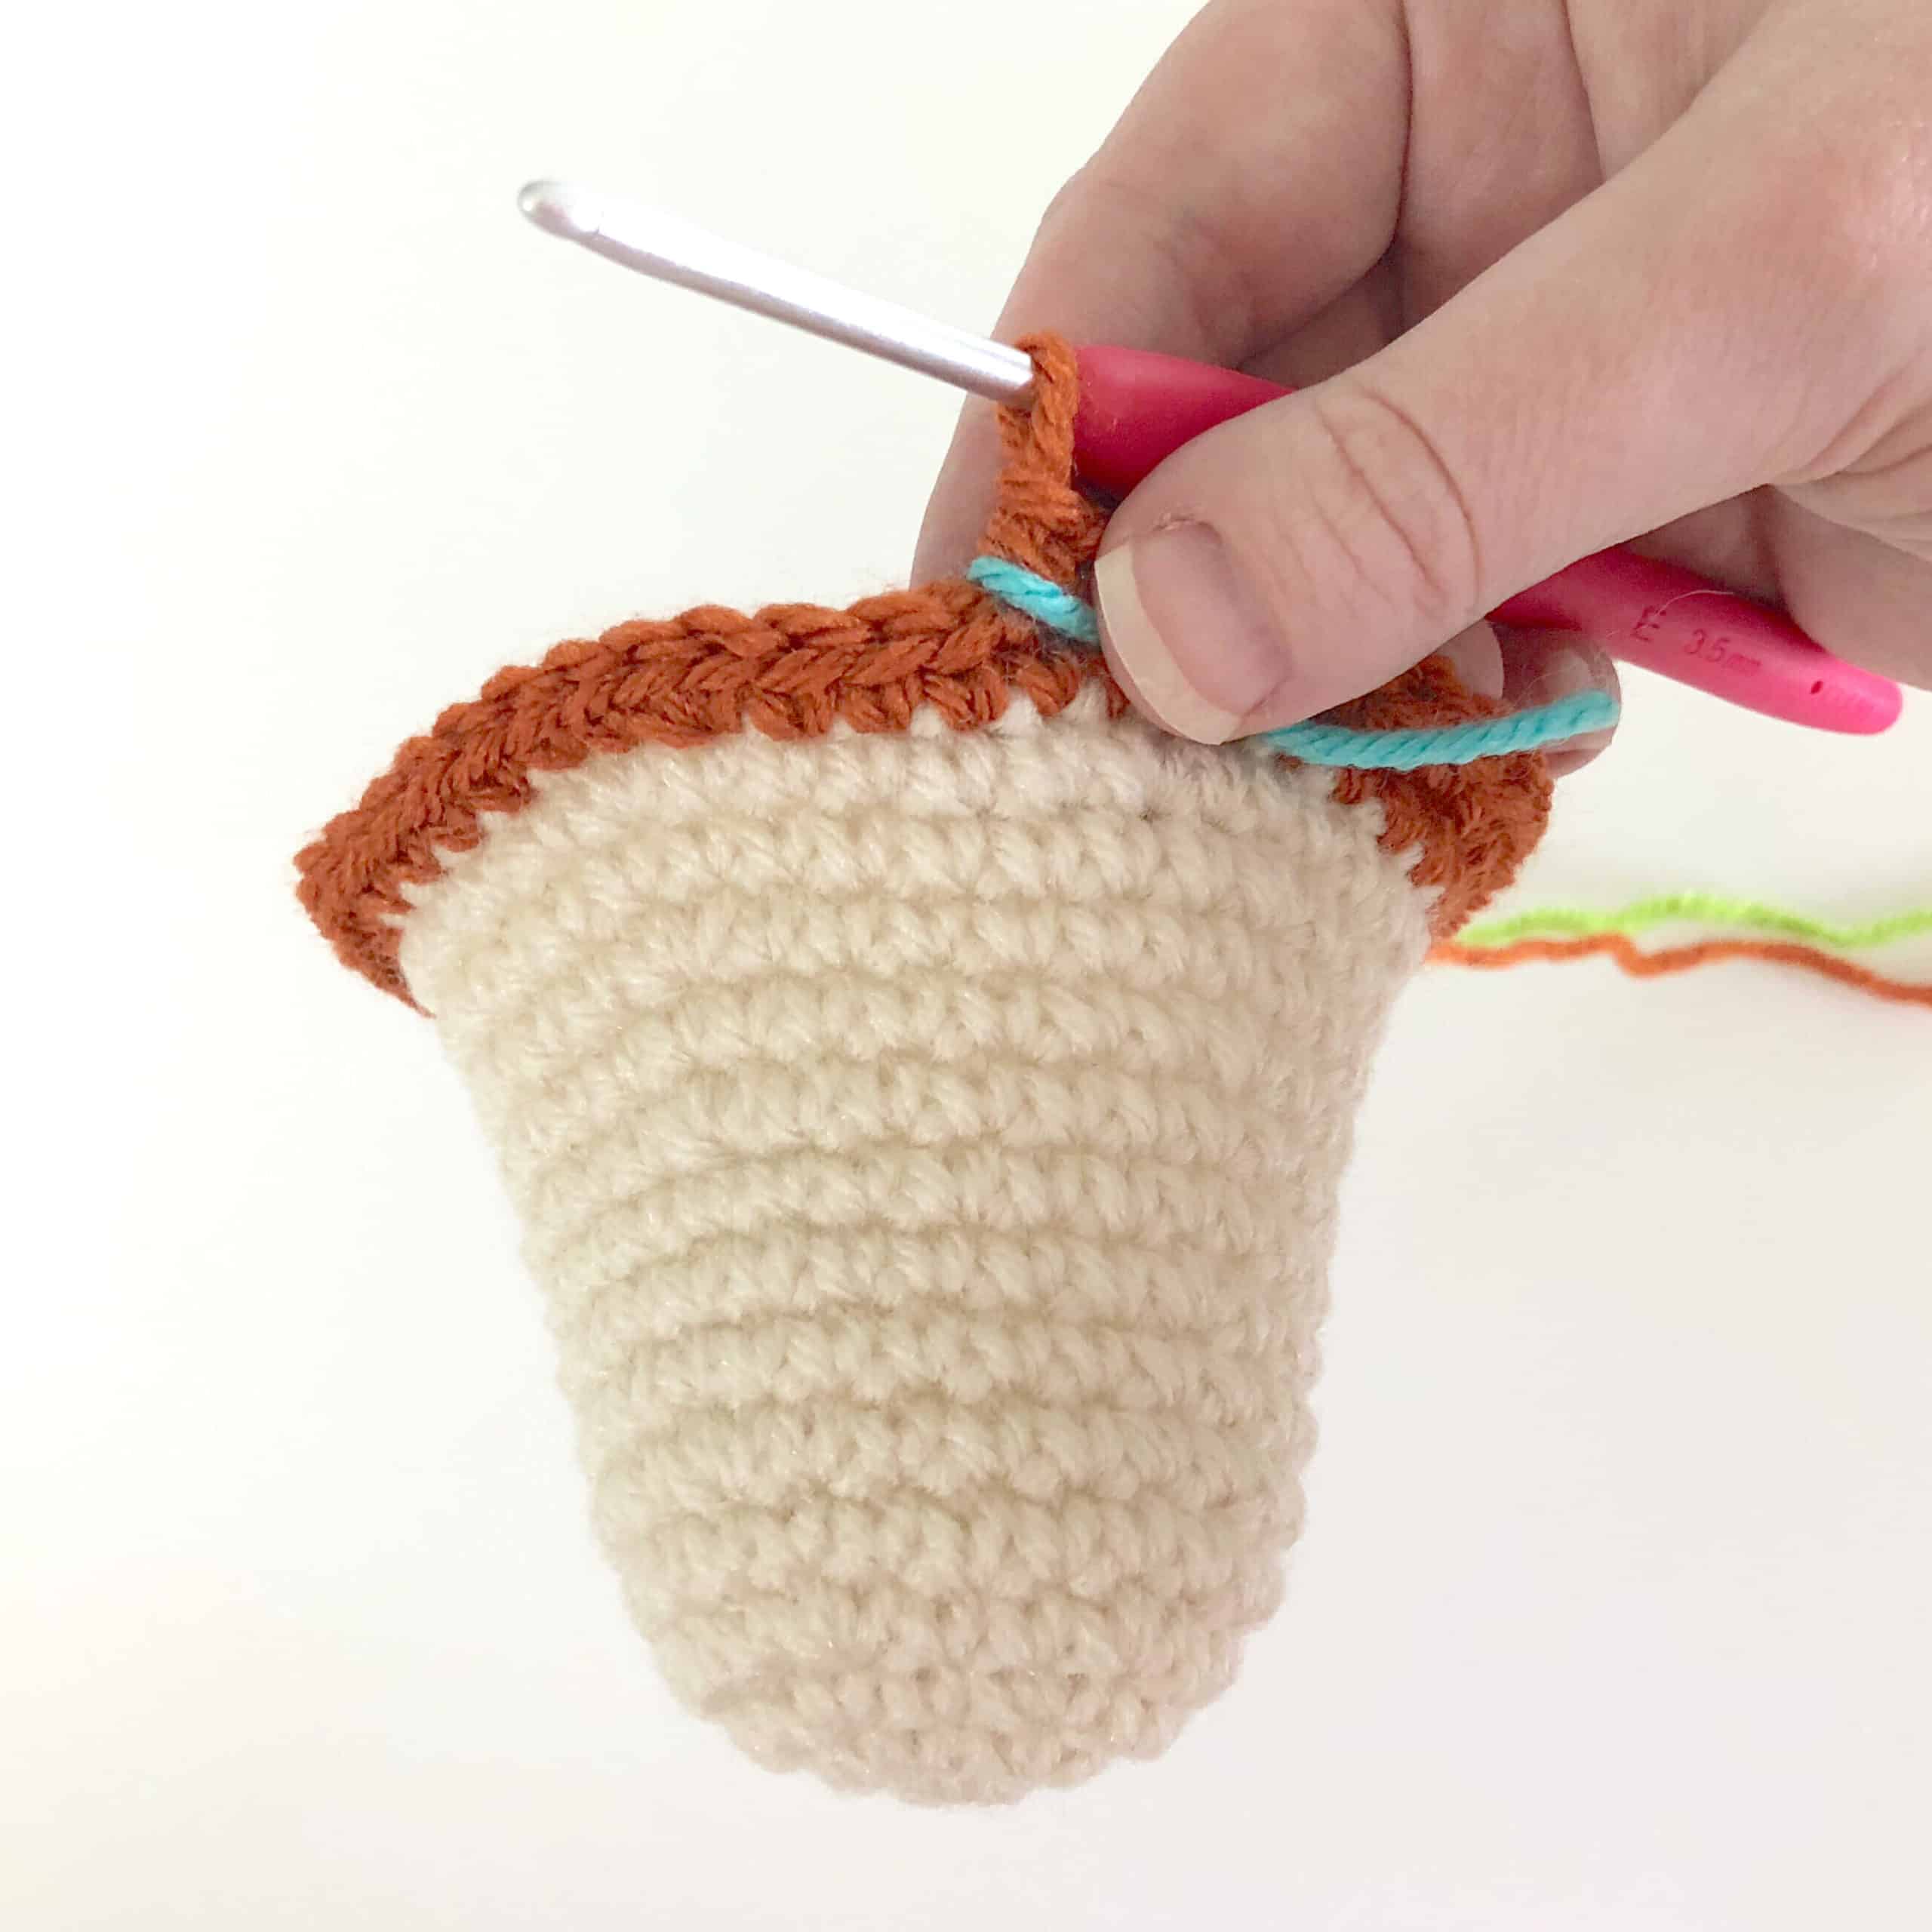
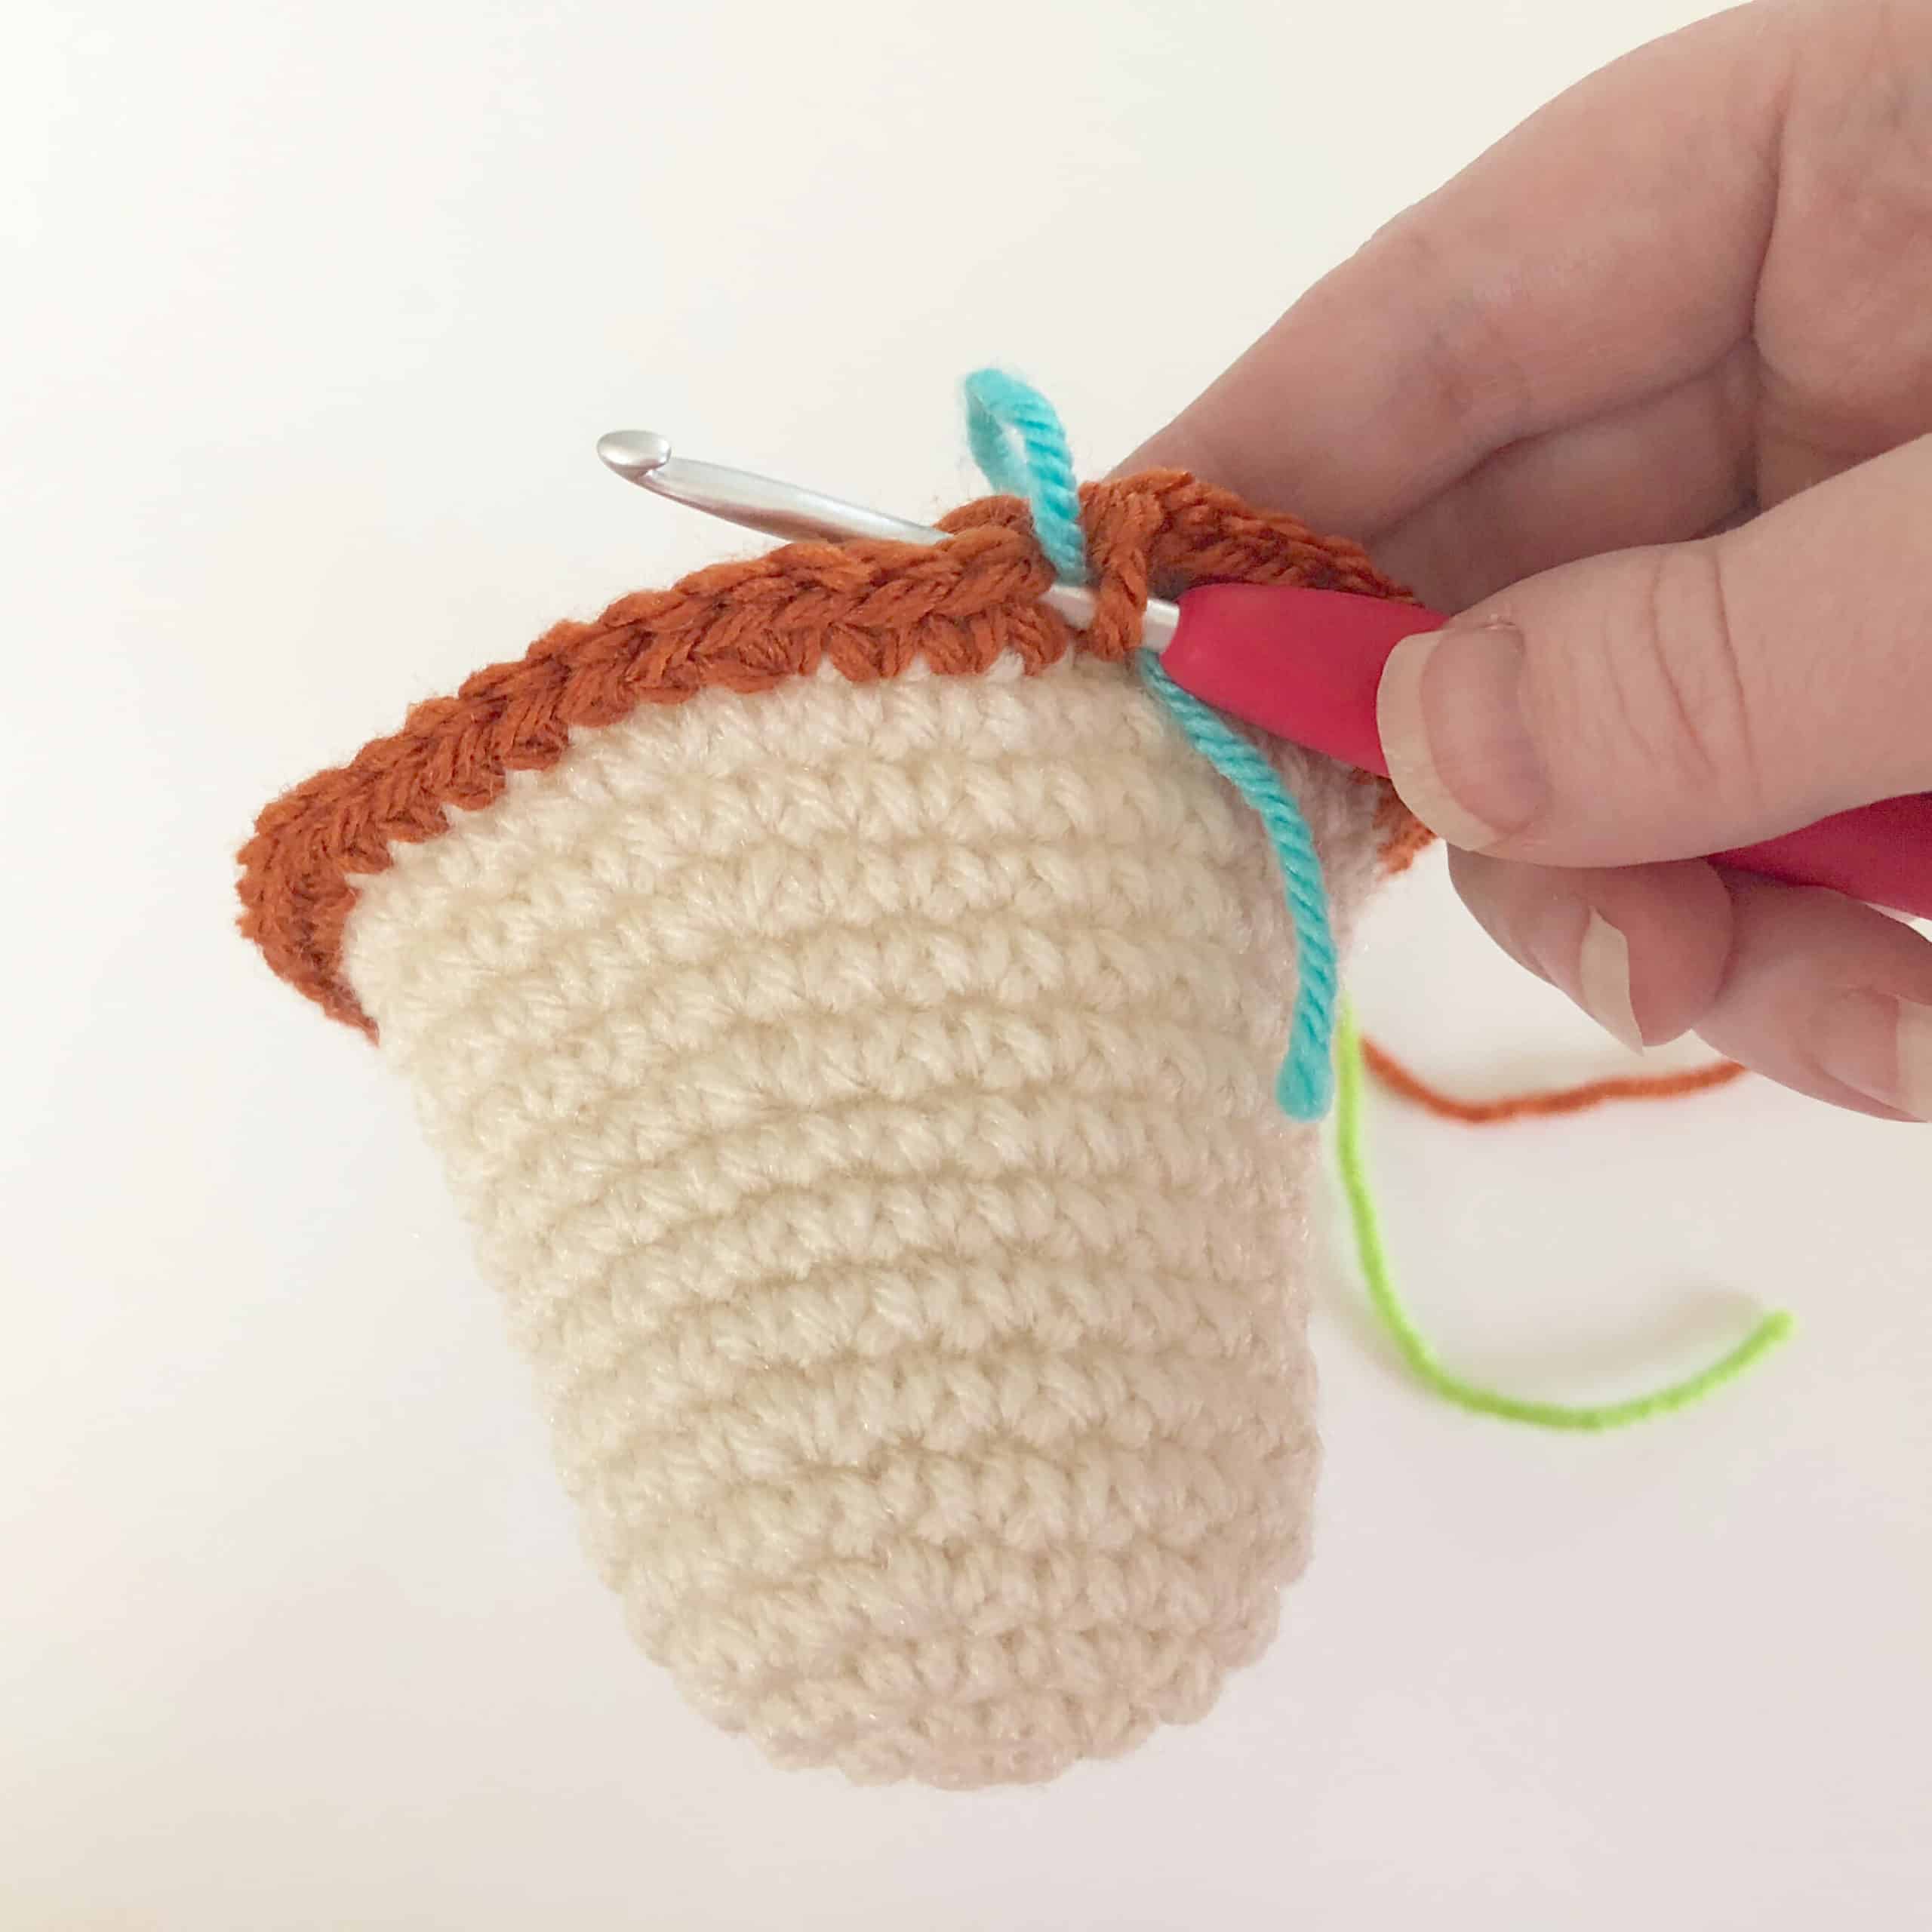
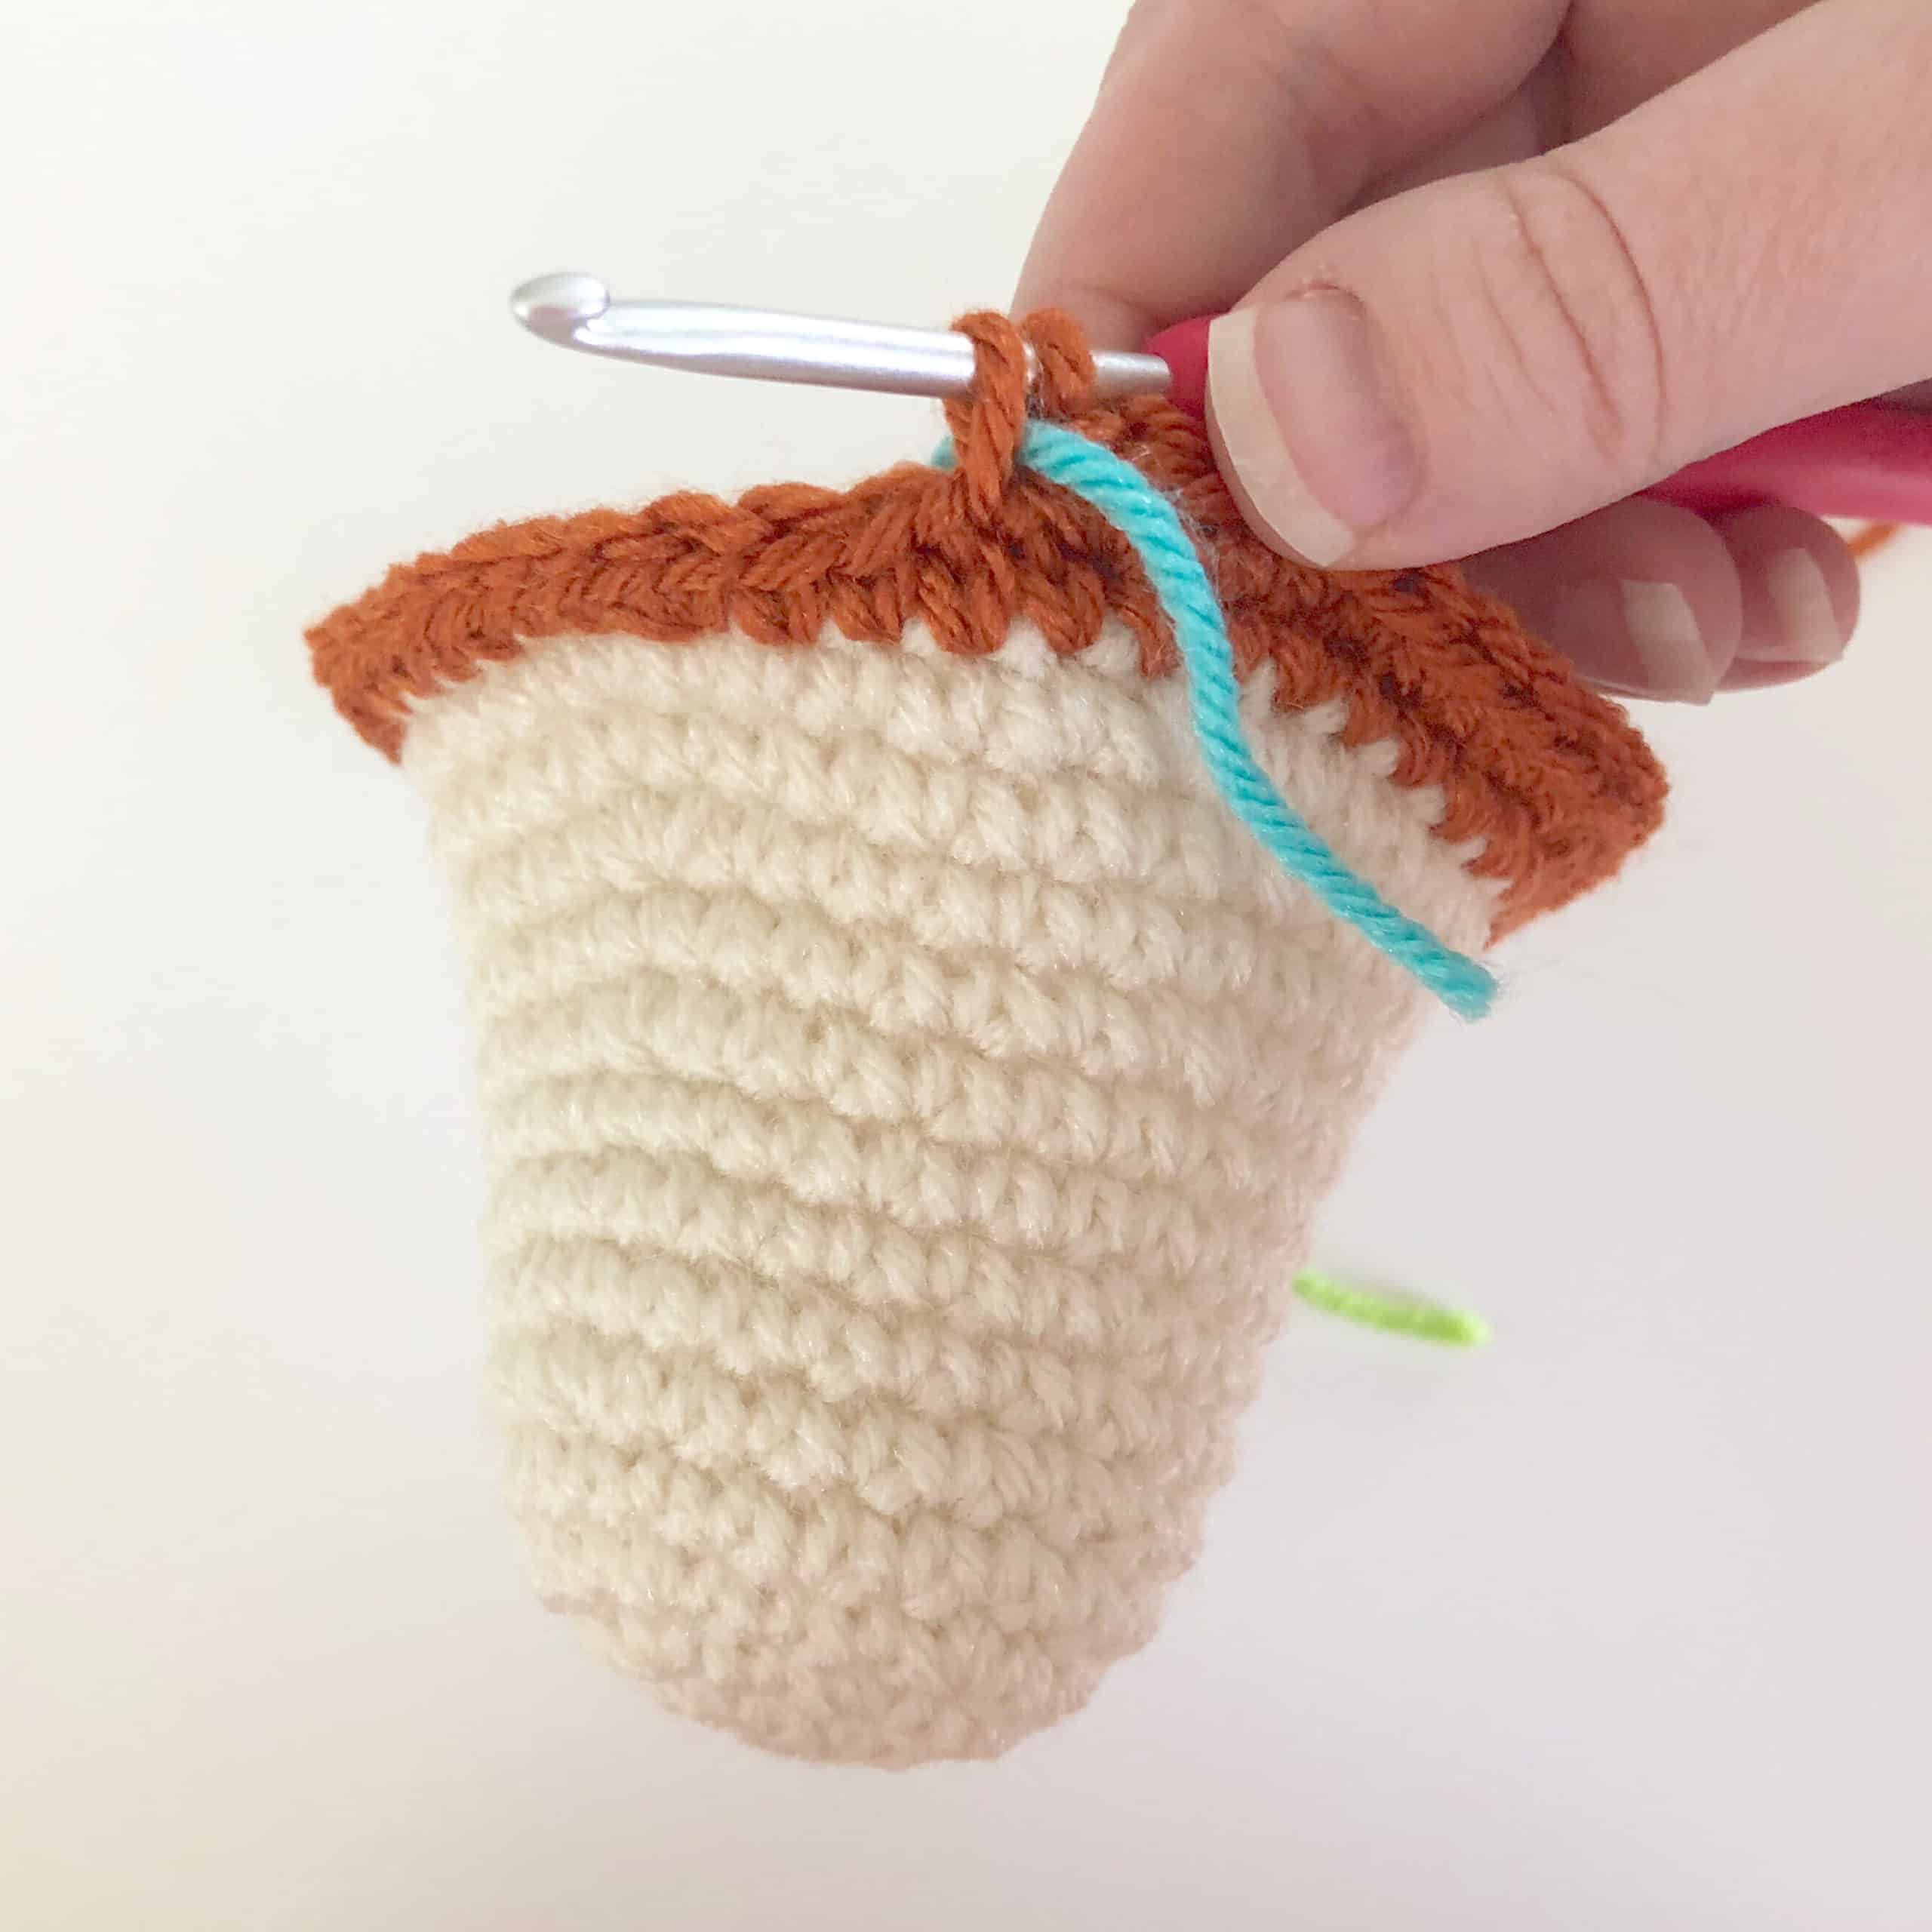
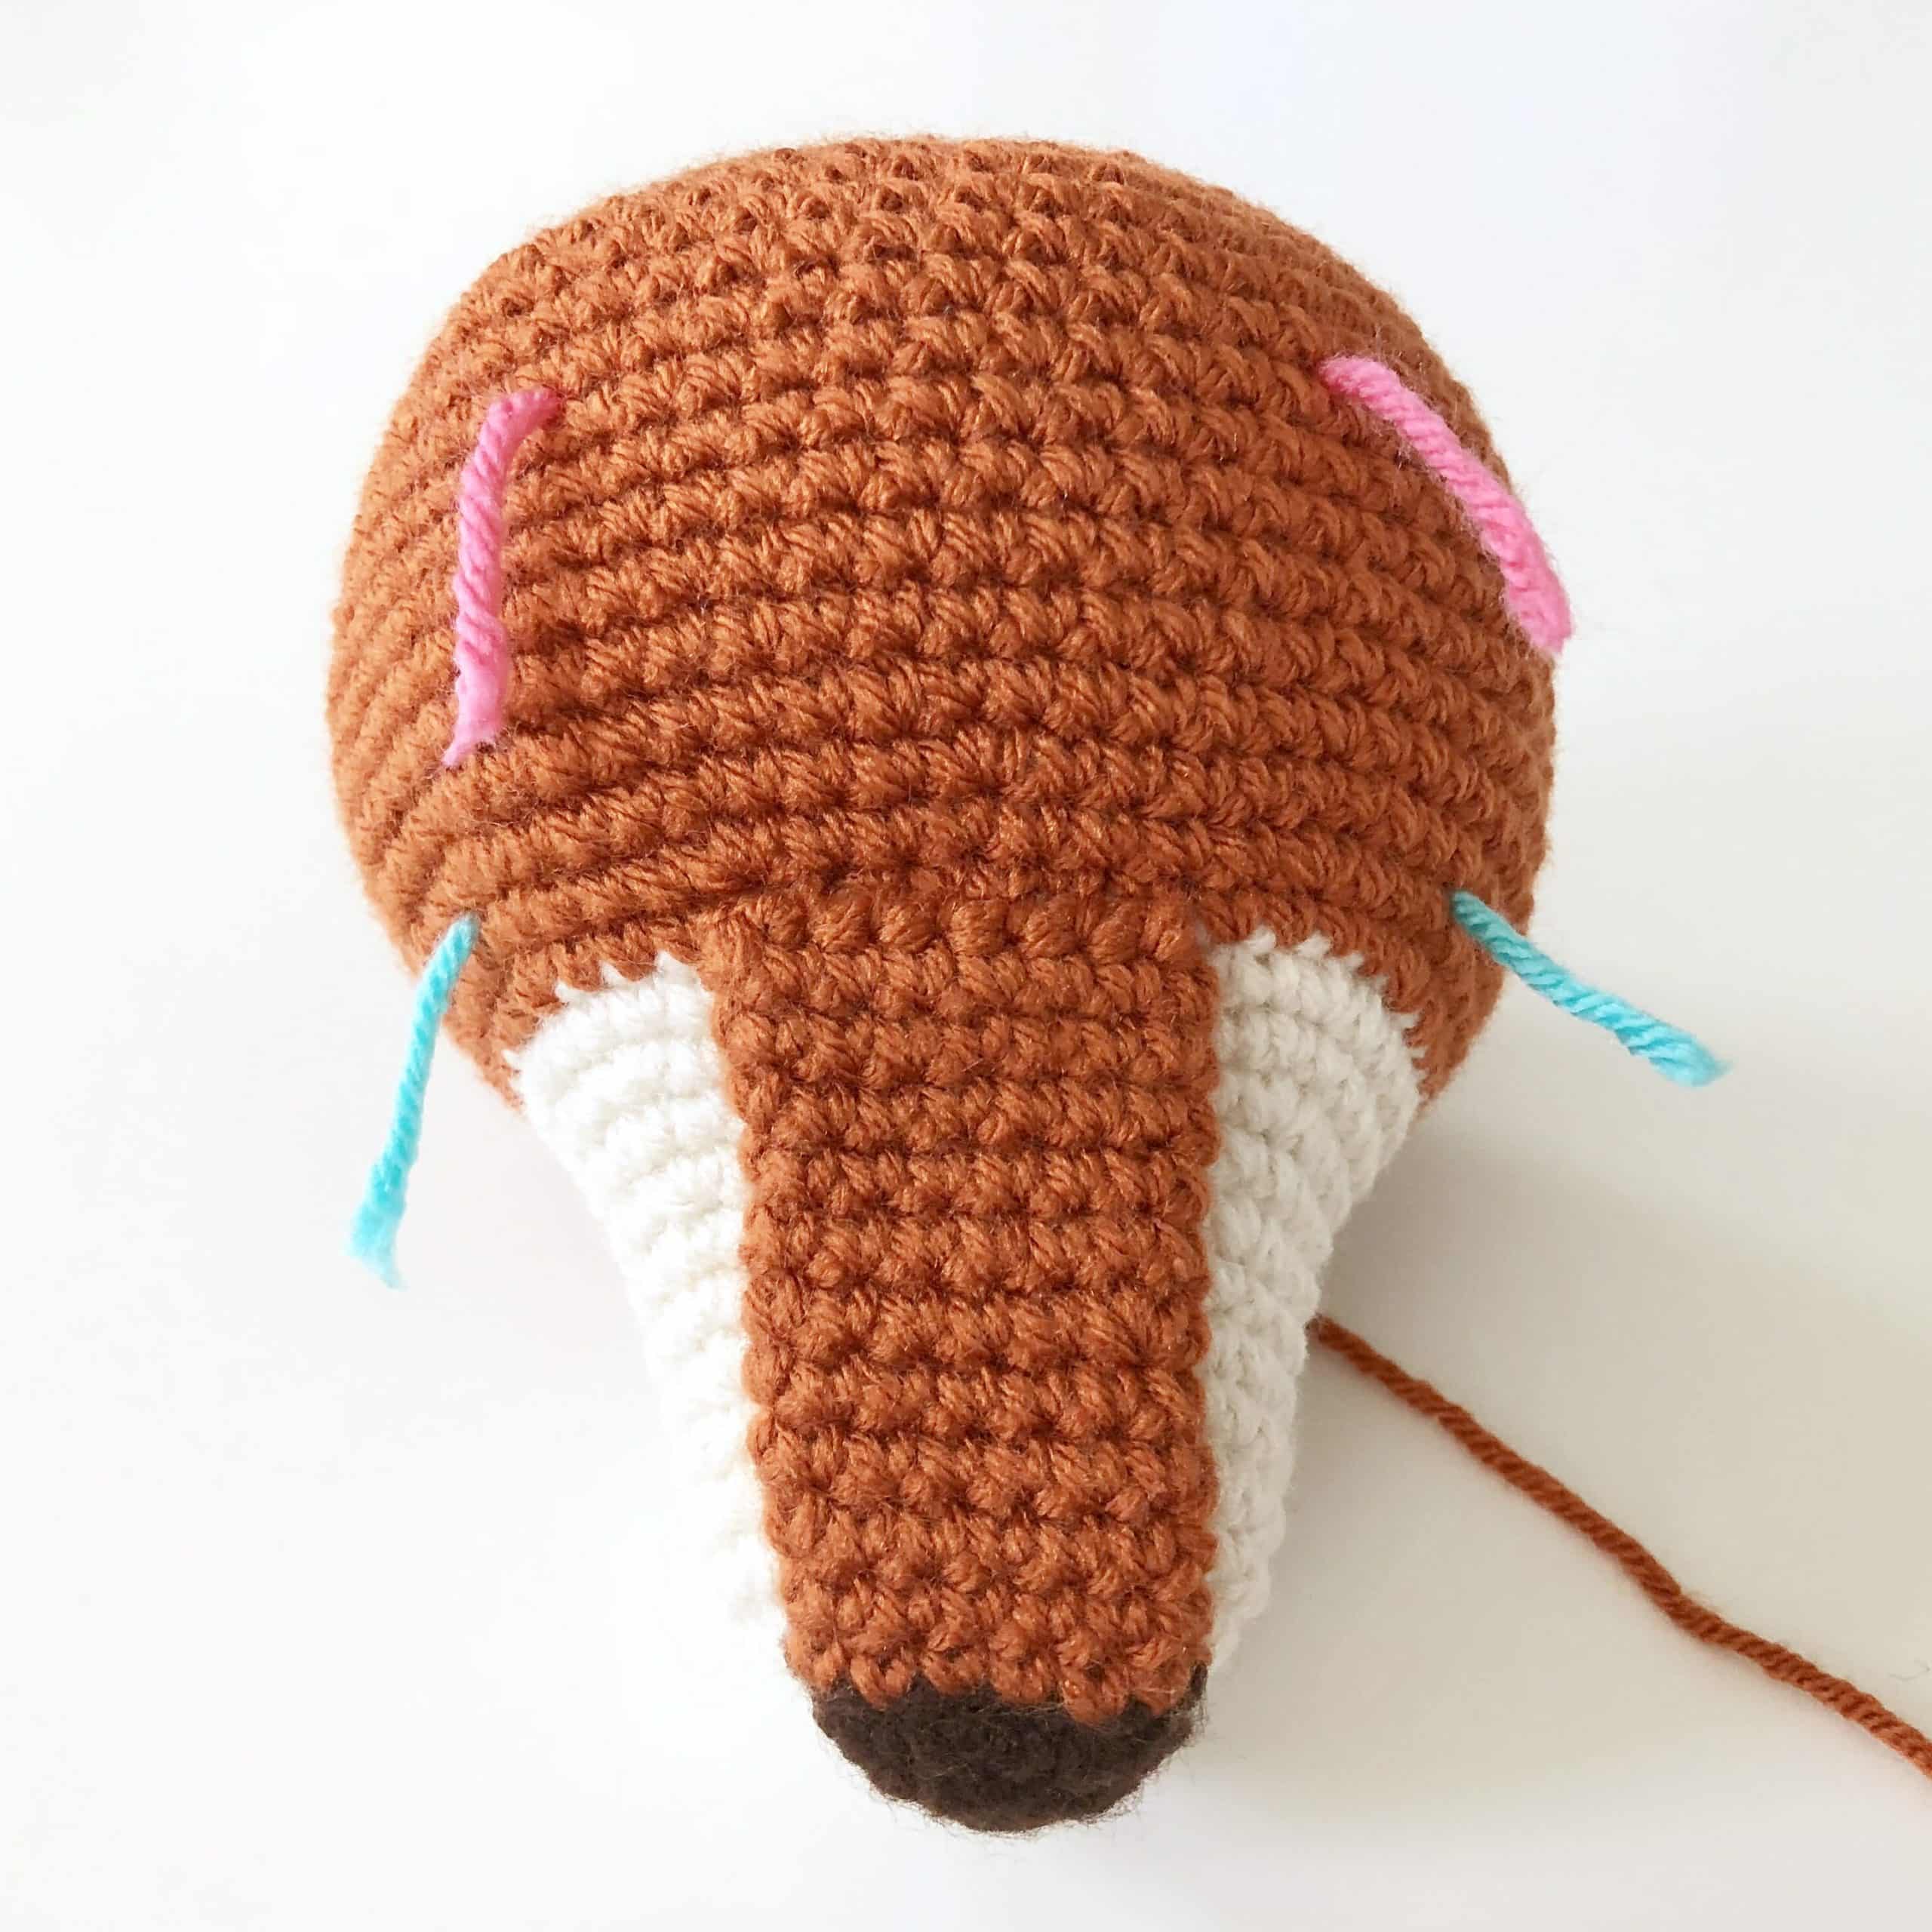
Stitch markers
Note: The photos above show a fox, but the technique is the same for all of my patterns.
The pattern indicates to insert 5 different stitch markers in various places besides the one you use to track the beginning/end of each round.
I recommend using strands of yarn in 4 different colors as your stitch markers: One strand in color 1 (purple) to mark where you will start attaching the nose, two strands in color 2 (blue) to mark where you will place each eye, two strands color 3 (pink) to mark where you will start attaching each ear, and one long strand in color 4 (green) to track the beginning/end of each round.
The photos above demonstrate how to mark a stitch while crocheting a round: lay your strand of yarn acting as a marker over your working yarn and the stitch you'll be working into, then complete the stitch as normal.
You'll essentially be weaving the long strand in color 4 through your work with each round. On odd rounds you'll be laying the strand back-to-front, and on even rounds you'll be laying the strand front-to-back.
The advantage of using this technique is you'll have the beginning of every single round marked, which makes it much easier to find your place if you make a mistake. That said, It's perfectly fine to use a regular ol' safety pin-like marker to keep track of your rounds instead. 🙂
How to attach the tip of the nose to the snout
Note: The photos above show a raccoon, but the technique is the same for all of my patterns.
Step 1 – Cut a strand of yarn approximately 18" long. Tie a large, secure knot in one end and thread the other end through your yarn needle.
Step 2 – Insert your needle through the back opening of the head and exit the needle through the starting magic ring on the snout.
Step 3 – Next, thread your needle through the starting magic ring of the nose, then insert your needle back through the starting magic ring on the snout.
Step 4 – Flip the head over. Secure the two black strands with a large knot on the inside of the snout, then trim the excess.
How to attach the top of the nose to the snout
Note: The photos above show a raccoon, but the technique is the same for all of my patterns.
Step 1 – Take the yarn tail from the top of your nose and thread it through a yarn needle. Thread your needle through the stitch marked with color 1. Then attach the remaining 5 stitches across the top of your nose to the next 5 stitches following your marked stitch on the snout.
Step 2 – Tighten down your stitches, secure the end with a knot, and hide the yarn tail inside the head.
How to indent the eyes
How fold the ears and sew them closed
Step 1 – Close the top opening of each ear with a slip stitch, leaving a long yarn tail.
Step 2 – Fold the slip-stitched edge in half and sew closed with a running stitch using your yarn tail and a yarn needle, leaving the tail intact.
Step 3 – Your ears should now look like figure 3 above and are ready to attach to the head at a later step!
How to attach the ears to the head
Step 1 – Line up your ear with your color 3 stitch marker on the top of the head.
Step 2 – Using a yarn needle and your yarn tail, attach the ear to the head stitch-for-stitch, leaving your stitches slightly loose in case you need to undo them. Repeat steps 1 and 2 for the second ear.
Step 3 – Examine the head from multiple angles to make sure your ears are symmetrical and look the way you want them, then remove your stitch markers. Tighten down your stitches, secure the end with a knot, and hide the yarn tail inside the head.Instructions
- Be sure to read the "notes" section before proceeding.
Nose
- With pink yarn:01. start 6 sc into a magic ring [6]02. *sc, inc* [9]03. *sc 2, inc* [12]Switch to tan yarn (tutorial):
04 - 05. sc in each st around [12]
06. sc 11, inc [13]
07. sc in each st around [13]
08. sc 6, inc, sc 6 [14]
Fasten off and leave a long tail for sewing. Fold the top opening in half and slip stitch closed.
Ears (make 2)
- With tan yarn:
01. start 6 sc into a magic ring [6]
02. inc in each st around [12]
03. *sc 3, inc* [15]
04. sc 2, inc, *sc 4, inc* 2 times, sc 2 [18]
05. *sc 5, inc* [21]
06. sc 3, inc, *sc 6, inc* 2 times, sc 3 [24]
07. *sc 7, inc* [27]
08. sc 4, inc, *sc 8, inc* 2 times, sc 4 [30]
09 - 11. sc in each st around [30]
12. sc 14, dec, sc 14 [29]
13. sc 27, dec [28]
14. sc 13, dec, sc 13 [27]
15. sc 25, dec [26]
16. sc 12, dec, sc 12 [25]
17. sc 23, dec [24]
18. sc 11, dec, sc 11 [23]
19. sc 21, dec [22]
Fasten off and leave a long tail for sewing. Next, follow the steps under "How fold the ears and sew them closed" in the notes section.
Snout & Head
- With cream yarn:
01. Chain 3 start: ch3, inc in 2nd ch from hook, 5sc in the last ch. Continue on the other side of the chain base, 3sc in the last ch [10]
02. inc, sc 2, *inc* 3 times, sc 2, *inc* 2 times [16]
03. inc, sc 4, *inc* 2 times, sc, inc, sc 4, *inc* 2 times, sc [22]
04. inc, sc 6, *inc, sc* 2 times, inc, sc 6, *inc, sc* 2 times [28]
05. *sc 13, inc* [30]
06 - 08. sc in each st around [30]
Now sc 7 additional stitches. This ensures your color join will be on the bottom of the head. These stitches are not included in the stitch count for round 8 nor for round 9. Move your stitch marker to the last of the 7 additional stitches and continue on with round 9 as normal.
Switch to tan yarn (tutorial):
09. BLO: slst in each st around [30]
10. BLO: sc 2, inc, sc 4, inc, sc 4, inc and insert marker color 1 into the first stitch of the increase (15th stitch from start of round; the second stitch of the increase is the 16th stitch from start of round), *sc 4, inc* 3 times, sc 2 [36]
11. *sc 5, inc* [42]
12. sc 3, inc, *sc 6, inc* 5 times, sc 3 [48]
13. *sc 7, inc* 2 times, insert marker color 2 into the next sc (19th st from start of round), sc 6, inc, sc 7, inc, sc, insert marker color 2 into the next sc (38th st from start of round), sc 5, inc, sc 7, inc [54]
14. sc 4, inc, *sc 8, inc* 5 times, sc 4 [60]
15 - 18. sc in each st around [60]
19. sc 25, insert marker color 3 into the next sc (26th st from start of round), sc 13, insert marker color 3 into the next sc (40th st from start of round), sc 20 [60]
20 - 24. sc in each st around [60]
25. sc 4, dec, *sc 8, dec* 5 times, sc 4 [54]
26. *sc 7, dec* [48]
27. sc 3, dec, *sc 6, dec* 5 times, sc 3 [42]
28. *sc 5, dec* [36]
29. sc 2, dec, *sc 4, dec* 5 times, sc 2 [30]
Attach the nose to the snout by following the steps below:
Step 1 – See “How to attach the tip of the nose to the snout” in the notes section.
Step 2 – See “How to attach the top of the nose to the snout” in the notes section.
Step 3 – Stuff head ¾ full and create indents for the eyes. See “How to indent the eyes” in the notes section.
Step 4 – Insert your safety eyes and secure the backings.
30. *sc 3, dec* [24]
31. sc, dec, *sc 2, dec* 5 times, sc [18]
32. *sc, dec* [12]
Finish stuffing.
33. *dec* [6]
Cut working yarn and close with an ultimate finish.
Attach the ears to the head (see “How to attach the ears to the head” in the notes section).
Belly
- With cream yarn:
01. Chain 5 start: ch5, inc in 2nd ch from hook, sc 2, 5sc in the last ch. Continue on the other side of the chain base, sc 2, 3sc in the last ch [14]
02. inc, sc 4, *inc* 3 times, sc 4, *inc* 2 times [20]
03. inc, sc 6, *inc* 2 times, sc, inc, sc 6, *inc* 2 times, sc [26]
04. inc, sc 8, *inc, sc* 2 times, inc, sc 8, *inc, sc* 2 times [32]
05. inc, sc 10, inc, sc 2, inc, sc, inc, sc 10, inc, sc 2, inc, sc [38]
06. inc, sc 12, *inc, sc 2* 2 times, inc, sc 12, *inc, sc 2* 2 times [44]
07. inc, sc 14, inc, sc 3, inc, sc 2, inc, sc 14, inc, sc 3, inc, sc 2 [50]
Fasten off and leave a long tail for sewing.
Body
- With tan yarn:
01. start 6 sc into a magic ring [6]
02. inc in each st around [12]
03. *sc, inc* [18]
04. sc, inc, *sc 2, inc* 5 times, sc [24]
05. *sc 3, inc* [30]
06. sc 2, inc, *sc 4, inc* 5 times, sc 2 [36]
07. *sc 5, inc* [42]
08. sc 3, inc, *sc 6, inc* 5 times, sc 3 [48]
09. *sc 7, inc* [54]
10. sc 4, inc, *sc 8, inc* 5 times, sc 4 [60]
11 - 17. sc in each st around [60]
18. sc 4, dec, *sc 8, dec* 5 times, sc 4 [54]
19. sc in each st around [54]
20. *sc 7, dec* [48]
21. sc in each st around [48]
22. sc 3, dec, *sc 6, dec* 5 times, sc 3 [42]
23 - 24. sc in each st around [42]
25. *sc 5, dec* [36]
26 - 27. sc in each st around [36]
28. sc 2, dec, *sc 4, dec* 5 times, sc 2 [30]
29 - 30. sc in each st around [30]
31. *sc 3, dec* [24]
Fasten off and leave a long tail for sewing. Stuff firmly with fiber fill. Attach the head to the body, then sew on the belly patch.
Legs (make 2)
- With cream yarn:
01. start 6 sc into a magic ring [6]
02. inc in each st around [12]
03. *sc, inc* [18]
04. sc, inc, *sc 2, inc* 5 times, sc [24]
Switch to tan yarn (tutorial):
05. BLO: slst in each st around [24]
06. BLO: *sc 3, inc* [30]
07. BLO: sc in each st around [30]
08 - 10. sc in each st around [30]
11. sc 14, dec, sc 14 [29]
12. sc 27, dec [28]
13. sc 13, dec, sc 13 [27]
14. sc 25, dec [26]
15. sc 12, dec, sc 12 [25]
16. sc 23, dec [24]
17. sc 11, dec, sc 11 [23]
18. sc 21, dec [22]
19. sc 10, dec, sc 10 [21]
20. sc 19, dec [20]
21. sc 9, dec, sc 9 [19]
22. sc 17, dec [18]
23. *sc 7, dec* [16]
24. *sc 2, dec* [12]
Fasten off and leave a long tail for sewing. Stuff firmly with fiber fill, then fold the top opening in half and slip stitch closed. Finally, attach the legs to the body.
Arms (make 2)
- With cream yarn:
01. start 6 sc into a magic ring [6]
02. inc in each st around [12]
03. *sc, inc* [18]
Switch to tan yarn (tutorial):
04. BLO: slst in each st around [18] 05. BLO: sc, inc, *sc 2, inc* 5 times, sc [24] 06. BLO: sc in each st around [24]
07 - 09. sc in each st around [24]
10. sc 11, dec, sc 11 [23]
11. sc in each st around [23]
12. sc 21, dec [22]
13. sc in each st around [22]
14. sc 10, dec, sc 10 [21]
15. sc in each st around [21]
16. sc 19, dec [20]
17. sc in each st around [20]
18. sc 9, dec, sc 9 [19]
19. sc in each st around [19]
20. sc 17, dec [18]
21. sc in each st around [18]
22. sc 8, dec, sc 8 [17]
23. sc in each st around [17]
24. sc 15, dec [16]
25 - 26. sc in each st around [16]
27. *sc 2, dec* [12]
Fasten off and leave a long tail for sewing. Stuff firmly with fiber fill, then fold the top opening in half and slip stitch closed. Finally, attach the arms to the body.
Tail
- With cream yarn:
01. start 6 sc into a magic ring [6]
02. inc in each st around [12]
03. *sc, inc* [18]
04. sc, inc, *sc 2, inc* 5 times, sc [24]
05. *sc 3, inc* [30]
06 - 08. sc in each st around [30]
09. *sc 3, dec* [24]
10. sc, dec, *sc 2, dec* 5 times, sc [18]
11. *sc, dec* [12]
12. *sc, dec* [8]
Fasten off and leave a long tail for sewing. Stuff, then fold the top opening in half and slip stitch closed. Attach the tail to the body.