Jump to the pattern of your choice:
I’ve been wanting to design a fuzzy animal for a long time, and this llama crochet pattern was just the opportunity I needed.
My dislike for working with fuzzy yarn coupled with the fact that many people don’t have access to specialty yarns, spurred me to create a fluffy animal with standard acrylic yarn that can be bought anywhere.
I’m so pleased with the results, and Loki the Llama is my most advanced pattern yet.
Even though this is a trickier pattern, I’ve done everything I can to ensure making your llama is as easy as possible:
- I released two versions of the pattern: a single crochet version–suitable for anyone familiar with the basics of amigurumi–and a Loop Stitch version, for advanced crocheters who are up for a challenge.
- I filmed not one, not two, but TWELVE video tutorials to guide you through the difficult parts of this pattern. That was an undertaking to say the least, and I think I’ll stick to designing simpler patterns for a while. 😂
Tips for working with the Loop Stitch
Fair warning: If you’re new to amigurumi or tend to crochet with loose tension, the loopy version of the llama may not be for you. A fair percentage of my pattern testers ended up with Loop Stitches that came undone. Here are my tips for avoiding loose loops:
- Keep your tension tight. There should not be any “wiggle room” in your stitches.
- Make sure your loops are long enough. Shorter loops can pull free easier.
- Be gentle with your work, especially when stuffing. Try not to stretch the work.
- Size down to the smallest hook size you can manage. I had no problems with the 3.5mm I usually use for my patterns, but if you can see gaps in your stitches with a hook that size, definitely try a smaller one.


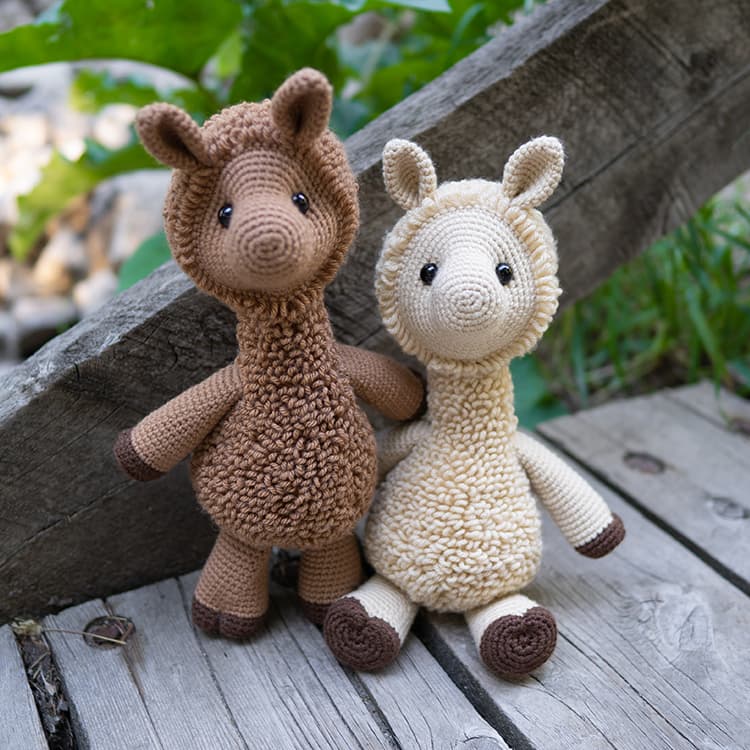


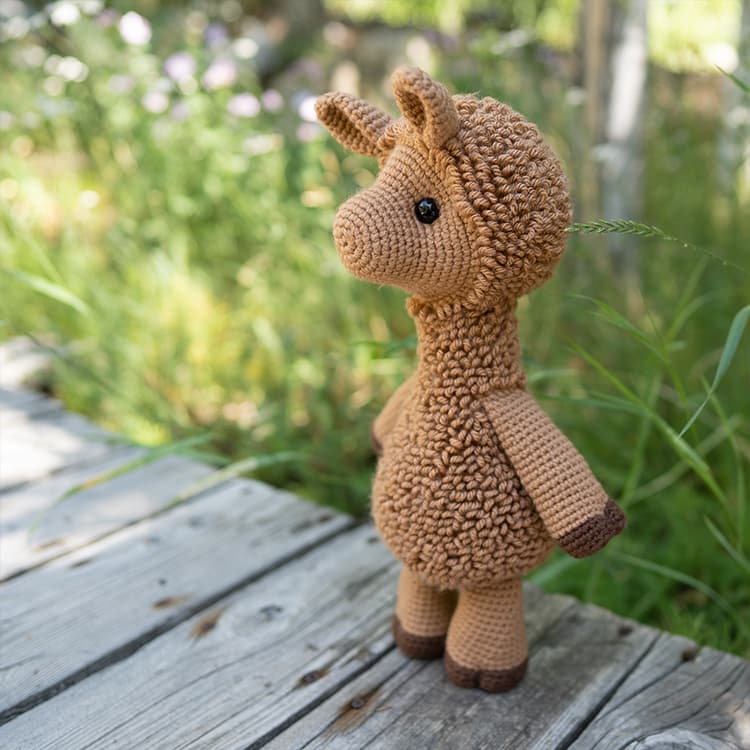
Loki the Llama – Loop Stitch
Height: 17" standing
Skill level: Advanced
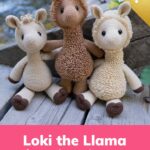
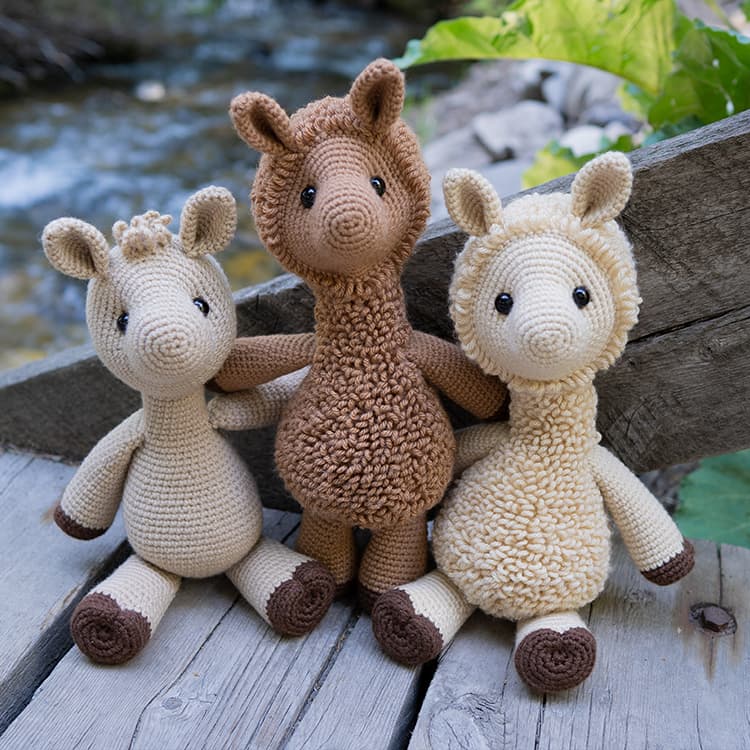
Ravelry: Loki the LlamaLoki is the center of barnyard drama, and may even try to spit in your face. He’ll keep you woolly warm, no prob-llama, if you can manage to put him in his place!
Skill level: Advanced
Ravelry: Loki the LlamaLoki is the center of barnyard drama, and may even try to spit in your face. He’ll keep you woolly warm, no prob-llama, if you can manage to put him in his place!
Supplies
Yarn (acrylic, weight 4) – 506 total yards
- Brown – 477 yards (I used Big Twist – Camel)
- Dark Brown – 29 yards (I used Big Twist – Chocolate Brown)
Notes
Abbreviations
General Instructions
Recommended Sequence
Here are the steps to create your llama, in order:
Head: Round 13 | Marking Stitches for the Eyes

Head: Round 17 | Marking Stitches for the Ears
Head: Rounds 18 & 19 | Making a Hole for the Dowel
Indenting the Eyes
Finishing & Attaching the Ears
Finishing the Arms & Legs
Body: Rounds 6 & 7 | Attaching the Legs
Body: Rounds 10 & 11 | Attaching the Tail
Body: Rounds 29 & 30 – Attaching the Arms
Inserting the Dowel & Attaching the Head to the Body
- ch – chain
- sc – single crochet
- Loop Stitch – Makes a loop on the back of each stitch, giving this animal its signature “furry” look. Rounds with “Loops” at the beginning should be completed in the Loop Stitch, including increases and decreases. Click the link for a video tutorial on how to do this stitch.
- inc – complete two single crochets within the same stitch
- dec – combine two stitches into one with an invisible decrease
- BLO – crochet in the back loop only
- *sc x* – repeat the instructions between asterisks(*) the indicated number of times. If the pattern doesn’t tell you how many times to repeat, then repeat the sequence until you reach the end of the round.
General Instructions
- Work all stitches in both loops unless the pattern instructs otherwise.
- This pattern is worked in one continuous spiral. Do not join rounds unless the pattern indicates otherwise (in other words, do not slip stitch and chain to start a new round).
- Use a stitch marker to keep track of where one round ends and the next begins.
Recommended Sequence
Here are the steps to create your llama, in order:
- Crochet the Head
- Crochet the Ears
- Attach the Ears to the Head
- Crochet the Dowel
- Crochet the Arms
- Crochet the Legs
- Crochet the Tail
- Crochet the Body
- Attach the Head to the Body
Head: Round 13 | Marking Stitches for the Eyes
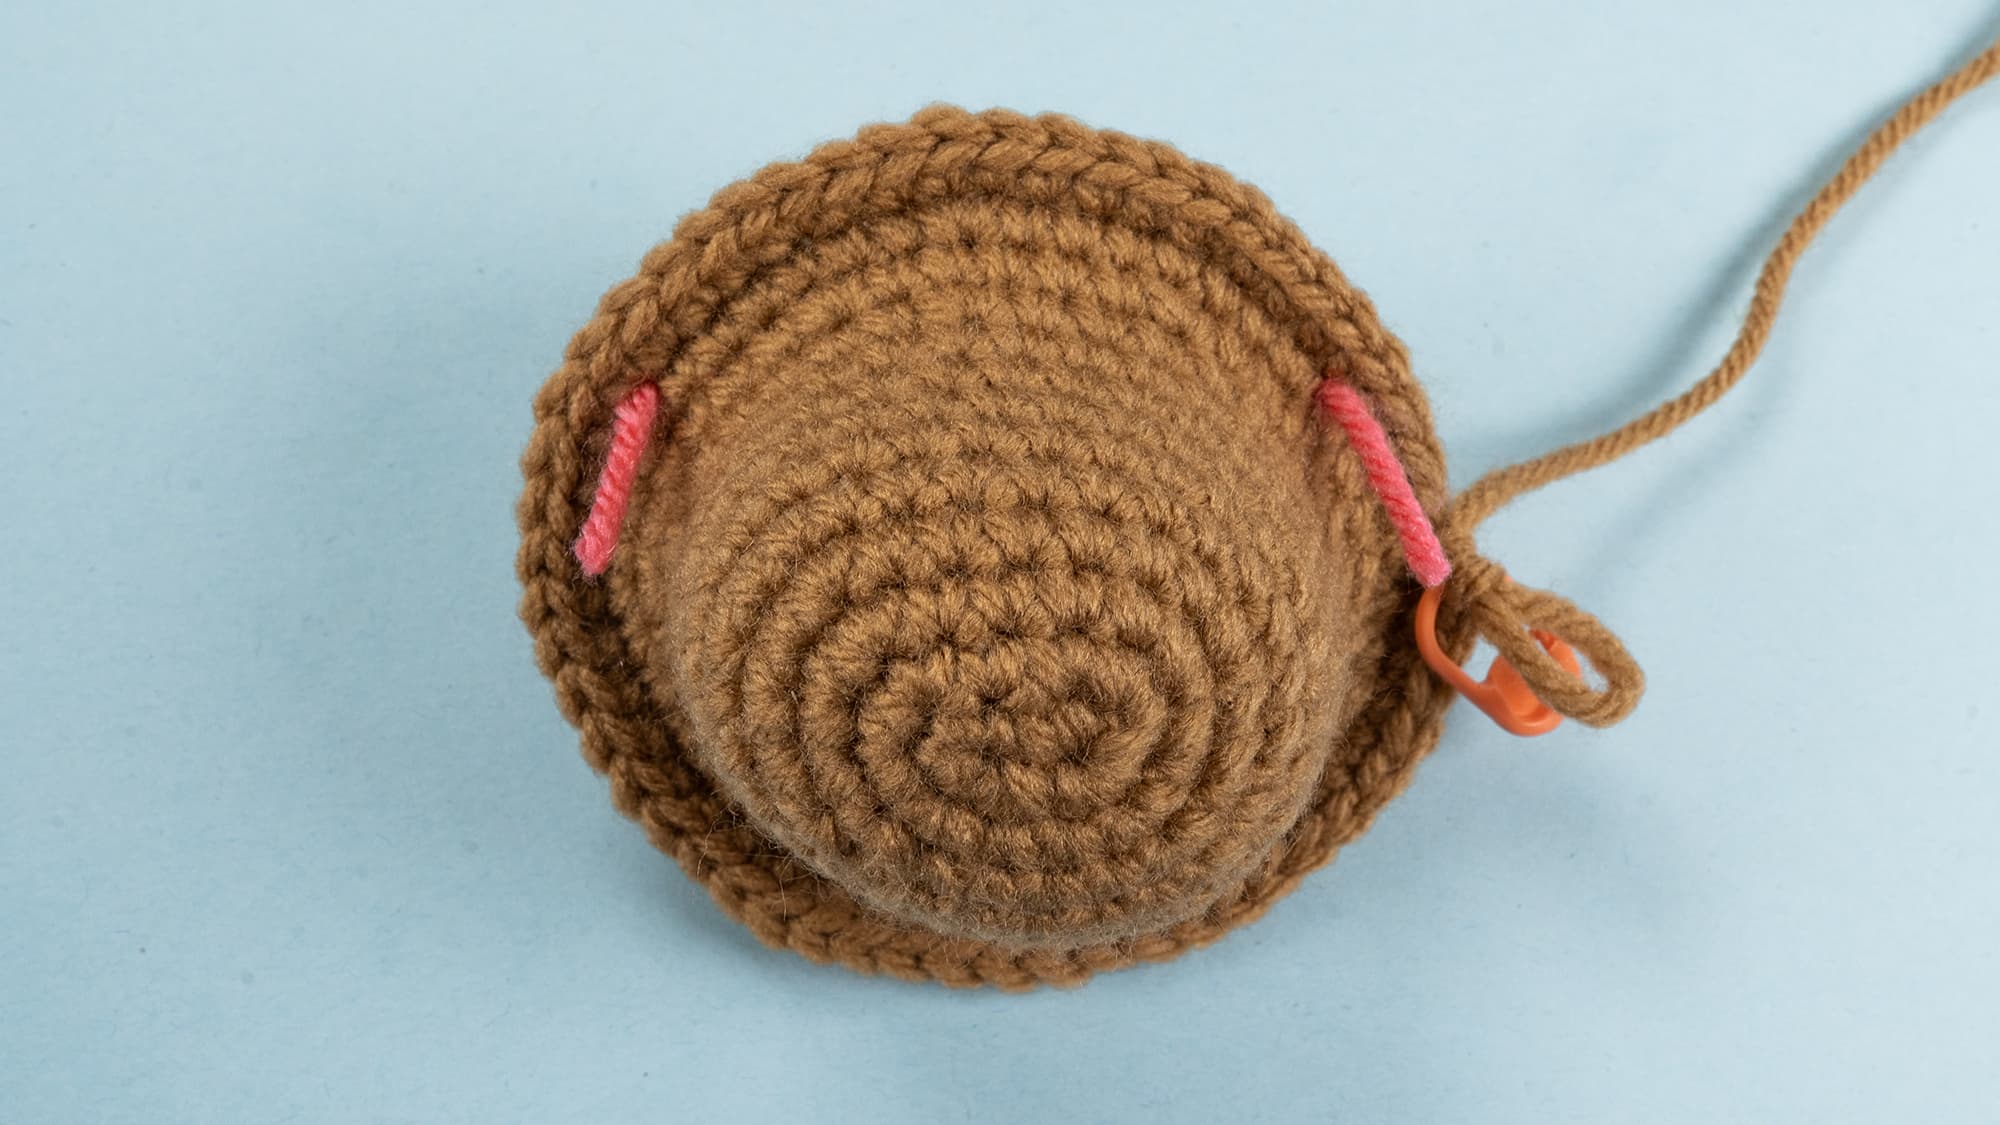
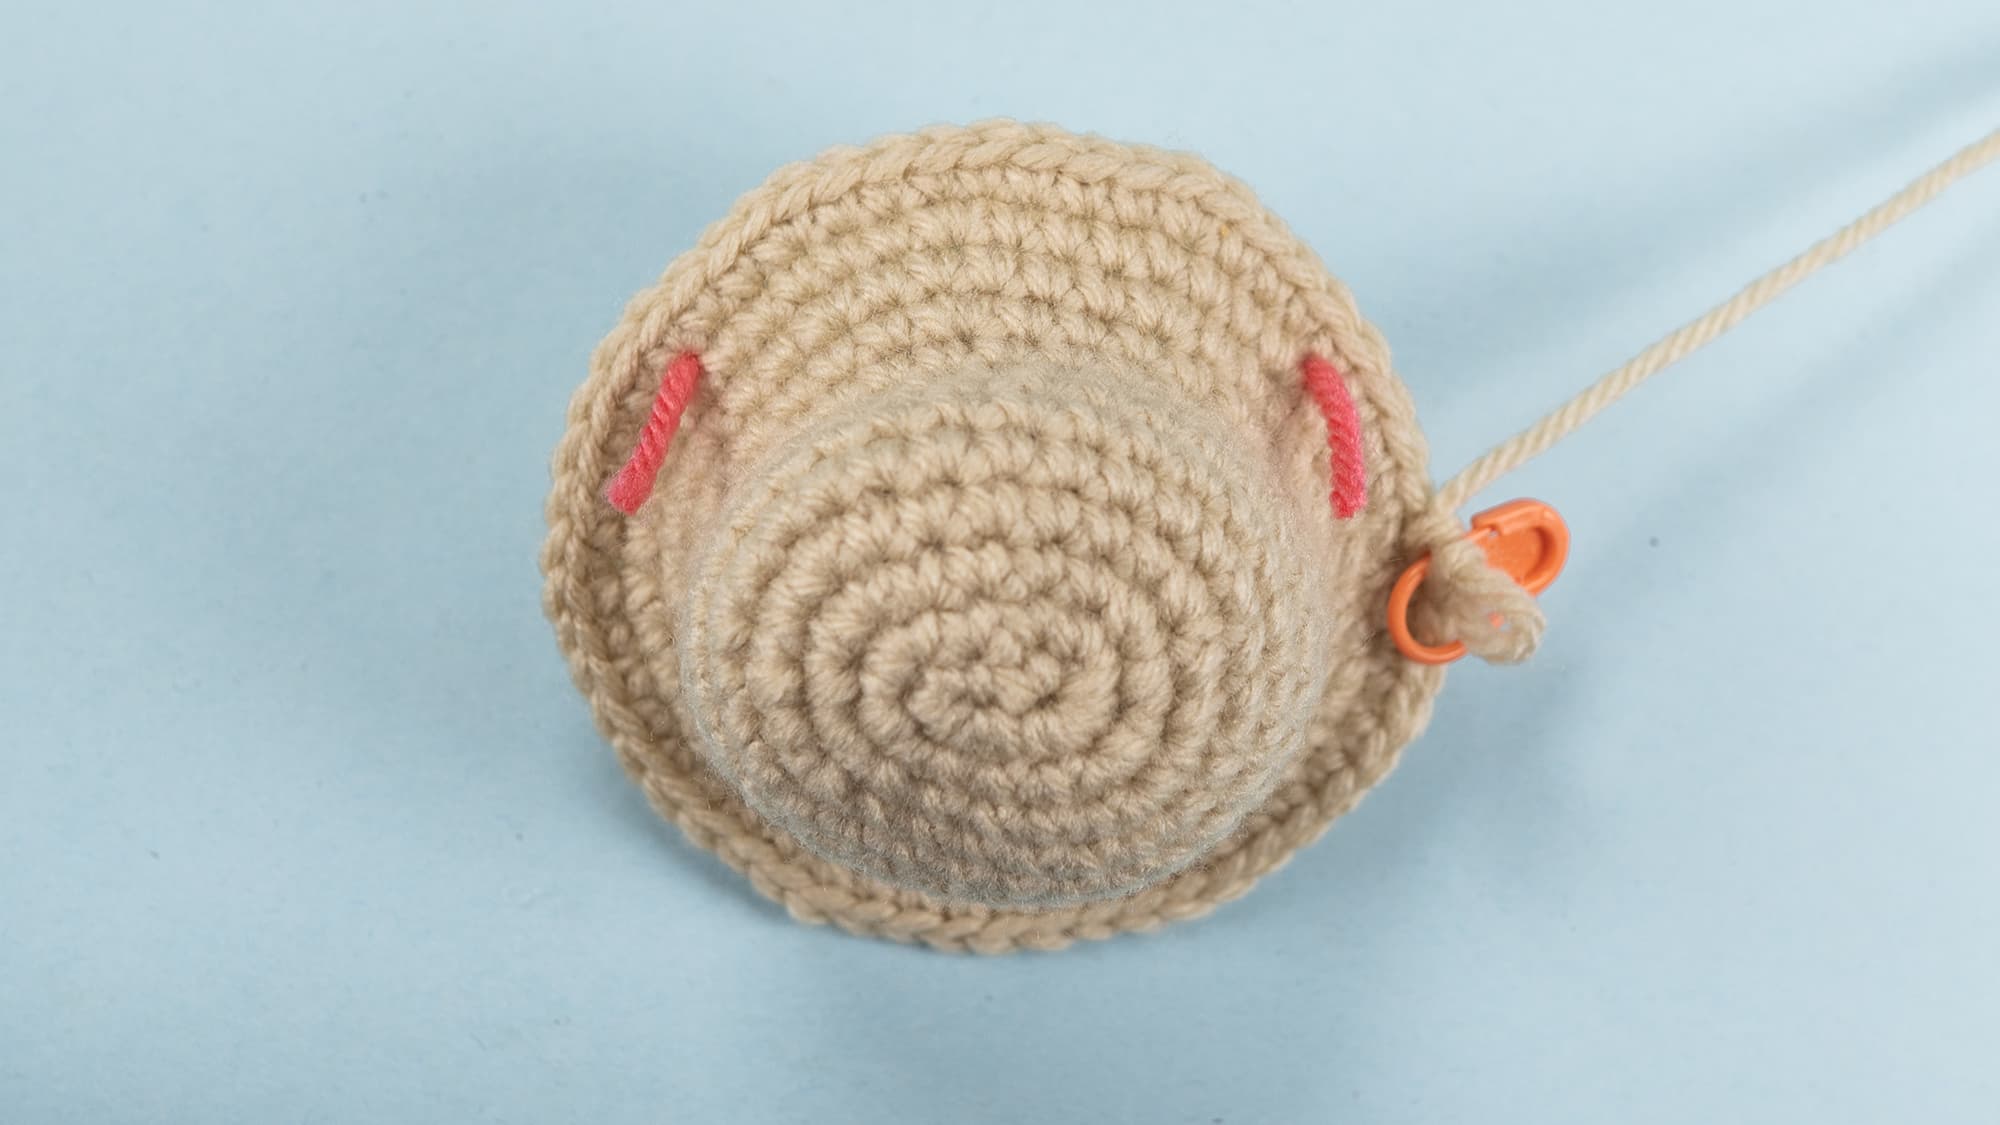
Now you will add two stitch markers that will show you where to insert your safety eyes at a later step. Place the markers 18 stitches apart centered on the snout between rounds 12 & 13 (the last two rounds you’ve completed).
You will leave the eye markers in place as you crochet rounds 14 – 29. I recommend using strands of yarn to mark these stitches, ensuring they’re easy to crochet around.
Use a yarn needle to insert each strand.
Head: Round 17 | Marking Stitches for the Ears
Now you will add two stitch markers that will show you where to sew on your ears at a later step.
Place the markers 10 stitches apart centered on the top of the head between rounds 16 & 17 (the last two rounds you’ve completed).
You will leave the ear markers in place as you crochet the remainder of the head. I recommend using strands of yarn to mark these stitches, ensuring they’re easy to crochet around.
Use a yarn needle to insert each strand.
Head: Rounds 18 & 19 | Making a Hole for the Dowel
After completing round 18, mark off 9 stitches centered on the bottom of the head (this should be on the opposite side of your eye markers).
Add a stitch marker in the first and last of those 9 stitches. Once you hit the first stitch marker as you crochet round 19, chain 9. Skip the 9 marked stitches entirely, then crochet in the next stitch.
Remove the stitch markers (keeping your end-of-round marker in place) and crochet the rest of the round as normal.
Indenting the Eyes
Note: This video shows a unicorn, but the technique is the same for all of my patterns.
Cut a strand of yarn approximately 18″ long. Tie a large, secure knot in one end and thread the other end through your yarn needle.
Insert your needle through the back opening of the head and sew between the two spots where you’ll be placing your safety eyes (marked with strands of yarn).
Pull your strand of yarn taut, which will create indents. Fasten off with a knot and hide your yarn tail inside the head.
Finishing & Attaching the Ears
Note: the video shows the single crochet version of the llama pattern, but the same techniques apply.
Fasten off and leave a 18″ tail. Pinch the final round together and slip stitch closed.
Fold the slip stitched edge in half and secure with a Running Stitch underneath the slip stitches. Exit the tail at the base of the ear in the front.
Attach each ear to the head where indicated by the markers.
Finishing the Arms & Legs
Cut your working yarn and leave a tail of about 18″, but do not fasten off yet.
Stuff the limb. In the final round, add however many single crochets as necessary to get the color join front-and-center on the limb. Now pull on your working loop until the strand comes free to fasten off.
Pinch the final round together and slip stitch it closed. Hide the yarn tail inside the work.
Cut an 18″ strand of dark brown yarn and attach one end to a yarn needle.
Pass the needle through the magic ring in the center of your hoof, then through the top of the hoof (above the last round of dark brown). Repeat this process a few times, pulling the yarn taut each time.
When you’re satisfied with the look, attach the starting tail to the ending tail with a secure knot. Hide both tails inside the work.
Body: Rounds 6 & 7 | Attaching the Legs
At the end of round 6, mark off the first 6 stitches of the round by inserting plastic stitch markers into the 1st and 6th stitches of the round.
Skip the next 6 stitches, then mark off a second group of 6 by inserting plastic stitch markers into the 13th and 18th stitches of the round.
As you crochet round 7, attach the first leg as you crochet into the first 6 stitches.
Crochet into the next 6 stitches as normal to leave a gap between the legs, then attach the second leg as you crochet into the second group of 6 marked off stitches.
Complete the remainder of the round as normal.
Body: Rounds 10 & 11 | Attaching the Tail
At the end of round 10, mark off 5 stitches centered between the legs on the opposite side of the round.
Crochet round 11 as instructed by the pattern until you hit the first marked stitch. Attach the tail as you crochet into the 5 marked stitches, then crochet the remainder of the round as normal.
Body: Rounds 29 & 30 – Attaching the Arms
At the end of round 29, mark off two groups of 6 stitches on each side of the body. You will attach each arm in each group of 6 as you crochet round 30.
The gap between each group of 6 should be centered above the tail.
Crochet round 30 as instructed by the pattern until you hit the first group of marked stitches. Attach the first arm as you crochet into the 6 marked stitches.
Continue to crochet the round, attaching the second arm as you crochet into the second group of marked stitches. Then complete the remainder of the round as normal.
Inserting the Dowel & Attaching the Head to the Body
Stuff the body firmly up to the arms, leaving the neck portion of the body unstuffed.
Insert the dowel two-thirds of the way inside the body.
Put your fingers up inside the hole on the bottom of the head and separate the stuffing to make room for the dowel.
Insert the dowel inside the head, and make sure the head is on straight.
Use the long tail from the body to sew the final round of the body around the perimeter of the hole on the bottom of the head.
Secure with a knot and hide the tail inside the work.
Instructions
Head
01. Chain 3 start: ch3, inc in 2nd ch from hook, 5sc in the last ch. Continue on the other side of the chain base, 3sc in the last ch [10]02. inc, sc 2, *inc* 3 times, sc 2, *inc* 2 times [16]03. inc, sc 4, *inc* 2 times, sc, inc, sc 4, *inc* 2 times, sc [22]04. inc, sc 6, *inc, sc* 2 times, inc, sc 6, *inc, sc* 2 times [28]05. sc 11, inc, sc 15, inc [30]06 – 09. sc in each st around [30]10. sc 2, inc, *sc 4, inc* 5 times, sc 2 [36]11. *sc 5, inc* 6 times [42]12. sc 3, inc, *sc 6, inc* 5 times, sc 3 [48]13. *sc 7, inc* 6 times [54] 16 – 17. Loops: sc in each st around [60] Marking Stitches for the Ears: Insert two markers 10 stitches apart between rounds 16 & 17. These markers will show you where to attach the ears at a later step. 18. Loops: sc in each st around [60] 30. Loops: *sc 3, dec* 6 times [24]31. Loops: sc, dec, *sc 2, dec* 5 times, sc [18]32. Loops: *sc, dec* 6 times [12]
Ears (make 2)
Dowel (supports neck & head)
With brown yarn:01. start 6 sc into a magic ring [6]02. inc in each at around [12]03. *sc, inc* 6 times [18]04. sc in each st around [18]
Arms (make 2)
To prep the arm to crochet into the body at a later step, see "Finishing the Arms & Legs" in the Notes section of the pattern.
Legs (make 2)
Tail
Your tail is now ready to crochet into the body at a later step.
Body
11. Loops: sc in each st around, attaching the tail where marked [60]12 – 17. Loops: sc in each st around [60]18. Loops: sc 4, dec, *sc 8, dec* 5 times, sc 4 [54]19. Loops: sc in each st around [54]20. Loops: *sc 7, dec* 6 times [48]21. Loops: sc in each st around [48]22. Loops: sc 3, dec, *sc 6, dec* 5 times, sc 3 [42]23 – 24. Loops: sc in each st around [42]25. Loops: *sc 5, dec* 6 times [36]26 – 27. Loops: sc in each st around [36]28. Loops: sc 2, dec, *sc 4, dec* 5 times, sc 2 [30]29. Loops: sc in each st around [30]

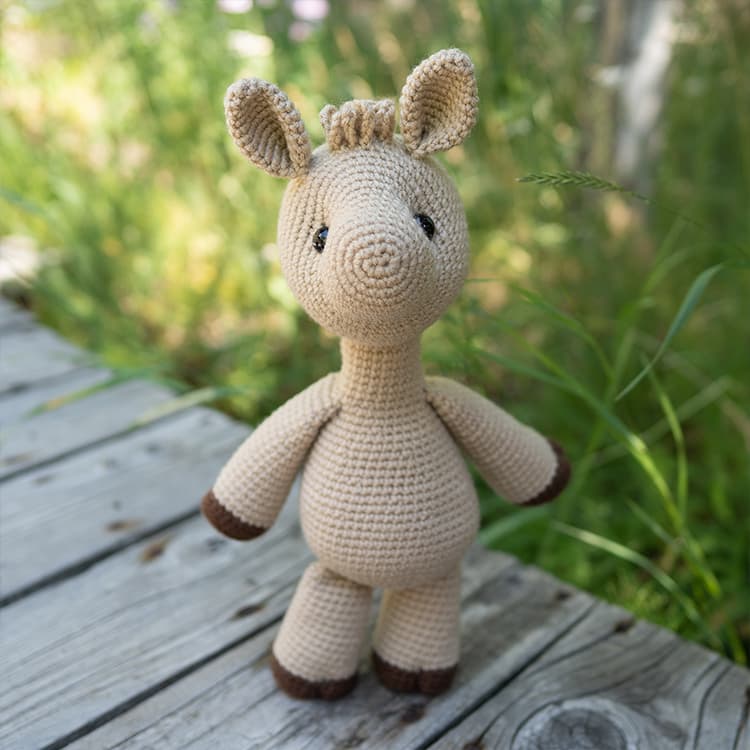
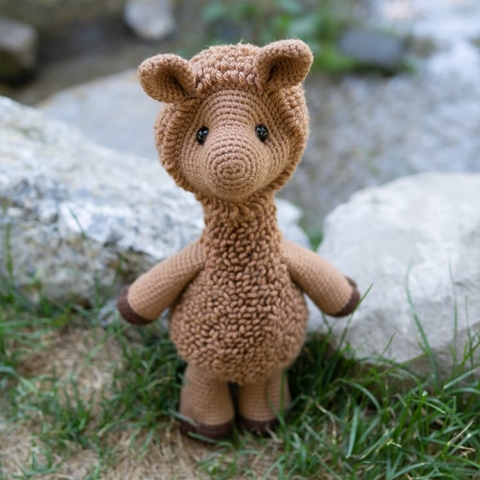
Loki the Llama – Single Crochet
Height: 17" standing
Skill level: Intermediate
Ravelry: Loki the LlamaLoki is the center of barnyard drama, and may even try to spit in your face. He’ll keep you woolly warm, no prob-llama, if you can manage to put him in his place!
Skill level: Intermediate
Ravelry: Loki the LlamaLoki is the center of barnyard drama, and may even try to spit in your face. He’ll keep you woolly warm, no prob-llama, if you can manage to put him in his place!
Supplies
Yarn (acrylic, weight 4) – 279 total yards
- Brown – 250 yards (I used Big Twist – Khaki)
- Dark Brown – 29 yards (I used Big Twist – Chocolate Brown)
Notes
Abbreviations
General Instructions
Recommended Sequence
Here are the steps to create your llama, in order:
Head: Round 13 | Marking Stitches for the Eyes
Head: Rounds 16 – 20 | Hair Tuft, Ear Markers & Dowel Hole
Indenting the Eyes
Finishing & Attaching the Ears
Finishing the Arms & Legs
Body: Rounds 6 & 7 | Attaching the Legs
Body: Rounds 10 & 11 | Attaching the Tail
Body: Rounds 29 & 30 | Attaching the Arms
Inserting the Dowel & Attaching the Head to the Body
- ch – chain
- sc – single crochet
- slst – slip stitch
- inc – complete two single crochets within the same stitch
- dec – combine two stitches into one with an invisible decrease
- BLO – crochet in the back loop only
- FLO – crochet in the front loop only
- *sc x* – repeat the instructions between asterisks(*) the indicated number of times. If the pattern doesn’t tell you how many times to repeat, then repeat the sequence until you reach the end of the round.
General Instructions
- Work all stitches in both loops unless the pattern instructs otherwise.
- This pattern is worked in one continuous spiral. Do not join rounds unless the pattern indicates otherwise (in other words, do not slip stitch and chain to start a new round).
- Use a stitch marker to keep track of where one round ends and the next begins.
Recommended Sequence
Here are the steps to create your llama, in order:
- Crochet the Head
- Crochet the Ears
- Attach the Ears to the Head
- Crochet the Dowel
- Crochet the Arms
- Crochet the Legs
- Crochet the Tail
- Crochet the Body
- Attach the Head to the Body
Head: Round 13 | Marking Stitches for the Eyes
Now you will add two stitch markers that will show you where to insert your safety eyes at a later step.
Place the markers 18 stitches apart centered on the snout between rounds 12 & 13 (the last two rounds you’ve completed).
You will leave the eye markers in place as you crochet rounds 14 – 29. I recommend using strands of yarn to mark these stitches, ensuring they’re easy to crochet around.
Use a yarn needle to insert each strand.
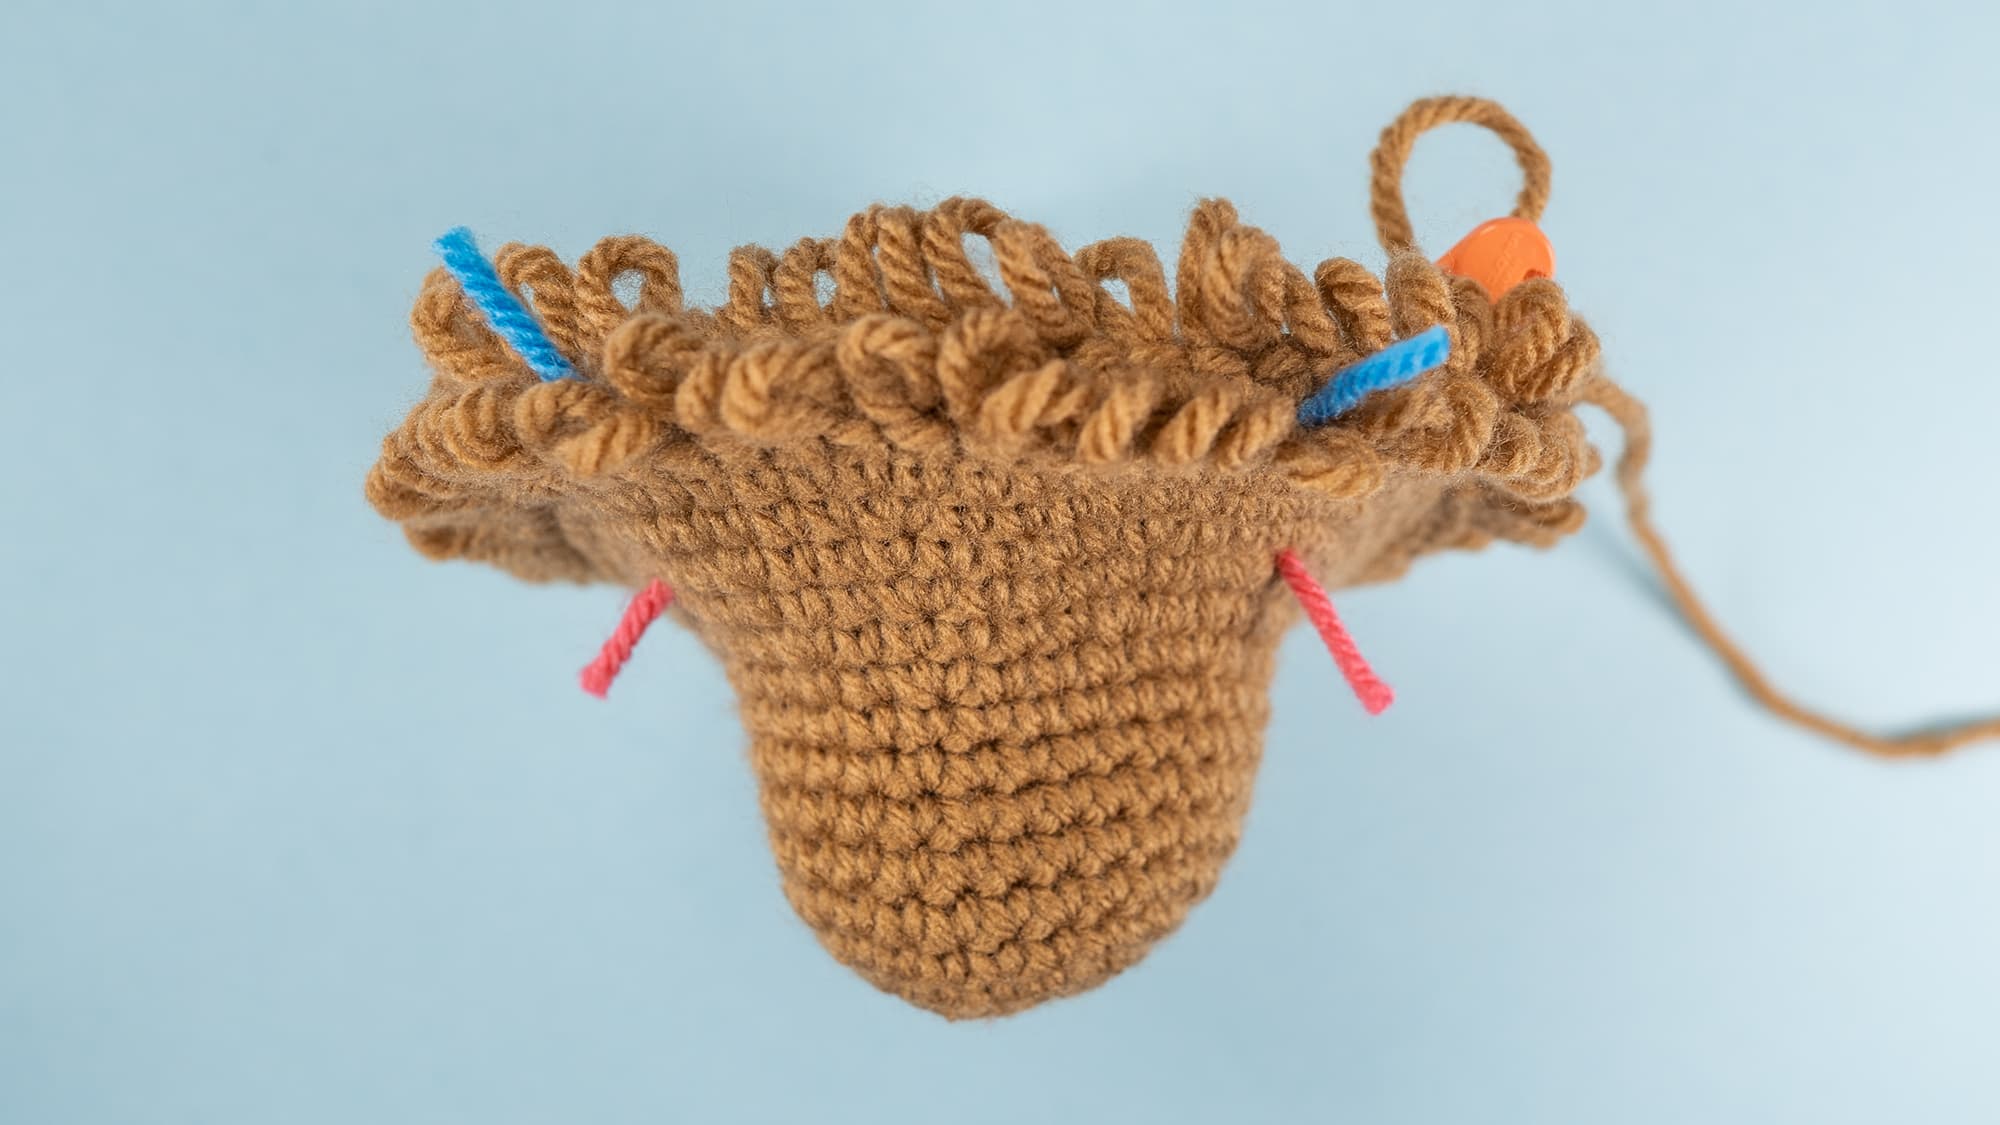
Head: Rounds 16 – 20 | Hair Tuft, Ear Markers & Dowel Hole
**Adding the First Row of Hair Strands**
At the end of round 15, mark off 3 stitches centered above the eye markers.
16. sc in each st around until you hit the marked stitches. FLO: *sc, ch 10, then sc in the same st* in each of the 3 marked stitches. Sc (in both loops) in each remaining st until the end of the round [60]
**Marking Stitches for the Ears** Now you will add two stitch markers that will show you where to sew on your ears at a later step. Place the markers 11 stitches apart centered on the top of the head with the chained strands of hair in the middle between rounds 16 & 17. You will leave the ear markers in place as you crochet the remainder of the head. I recommend using strands of yarn to mark these stitches, ensuring they’re easy to crochet around. Use a yarn needle to insert each strand.
**Adding the Second Row of Hair Strands** At the end of round 17 after marking stitches for the ears, mark off 5 stitches directly behind the chained strands of hair created in round 16. 18. sc in each st around until you hit the marked stitches. FLO: *sc, ch 10, then sc in the same st* in each of the 5 marked stitches. Sc (in both loops) in each remaining st until the end of the round [60]
**Making a Hole for the Dowel** After completing round 18, mark off 9 stitches centered on the bottom of the head (this should be on the opposite side of the round from your eye markers, ear markers & hair tuft). Add a stitch marker in the first and last of those 9 stitches. Begin crocheting round 19. Once you hit the first stitch marker, chain 9. Skip the 9 marked stitches entirely, then crochet in the next stitch. Remove the stitch markers (keeping your end-of-round marker in place) and crochet the rest of the round as normal.
Indenting the Eyes
Note: This video shows a unicorn, but the technique is the same for all of my patterns.
Cut a strand of yarn approximately 18″ long. Tie a large, secure knot in one end and thread the other end through your yarn needle.
Insert your needle through the back opening of the head and sew between the two spots where you’ll be placing your safety eyes (marked with strands of yarn).
Pull your strand of yarn taut, which will create indents. Fasten off with a knot and hide your yarn tail inside the head.
Finishing & Attaching the Ears
Fasten off and leave a 18″ tail. Pinch the final round together and slip stitch closed.
Fold the slip stitched edge in half and secure with a Running Stitch underneath the slip stitches. Exit the tail at the base of the ear in the front.
Attach each ear to the head where indicated by the markers.
Finishing the Arms & Legs
Cut your working yarn and leave a tail of about 18″, but do not fasten off yet.
Stuff the limb. In the final round, add however many single crochets as necessary to get the color join front-and-center on the limb. Now pull on your working loop until the strand comes free to fasten off.
Fold the top opening in half and slip stitch it closed. Hide the yarn tail inside the work.
Cut an 18″ strand of dark brown yarn and attach one end to a yarn needle.
Pass the needle through the magic ring in the center of your hoof, then through the top of the hoof (above the last round of dark brown). Repeat this process a few times, pulling the yarn taut each time.
When you’re satisfied with the look, attach the starting tail to the ending tail with a secure knot. Hide both tails inside the work.
Body: Rounds 6 & 7 | Attaching the Legs
At the end of round 6, mark off the first 6 stitches of the round by inserting plastic stitch markers into the 1st and 6th stitches of the round.
Skip the next 6 stitches, then mark off a second group of 6 by inserting plastic stitch markers into the 13th and 18th stitches of the round.
As you crochet round 7, attach the first leg as you crochet into the first 6 stitches.
Crochet into the next 6 stitches as normal to leave a gap between the legs, then attach the second leg as you crochet into the second group of 6 marked off stitches.
Complete the remainder of the round as normal.
Body: Rounds 10 & 11 | Attaching the Tail
At the end of round 10, mark off 5 stitches centered between the legs on the opposite side of the round.
Crochet round 11 as instructed by the pattern until you hit the first marked stitch. Attach the tail as you crochet into the 5 marked stitches, then crochet the remainder of the round as normal.
Body: Rounds 29 & 30 | Attaching the Arms
At the end of round 29, mark off two groups of 6 stitches on each side of the body. You will attach each arm to each group of 6 as you crochet round 30.
The gap between each group of 6 should be centered above the tail.
Crochet round 30 as instructed by the pattern until you hit the first group of marked stitches. Attach the first arm as you crochet into the 6 marked stitches.
Continue to crochet the round, attaching the second arm as you crochet into the second group of marked stitches. Then complete the remainder of the round as normal.
Inserting the Dowel & Attaching the Head to the Body
Stuff the body firmly up to the arms, leaving the neck portion of the body unstuffed.
Insert the dowel one half of the way inside the body.
Put your fingers up inside the hole on the bottom of the head and separate the stuffing to make room for the dowel.
Insert the dowel inside the head, and make sure the head is on straight.
Use the long tail from the body to sew the final round of the body around the perimeter of the hole on the bottom of the head.
Secure with a knot and hide the tail inside the work.
Instructions
Head
01. Chain 3 start: ch3, inc in 2nd ch from hook, 5sc in the last ch. Continue on the other side of the chain base, 3sc in the last ch [10]02. inc, sc 2, *inc* 3 times, sc 2, *inc* 2 times [16]03. inc, sc 4, *inc* 2 times, sc, inc, sc 4, *inc* 2 times, sc [22]04. inc, sc 6, *inc, sc* 2 times, inc, sc 6, *inc, sc* 2 times [28]05. sc 11, inc, sc 15, inc [30]06 – 09. sc in each st around [30]10. sc 2, inc, *sc 4, inc* 5 times, sc 2 [36]11. *sc 5, inc* 6 times [42]12. sc 3, inc, *sc 6, inc* 5 times, sc 3 [48]13. *sc 7, inc* 6 times [54] **See "Head: Rounds 16 – 20 | Hair Tuft, Ear Markers & Dowel Hole" in the Notes section of the pattern for detailed instructions and a video tutorial on how to complete the next four rounds.** 17. sc in each st around, including in the 3 exposed back loops from round 16 [60] Marking Stitches for the Ears: At the end of round 17, insert two markers 11 stitches apart between rounds 16 & 17 with the chained strands of hair centered in the middle. These new markers will show you where to attach the ears at a later step. Making a Hole for the Dowel: At the end of round 18, mark off 9 stitches centered on the bottom of the head with plastic stitch markers (this should be on the opposite side from your eye markers). 19. sc in each st around, including in the 5 exposed back loops from round 18, until you hit the first stitch marker. Chain 9. Skip the 9 marked stitches entirely, then crochet in the next stitch. Remove the stitch markers and sc in all remaining stitches of the round [60] 20. sc in each st around, including in each of the 9 chain stitches from the previous round [60] 21 – 24. sc in each st around [60] 25. sc 4, dec, *sc 8, dec* 5 times, sc 4 [54]26. *sc 7, dec* 6 times [48]27. sc 3, dec, *sc 6, dec* 5 times, sc 3 [42]28. *sc 5, dec* 6 times [36]29. sc 2, dec, *sc 4, dec* 5 times, sc 2 [30] 30. *sc 3, dec* 6 times [24]31. sc, dec, *sc 2, dec* 5 times, sc [18]32. *sc, dec* 6 times [12]
Ears (make 2)
Dowel (supports neck & head)
Arms (make 2)
To prep the arm to crochet into the body at a later step, see "Finishing the Arms & Legs" in the Notes section of the pattern.
Legs (make 2)
Tail
Your tail is now ready to crochet into the body at a later step.
Body